Swedish studio Kind Us With Love has created an all-white interior for a Stockholm boutique committed to coloured pens.
Type Us With Love wanted to make the Pen Retailer a lot more engaging for guests, so integrated a gallery and an atelier within the retail space on Hornsgatan – designed to appear like a supplier warehouse.
Connected story: Kind Us With Love draws giant all-natural objects for 1st graphics collection
“We would like to change the perspective and show what you truly can do with Pen Store’s great goods rather then just show the pens,” mentioned the studio, which has also created a boutique exactly where menswear is displayed like tools in a shed.
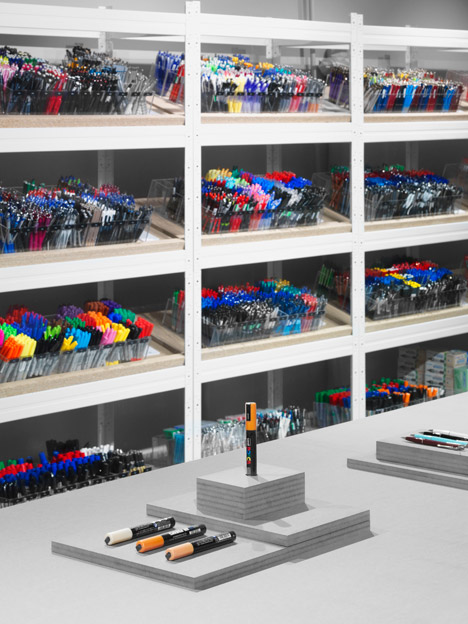
Shelving units run along the walls of the space, placed either side of lengthy tables that consumers can sit at to test the pens.
The plastic tops of the fountain pens, markers, and brush-tips stored on the units add colour to the monochrome area. Black lighting fixtures along the ceiling also interrupt the white-painted surfaces.
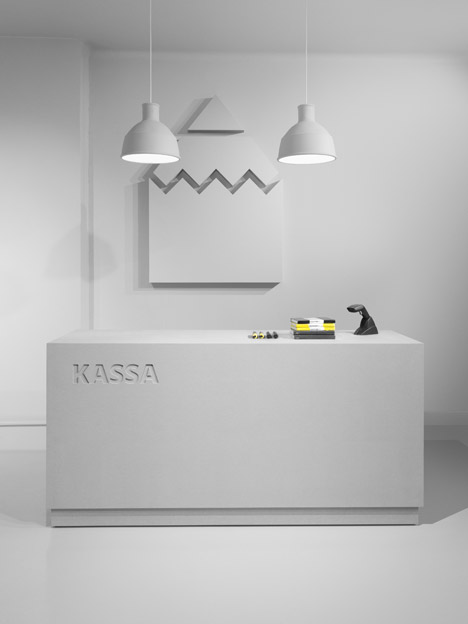
A minimal counter has the word “kassa” – meaning “money” – set into its front and is illuminated by a pair of white pendant lamps, which are also utilized in a row at the back of the shop.
The Pen Store’s logo is embossed above the minimal counter and also functions as a white graphic on the storefront’s big window.
To support the space obtain a reputation as a hub for local creatives, Type Us With Love asked a variety of artists to use merchandise from the store’s developing variety to generate artworks.
“We asked our favourite artists, illustrators and designers to choose their favourite pen and interact with the space,” the studio said.
These and future styles designed in-retailer will be made by poster business Paper Collective, with 15 per cent from any sales donated towards rainforest preservation.
Bear in mind how I said I wanted to produce some thing this week? Effectively, thanks to misplacing all my craft stuff and giving myself a kink in my neck soon after moving some furniture around, I figured out precisely the way to cure that.
Ow. But in spite of the pain (which unfortunately creeped down to my upper back right after sleeping on it final night… guess I’m acquiring a new pillow for 2015!), I still managed to get a little Christmas crafting carried out:
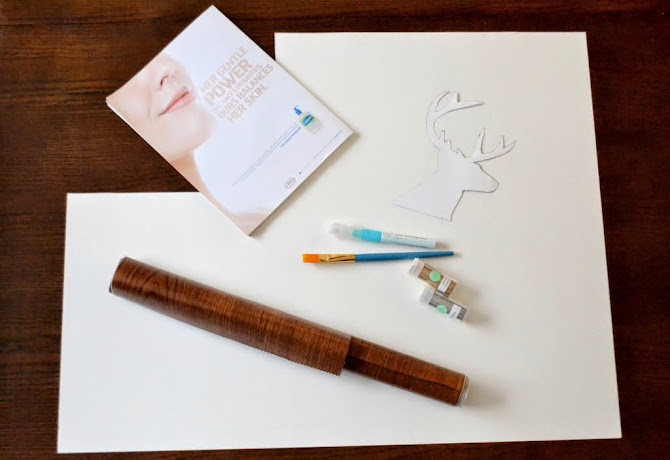
When I was in college and before I purchased the house, I did a lot of crafts. Embossing, polymer clay, jewelry creating, and so forth tiny-scale stuff that accumulated a lot of exciting little tools and a need to have for storage in my workplace. But after switching to largely power tools and home repair projects these last couple of years, my memory for where every little thing is stashed in my crafting boxes is a little… off. It took some digging to find a few things that I believed may possibly inspire a new piece of art for the holidays, but right here’s what I in the end picked:
Wood veneer speak to paper (from the dollar store)
Ultra-fine glitter (I wasn’t confident if I would eventually pick silver or gold, so I grabbed both)
Glue pen (I like Martha Stewart pens… they are tightly packaged and don’t dry out)
Poster board
Decorative tape (optional, not pictured)
And a handful of other supplies that had been merely functional to total the project:
White sheet of paper (for cutting out & utilizing as my outline for the get in touch with paper)
Pen/pencil
Scissors
Old magazine
Old credit/membership card
Paint brush (or old makeup brush)
With an 8吆 frame chosen, I cut the poster board to size. Considering that my printer was MIA (aka stashed in the closet & I didn’t feel like obtaining it out), I utilised a plain sheet of printer paper (which strangely, I nevertheless had accessible) to trace out this reindeer silhouette directly off my pc screen. I then cut it out, flipped it more than onto the back of the speak to paper, and traced the very same image in reverse. It sounds a lot a lot more complex than it is.
Once the make contact with paper was reduce to the appropriate shape and size, I peeled off part of the backing and started at the bottom correct corner of the poster board. By peeling off the backing a tiny at a time and using a piece of rigid plastic (credit cards perform nicely, but I use a dingy old Marta card for crafts), it’s easier to avoid air bubbles and wrinkles. The only tricky portion was getting the antlers in spot, because they’re smaller and wider than the card, so I smoothed out 1 and then the other.
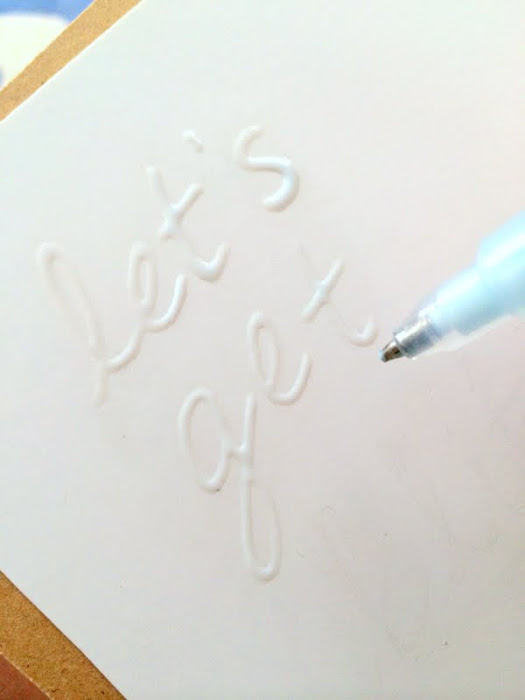
After the “reindeer” (reindeer/deer silhouette, Google image search turns up the exact same outcomes) was on, the only factor left to add was some lettering. Not to knock a excellent “Noel” or “Merry & Bright”, but I wanted some thing that created me chuckle.
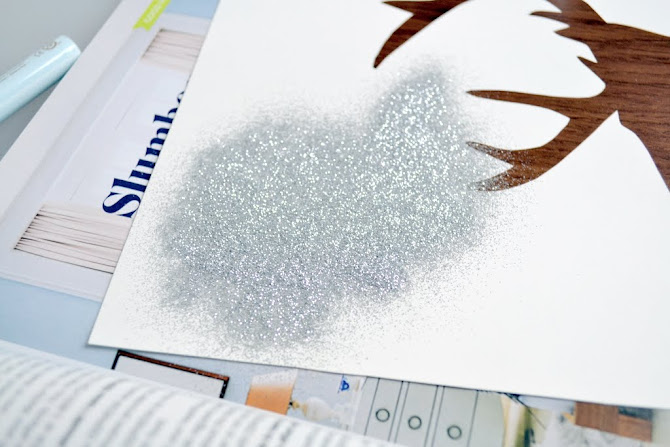
After lightly drawing on a few letters with a pencil (I tried going with block letters as well, but it just didn’t appear right), I grabbed the glue pen and filled everything in. Glitter can be ridiculously messy, but it’s hard to beat when it comes to Christmas decor.
I was tempted to pop a bright red nose on the deer, but that kind of killed the entire “Blitzen” thing, so I left it alone.
Tip: When sprinkling on glitter, I locate that a magazine performs fairly properly underneath because you can use the fold to tap the excess glitter down and put back into the container.
Tip #two: When functioning about lettering like this, you’ll probably nonetheless see lots of added glitter in amongst and about every single letter right after a great shake. Let it dry, then use an old, soft paint or makeup brush to remove the rest and maintain the lettering intact.
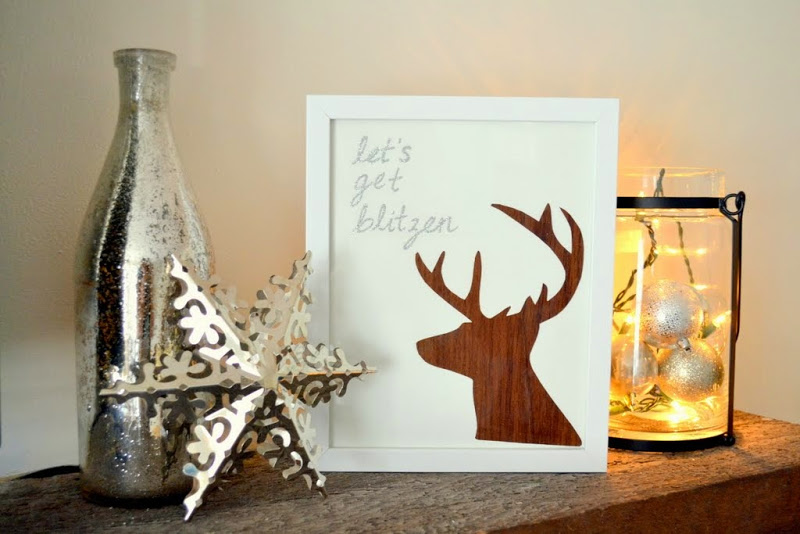
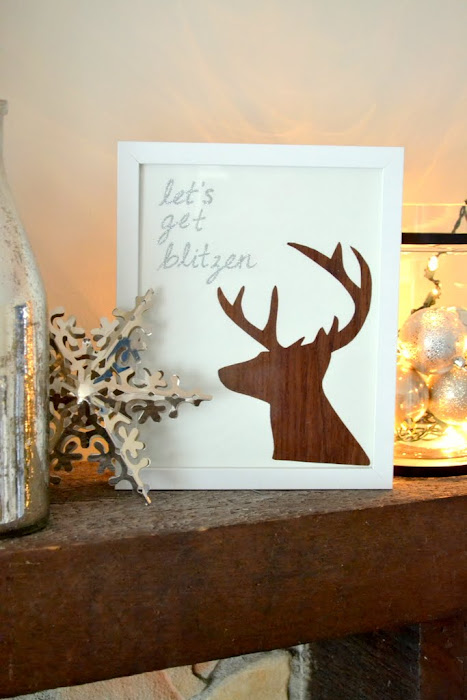
With a little dry time, I popped it into a frame, and it’s accomplished. Suuuuper basic DIY Christmas Reindeer Art, and a happy Friday craft.
I had a tiny fun arranging items on the mantel (that glass container is just leftover ornaments with a set of lights mixed in).
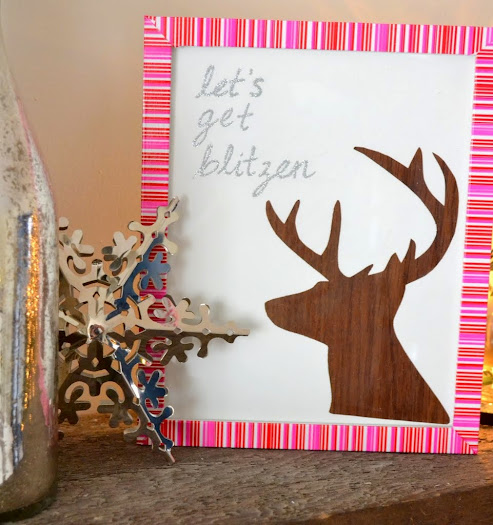
Whilst I was taking these photos, I also wondered what it may possibly appear like with a far more colorful frame. I dug out this pink and red-striped tape to see what it would look like to add some colour to the mix (the makers of Echotape sent me a huge box of different sorts of tape earlier this year to try out… while most of it was for more heavy-duty stuff, they incorporated a couple of printed tapes like this one particular from their Goddess Tape line, but it appears to be discontinued now). The ideal portion about this tape is that it can come proper back off with zero residue (I choose the white version, but it’s fun to play around with it).
I’m considering of creating a few more factors to frame over the weekend (“run run reindeer” comes to mind, as well as some ornaments, “get lit”, and possibly a “jingle my bells” thrown in, ha!). Funny how one particular craft leads to another. Gateway crafts, so-to-speak. This wasn’t really anything specific craft-sensible, but it did put me in the vacation mood, which was the entire point to begin with.
Now, if only I could locate a painkiller and a neck pillow, I’d be all set…
The post Christmas DIY: “Let’s Get Blitzen” Reindeer Art
News: Zaha Hadid Architects has unveiled its very first project in Brazil – an 11-storey apartment building overlooking Copacabana Beach in Rio de Janeiro.
Due to begin construction in the new year, the residential block will be sandwiched in between two buildings on Avenida Atlântica, facing south-east towards the beach.
Associated story: “They believed I was a troublemaker” says Zaha Hadid
London-based Zaha Hadid Architects – which has also not too long ago announced projects in Cambodia, Australia and the United Arab Emirates – has developed a building with a skeletal facade where every single storey resembles a horizontal vertebra.
The developing will be named Casa Atlântica, and will also feature a rooftop swimming pool.
“Casa Atlântica’s style continues the liberating formal composition and spatial flow inherent within Brazil’s wealthy Modernist tradition and engages with the special tempo and vitality of Copacabana’s urban beach culture, as effectively as the fluidity of its renowned Burle Marx promenade,” said the studio in a statement.
The client, Brazilian entrepreneur Omar Peres, reportedly gave Hadid cost-free rein over the style, despite the fact that the it must comply with strict organizing requirements governing height and proximity to neighbours.
The present height is set at 41.five metres. Construction is expected to start in March.
Speaking earlier this month in Miami, Hadid hit back at the Japanese architects who have criticised her design and style for the Tokyo 2020 Olympic stadium.
“I consider it really is embarrassing for them, that’s all I can say,” Hadid told Dezeen. “I realize it is their town. But they’re hypocrites.”
Her 1 Thousand Museum residential tower in Miami is currently under building.
Project credits:
Client: Omar Peres Architect: Zaha Hadid Architects (ZHA) Style: Zaha Hadid and Patrik Schumacher ZHA Project Director & Designer: Saffet Kaya Bekiroglu ZHA Project Team: Clara Martins, Armando Bussey Chien-Shuo Pai, Natassa Lianou
Notice anything diverse this morning? Dream Green DIY has a brand new look just in time for 2015! I had been arranging on building the style over the subsequent couple of weeks, but an emergency hacker scenario final evening necessitated an instant revamp. I’m currently running on about 3 hours of sleep, but at least the site looks presentable! If you run into any problems, please don’t hesitate to let me know. I also ask for just a tiny bit of leeway and patience as I perform to ideal each detail.
And with that order of organization out of the way, it’s time for my final Holiday Paper Wrap Up tutorial. I can’t think the season is currently nearly more than, and considering that most of your shopping is probably “wrapping” up (har, har), I wanted to share one last trick for decorating these naked gift boxes. This time? We’re talking fabric.
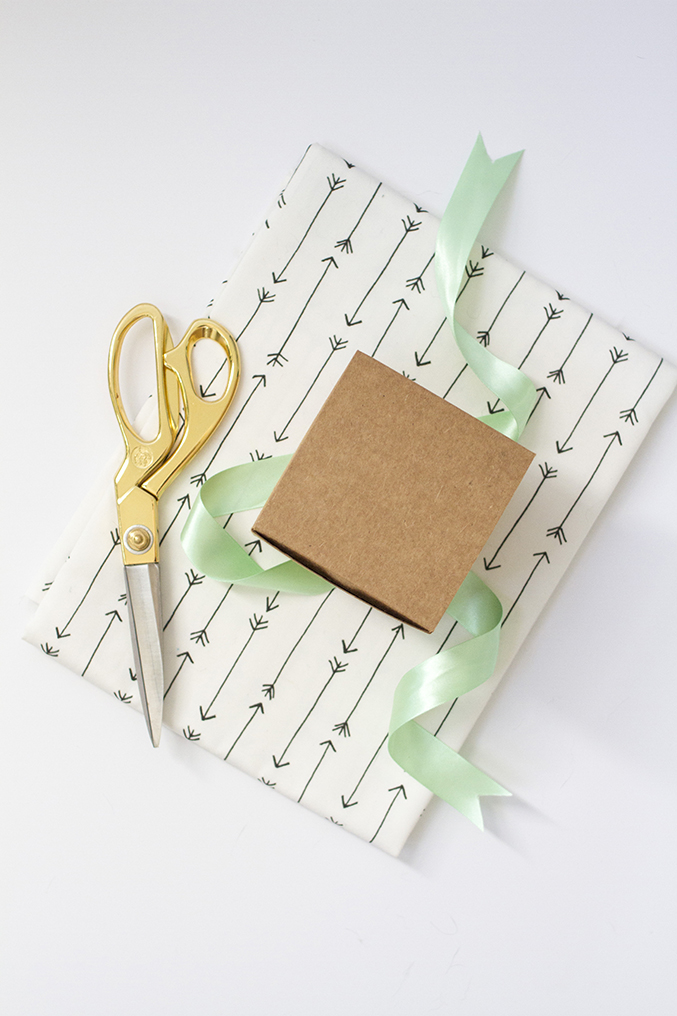
Printed fabric
Scissors
Double sided tape
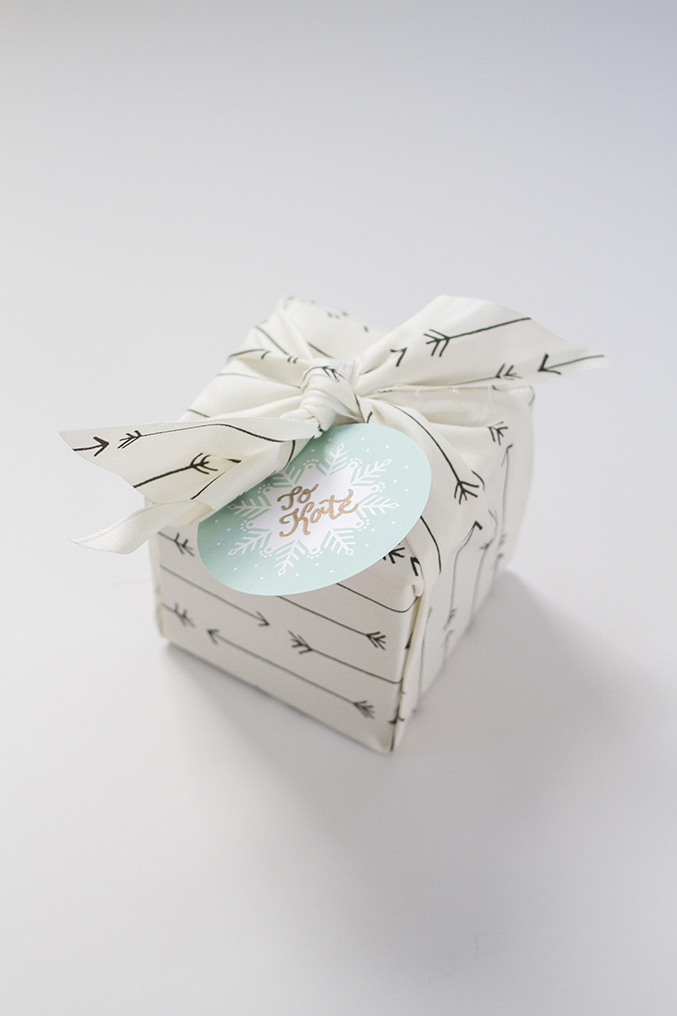
Paper gift tag (optional)
I just not too long ago became conscious of Minted’s fabric line-up and have been dreaming up lots of upholstered projects so that I can exploit the collection in the close to future. For my 1st foray even though, I decided to test out all of these DIY fabric-wrapped present box tutorials I’ve seen littering my Pinterest feed as of late. And, as it turns out, they’re just as easy as they sound!
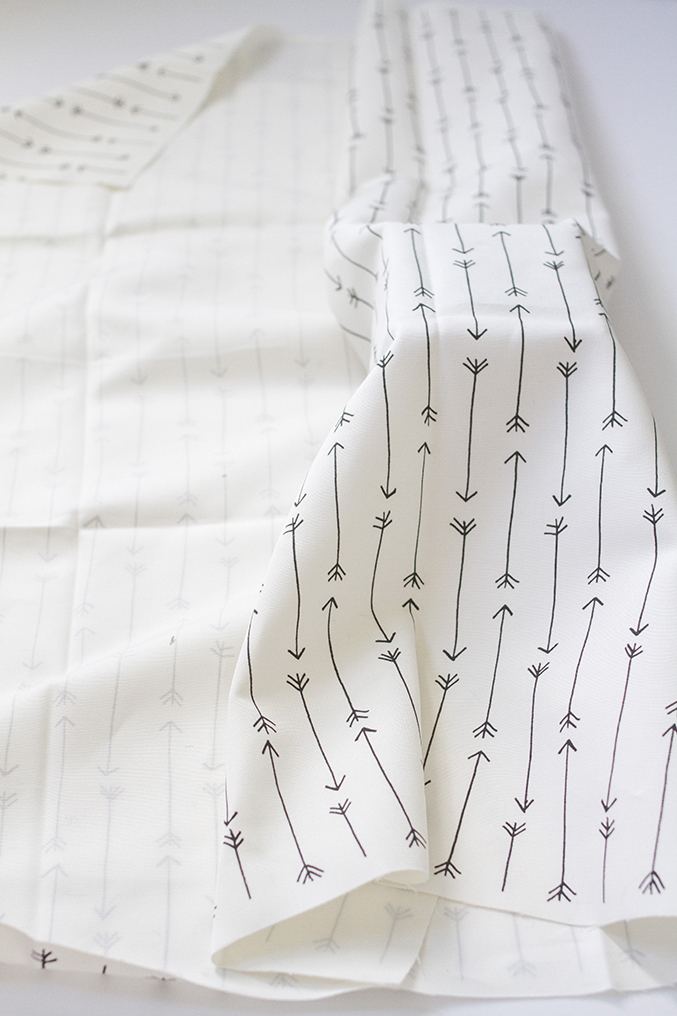
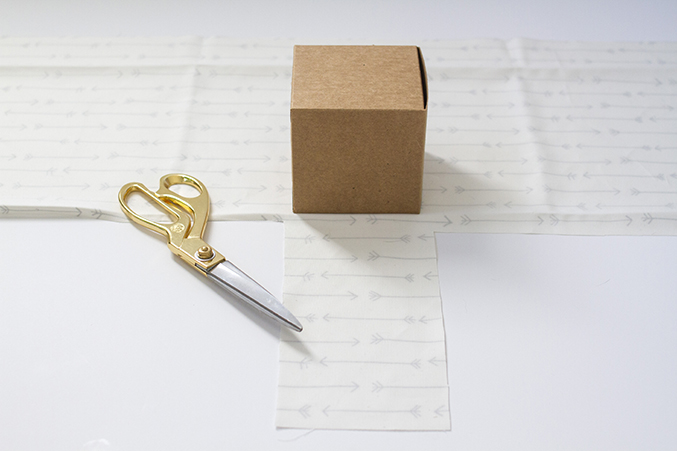
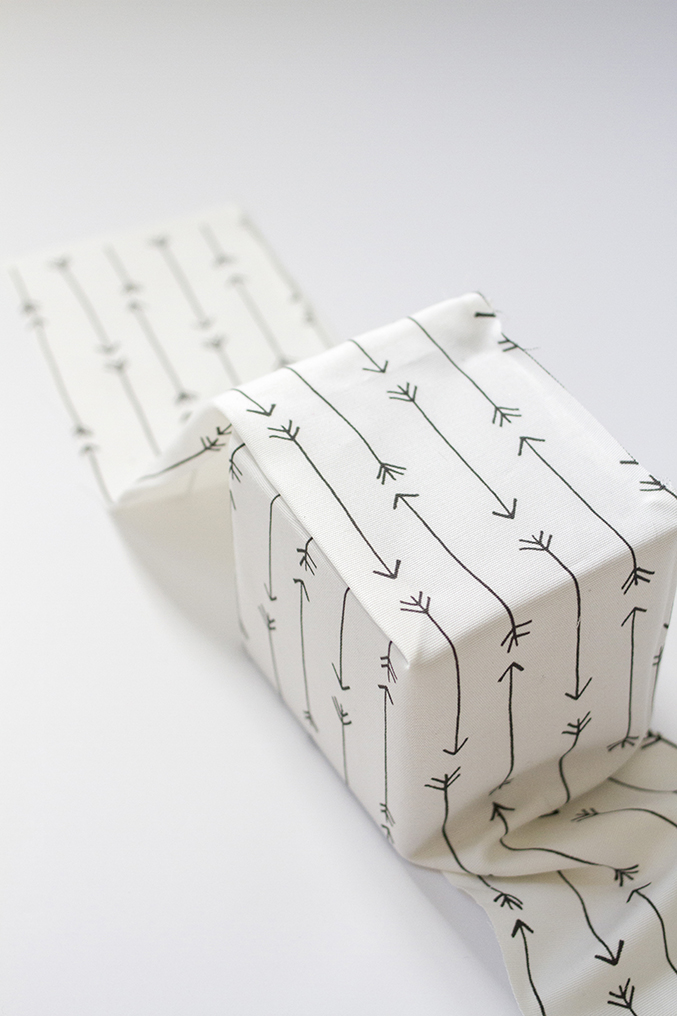
Very first, unfold your fabric on a flat surface and location your box proper at the edge closest to you. Then, to decide just how significantly fabric you’ll need to have, hold the fabric to the edge of the box and flip the box over and over until it’s covered. Mark the fabric, get rid of the box and cut the fabric to size. You’ll want to leave the complete width as is since you’ll require it in a later step.
Subsequent, location your box in the center of your cut piece of fabric and then use your scissors to reduce huge notches into the fabric towards the corners of the box. When you’re finished, you must have two short flaps of fabric and two lengthy flaps of fabric spread out perpendicularly on all sides of your box.
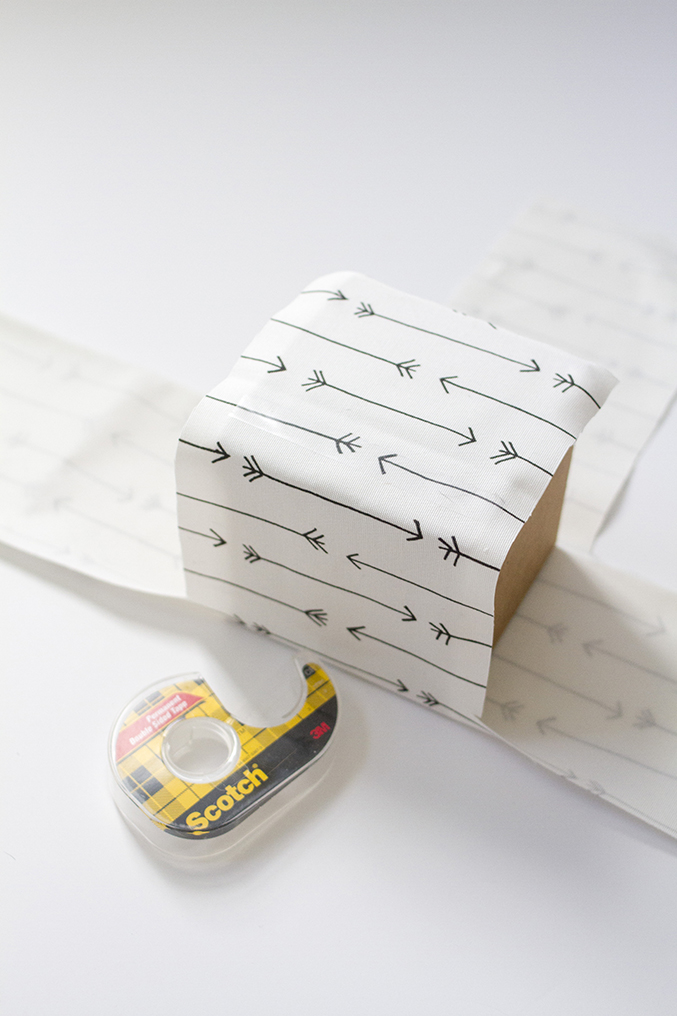
To wrap the box, grab a roll of permanent double sided tape and add a piece to a single prime-most edge of the box. Then bring one particular of the shorter flaps of fabric (the a single opposite to the edge you just added tape to) up and more than the box and press it firmly to the tape.
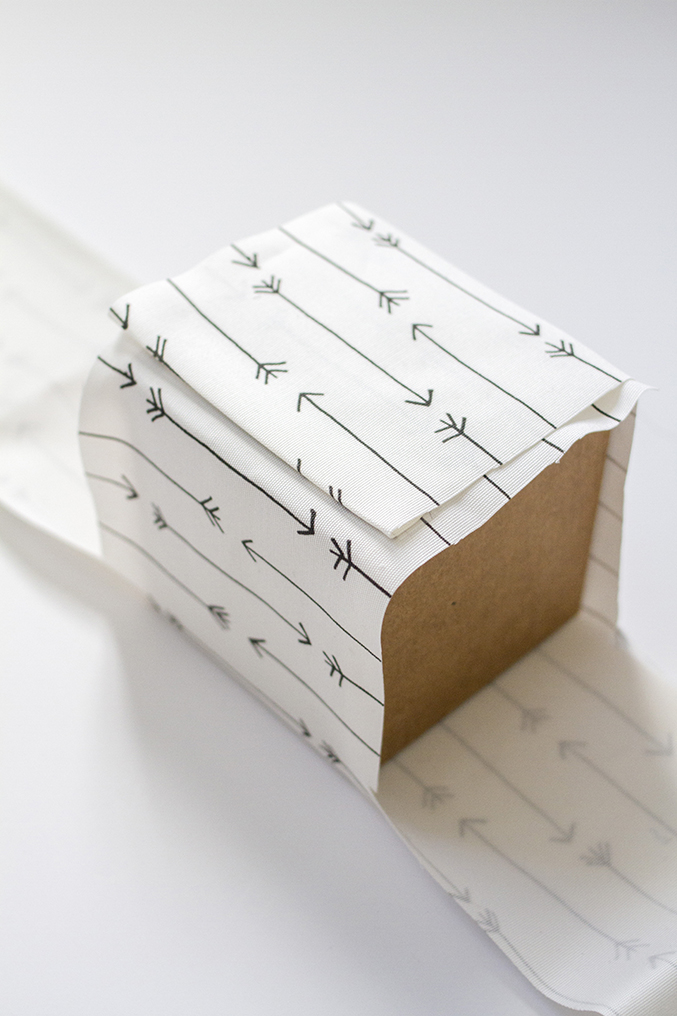
After that, add one more piece of tape, this time to the opposite edge of the box appropriate on leading of the fabric and bring the other quick flap up and over the box. Fold the cut edge of the fabric over so that you give it a bit of a hem and then press it firmly to the tape.
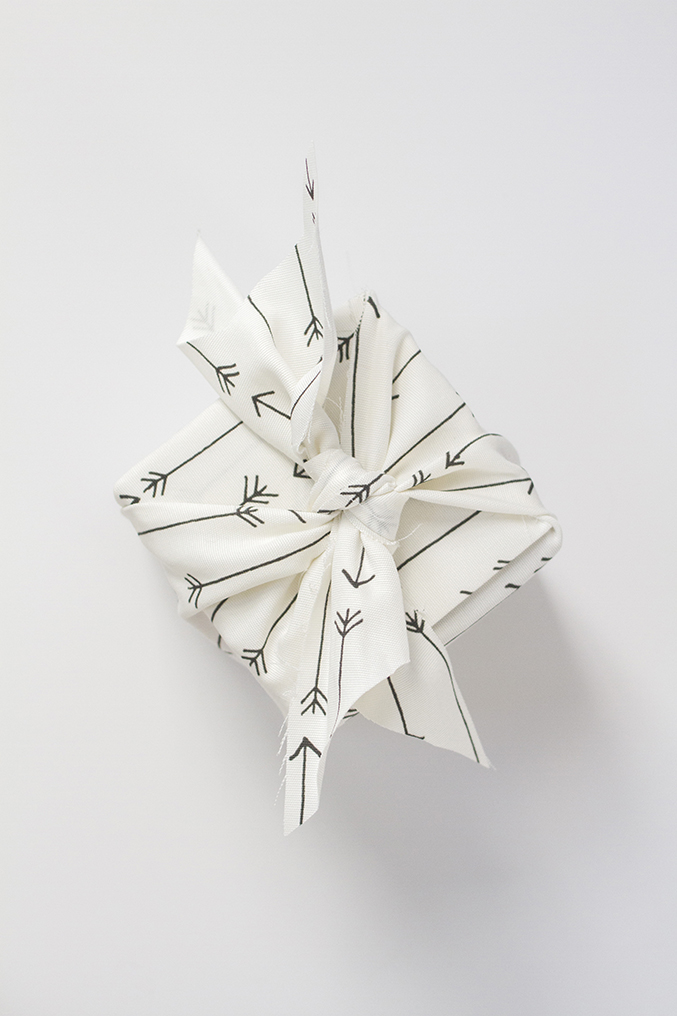
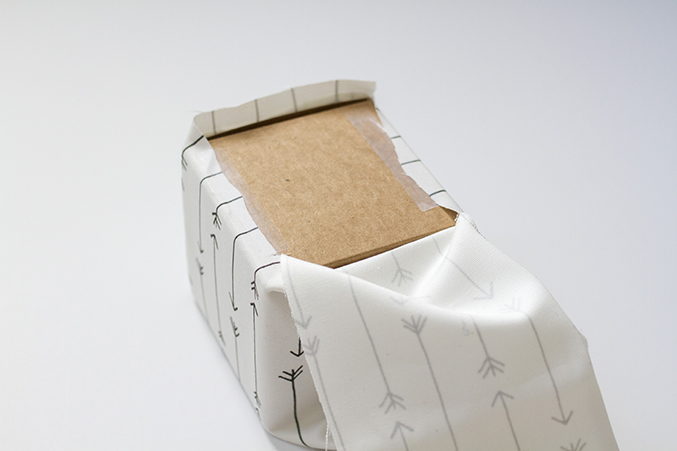
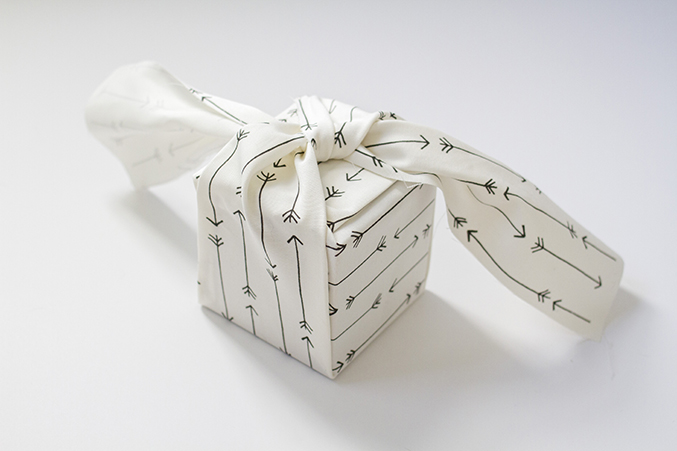
As for the perpendicular planes of the box now left exposed, add two pieces of tape to the outdoors edges and then bring the larger flaps up and press them into location. After undertaking this to each sides, you should be left with a fully wrapped box with two large flaps meeting at the prime.
Finish by merely knotting the two large flaps with each other at the leading of the box, and then use your scissors to trim the flaps down. For a small added touch, I also cut decorative notches into my fabric, but it’s totally up to you how you finish it. You also can leave your box with fabric alone, or tuck in a small paper gift tag to total.
In case you missed the other tutorials in this series, really feel free to click back to my wrapping 101 breakdown, wooden ornament topper, Sharpie bow, DIY pom-pom, photo tag, calligraphy stamp, felt holly and jingle bell tassel. Have a tutorial of your own to share? Please leave your links in the comments!
P.S. The winner of the Terbear Co. and Laura Hooper Calligraphy stamp has been announced! Click via to see if it was you.
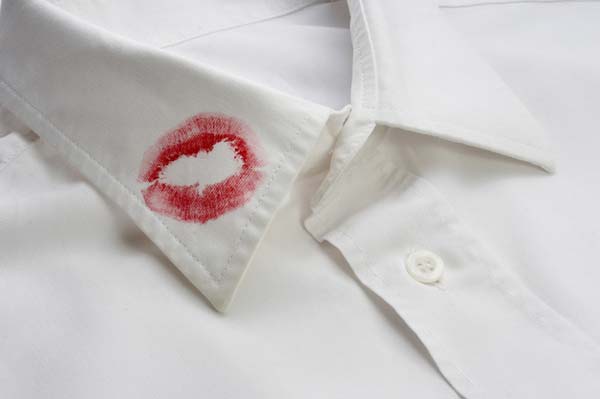
Are you nevertheless frustrated with becoming a mom? Mad with all the housework? Busy with taking care of all the stuff? Great news: Right here are some genius life hacks. They can do you a favor and make everything less difficult in your household. If your carpet was strained, the hot bread crumb is the very best weapon to wipe it. If your tablecloth is colored with wine, attempt to use the day-to-day Medicated Oil. And soon after waiting for some time, the entire smear was gone. These are not magic. Cool collection of different hacks was provided right here. Attempt some of them. Just with easy organic material, all become cleaner, less difficult, and funnier. I bet you will get pleasure from it.
1.Place your necklace by way of a straw to preserve the chain from tangling.
Supply: realsimple.com
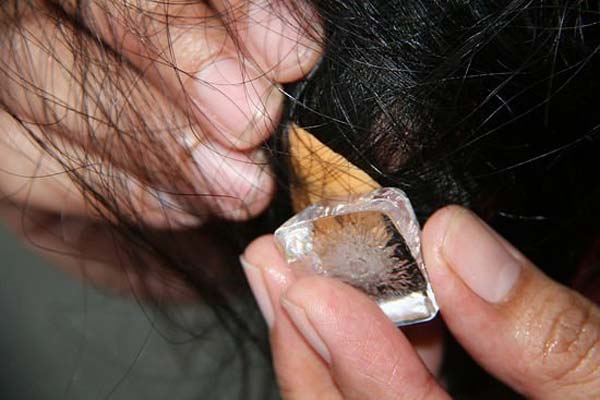
two.Get rid of gum from your hair by using ice cubes.
Source: wikihow.com
3.Pack your shoes in a shower cap to avoid them from dirtying clothes in your suitcase.
Source: realsimple.com
4.Cease run in your tights by spraying them with hairspray.
Source: letswearthat.com
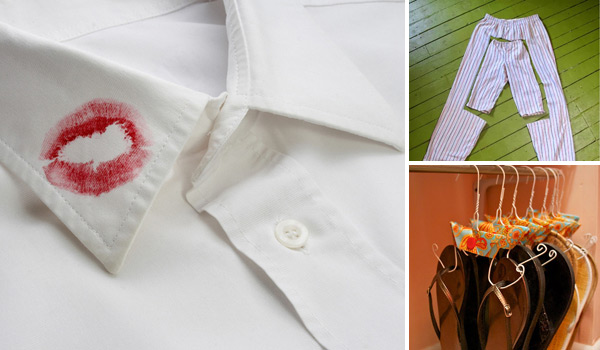
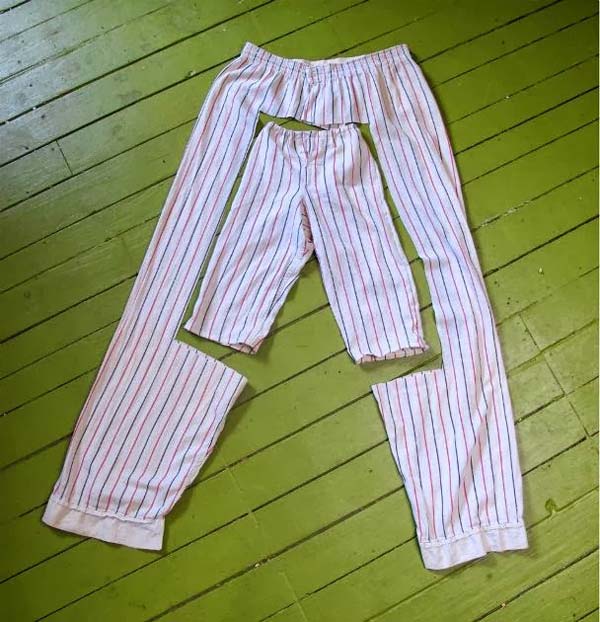
five.Transform Old Pajamas into Child Pajamas
Source: mixandfixsis.blogspot.ca
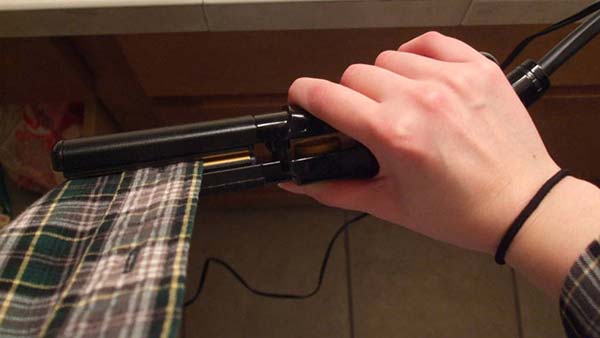
six.A hair-straightening flat iron as an iron.
Supply: lifehacker.com
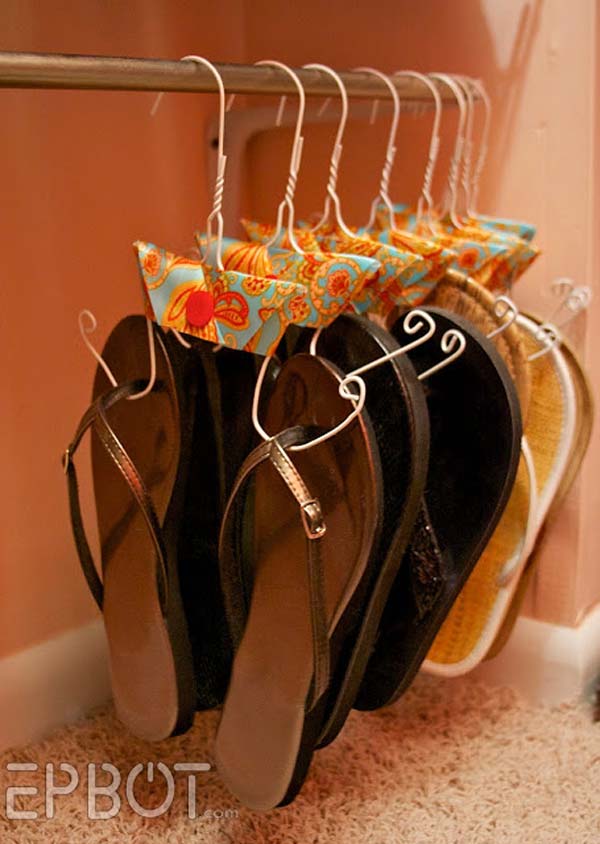
7.Use old hangers to easily retailer sandals.
Source: epbot.com
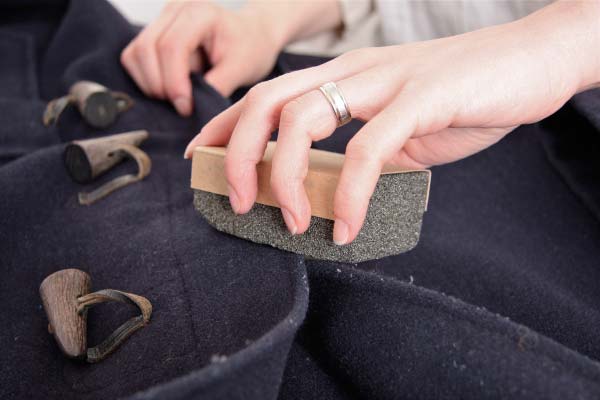
eight.Use a pumice stone to de-fuzz your sweaters and they’ll look as very good as new.
Source: larkabout.wordpress.com
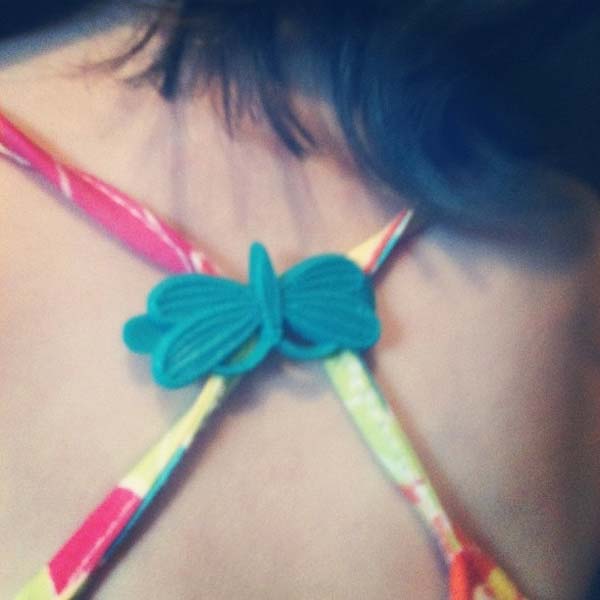
9.Cease your bra from displaying
Supply: muyingenioso.com
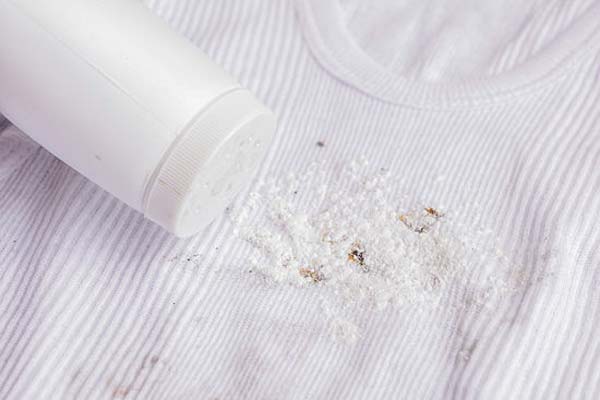
ten.If you get an oil stain your clothing, leave child powder on it overnight.
Source: letswearthat.com/our-weblog
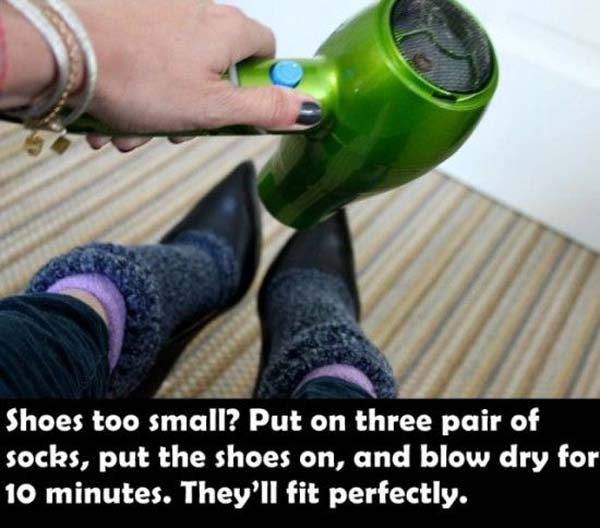
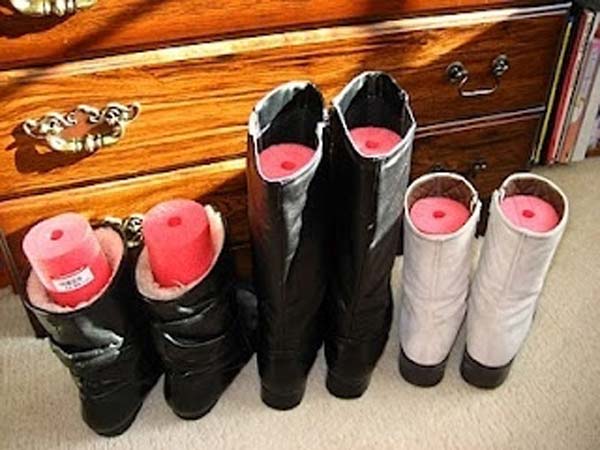
11.Footwear as well tiny, you can tre this hack.
Source: funcage.com
12.Use dryer sheets to remove deodorant stains.
Supply: tastestylemag.com
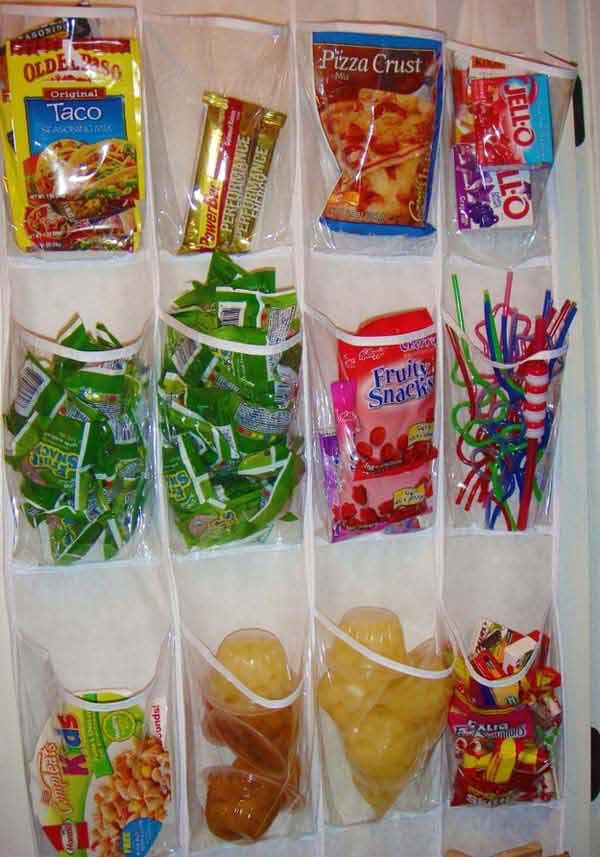
13.A shoe organizer is ideal for the pantry.
Supply: organizinghomelife.com
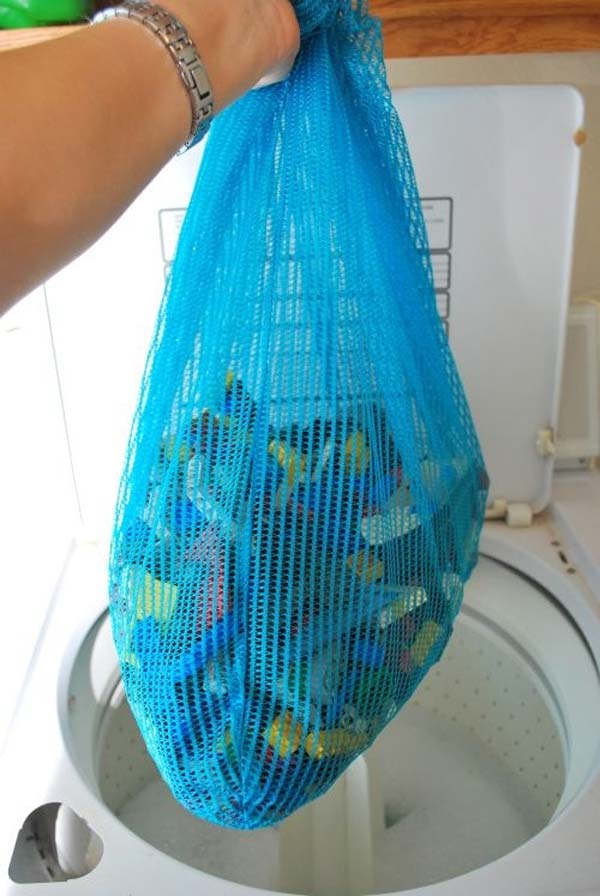
14.A straightforward way to disinfect Legos.
Source: gettinby.wordpress.com
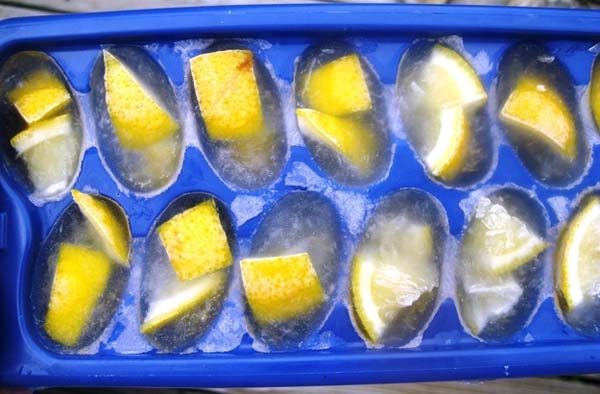
15.Make garbage disposal cleaner cubes with lemon and vinegar.
Supply: thetipgarden.com
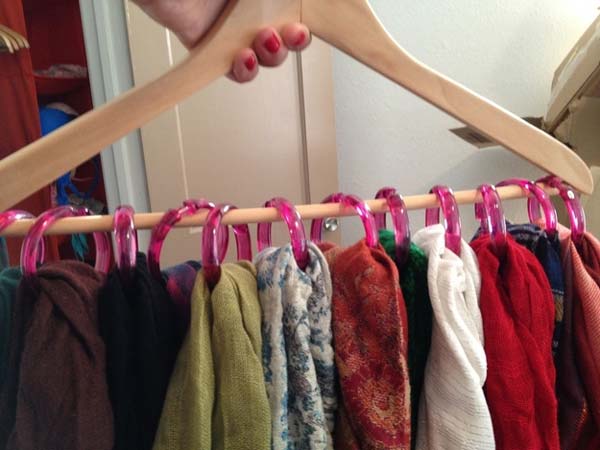
16.Use shower curtain rings to organize your scarves on a hanger.
Source: ftdofsmcp.blogspot.com
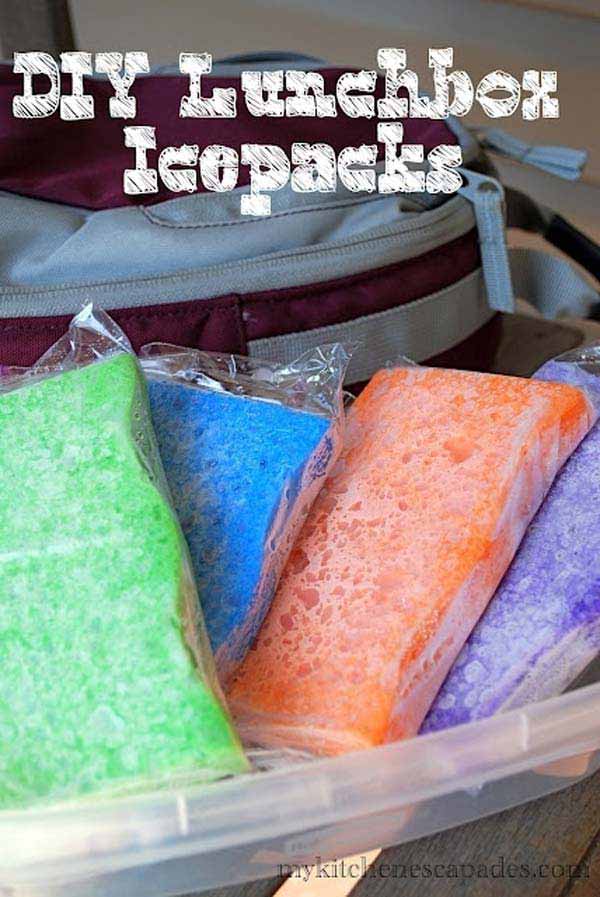
17.Use Frozen Sponges for Inexpensive Lunchbox Ice Packs
Supply: mykitchenescapades.com
18.Get rid of the red wine stains from clothes by making use of white wine.
Source: wikihow.com
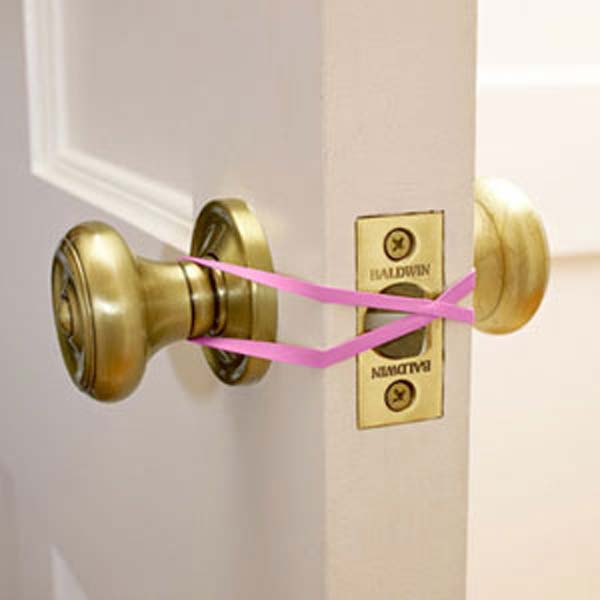
19.Want to keep your door open, try a rubberband.
Supply: goodhousekeeping.com
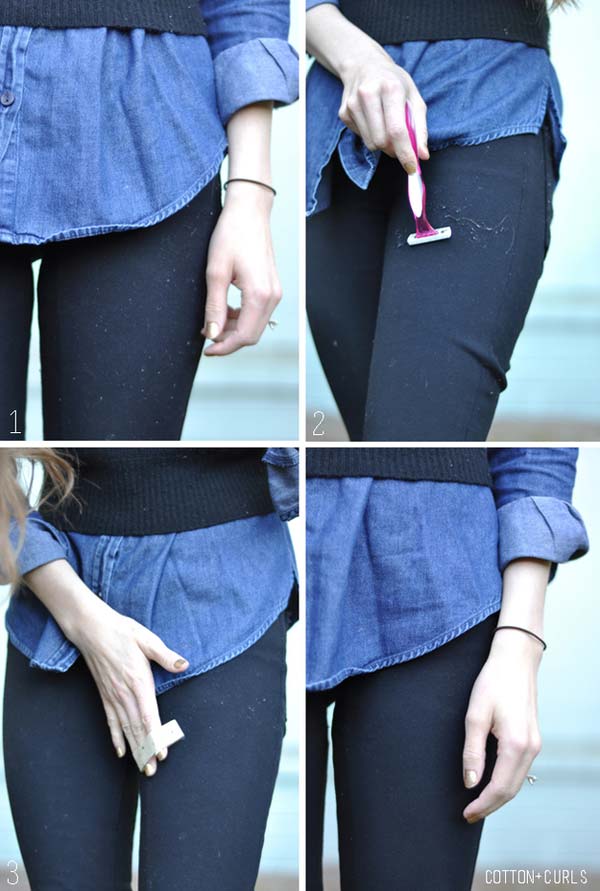
20.De-pill your garments with a razor and some tape.
Supply: cottonandcurls.blogspot.com
21.Use a barrette to fix your tiny girl’s also-loose tank leading.