Hello there and welcome to what will be a crazy hectic weekend for us! It is going to be packed but will be a enjoyable one particular for certain.
As several of you know, final month was a no invest month for me. I typically do this 1 month out of the 12 months and I believe I’ll make every single January that month from now on. It was just what I required soon after the hustle and bustle and Spending in the course of the holidays. For the duration of these months I don’t commit on anything DIY or decor and it typically spills over to other items like garments and other added things as well. I do even now go out to consume though. 🙂
My to do record is even now very long but did get a great deal carried out! My very first large task of the 12 months (I in fact feel I got it accomplished at the end of last year) was cleaning out the catastrophe that was our storage space:
I do not think you can appreciate the following unless of course you go see the just before. ) It is so great to have it organized again and to have some empty area on the shelves!
Following up I shared the prepare for our extended-awaited kitchen redo:
Really do not you love the beautiful island? It’s looked like that given that our family members room renovation in the summer season of final 12 months. 🙂 I’m SO enthusiastic about the potential for this space folks!! I’ve presently manufactured wonderful progress in the past week (I am in beast mode soon after that no commit month) and you can see our quite new window seat here.
Most of the tasks I finished during the month were people I had laying all around or on the record permanently. I lastly finished our small basement kitchenette by hanging the shelves that I’ve had considering that final summer:
I did not want to do upper cabinets – I knew it would truly feel too heavy, so the tiny shelves are excellent. We don’t have a ton of factors to retailer in that region anyway.
I inform you what – you get a Great deal carried out around the property when you are not paying income. I decluttered like crazy and shared some of my preferred clutter busters in this submit:
It appears like I use that tiny organizer virtually each day – it is wonderful!
I received began on the initial task in the kitchen by adding new door trim and starting up the board and batten around the pantry as well:
It wasn’t finished when I shared it (no baseboards) but I’m constantly shocked at the energy of white paint and a tiny bit of trim! It manufactured such a distinction and truly brightened up that spot. It is virtually done now – just have to finish painting the boards I place up this week.
As I was decrapifying the residence I realized there are five items we keep about that we had WAY also several of. So numerous of you agreed but some of you are magical individuals that do not have sufficient cups! )
A whole lot of what I accomplished in excess of the month were minor projects that had been bugging me for months. I acquired a ton accomplished in our master bathroom:
And I actually feel like I achieve a lot more when I get the smaller things knocked out. I shared far more of the tiny stuff like hanging art I’ve had leaning against the wall for a year:
One particular of the simplest projects I acquired done was an straightforward (and totally free for me) frame I put on the artwork my son and I manufactured:
It was just a canvas and I knew it required a tiny one thing to set it off and the black frame is best!
Have you ever experimented with a spending freeze like this? I found last month to be exceptionally comforting actually. We stayed home a Lot much more – working out to run errands really grew to become a chore because we had been home so considerably and loved it. I utilised less gas and my automobile (and home!) stayed a whole lot cleaner. I could do this more than when a yr! )
Sumptuous, Yet Intimate Design Scheme Exhibited by M Restaurant in London
The first thing that strikes you when you walk into M Restaurant on Threadneedle Walk is how big the space is, yet how intimate it feels! This brand new 12,000 square foot London eatery, was a collaboration between a veteran restaurateur and his interior designer, Rene Dekker. Martin Williams’ vision was to create an establishment that would appeal to a broad spectrum of gastronomes and offer the best cuts of meat as well as the finest ‘raw’ cuisine. Coupled with this, the interiors had to emulate a sleek and sophisticated ambiance that would feel intimate yet familiar; in his words “a boutique hotel without any rooms or a private members club with no members”.
On the ground floor the space is divided into two main areas by the clever use of bespoke designed, bronze screens, emblazoned with the subtle but ubiquitous M logo. To the left is ‘M Grill’, which serves some of the finest cuts of beef in Europe. The scheme is a fusion of many elements, most notably the strong teal fabrics on the banquette seating mixed with subtle wool tweeds on the chocolate brown armchairs which create a sumptuous, yet simple ambiance. Everywhere you look, René Dekker Design have added exciting textural elements leaving no surface unadorned, such as the faux eel skin wall paper by Elitis, which decks the walls in the banquette niche.
The client wanted a scheme that was unique and exciting but that would still be self-deprecating,and this is evident in the selection of art as seen in one of the many Miles Adridge photos that adorn the restaurant. Hanging squarely in the middle of this gorgeously finished wall is a seductive shot of a glamorous model sitting at a table in front of a large plate of steak tartar. The scale has also been carefully contemplated considering the double volume ceiling height on the ground floor. It was essential to ensure the space delivered an intimate atmosphere, so the team created niches for the banquette seating and brought the decorative lighting down to just above the tables. [Photos and information provided via e-mail by James Silverman]
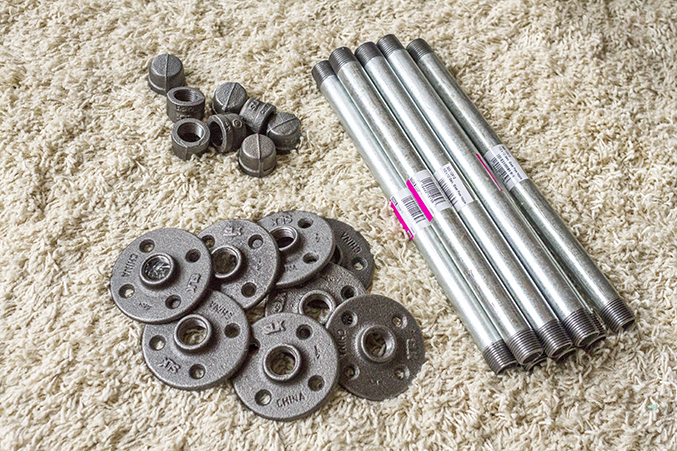
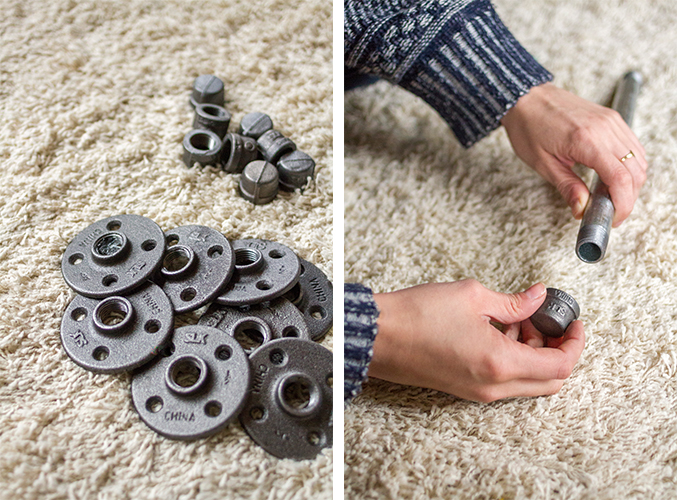
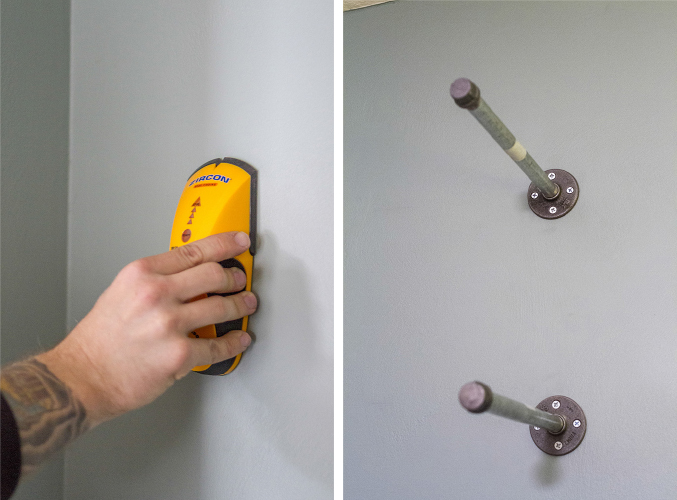
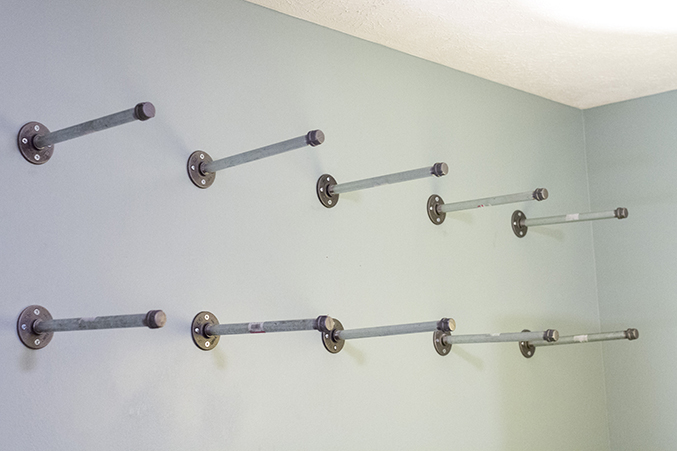
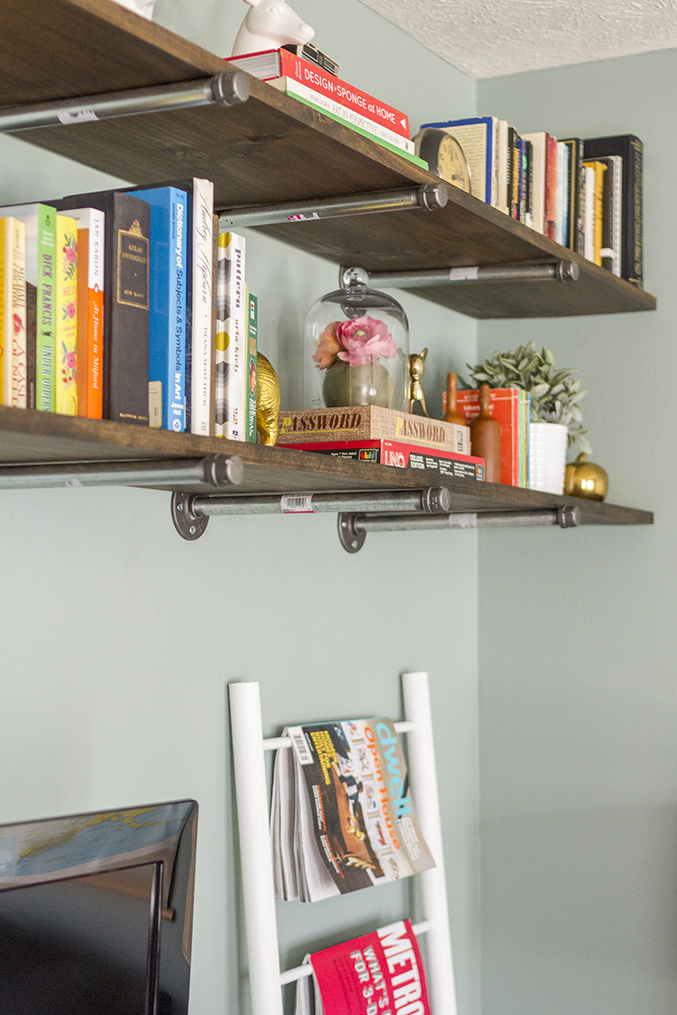
Begin by screwing the caps onto every of the galvanized pipes and set them aside. Then, use a stud finder to find and mark all of the studs in your wall with a pencil. It’s specifically crucial to uncover the studs and drill appropriate into them for this undertaking since the industrial supplies are hefty, as are the books and add-ons you’ll put on the shelves once they’re complete. Carry on the process down the length of the wall, making certain each mark is degree with the one beside it.
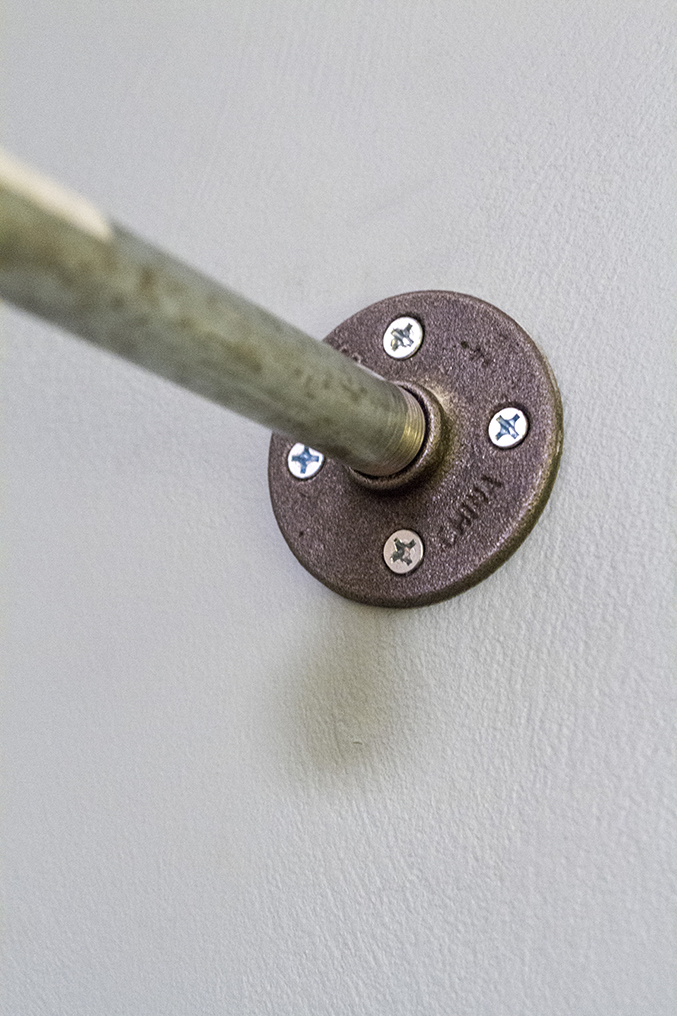
Pre-drill holes into the marked wall and studs making use of an electrical power drill and drill bit, and then screw the flanges tightly into the wall. Use a guide screwdriver if needed to get the hardware started out and then finish with the electrical power drill. Complete the supports by screwing the exposed, threaded finish of the galvanized pipes into the flanges now attached to the wall.
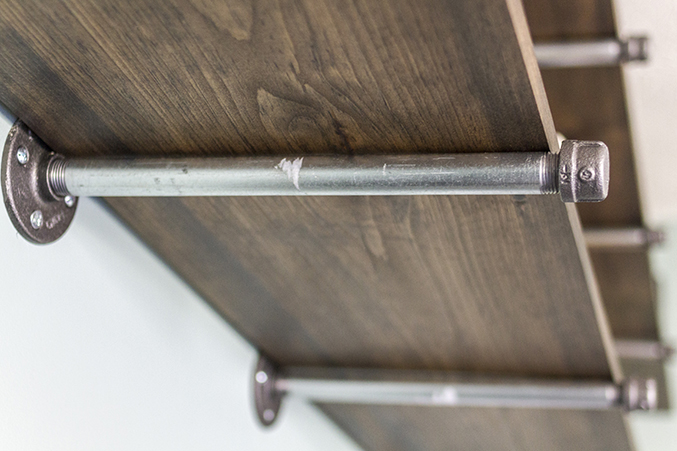
Sand down the wood for your shelf and give it two coats of stain. Let the stain to dry for 24 hrs, and then place the shelves on leading of the galvanized pipes. Because the cast metal flanges are all inherently distinctive from one particular yet another, there may be some inconsistency in angle. If this is the case, you can consider unscrewing the flange from the wall and flip it 180 degrees, then screw it back into the wall. This could assist to reorient some of the a lot more sharply angled pipes and enable the wood to sit levelly.
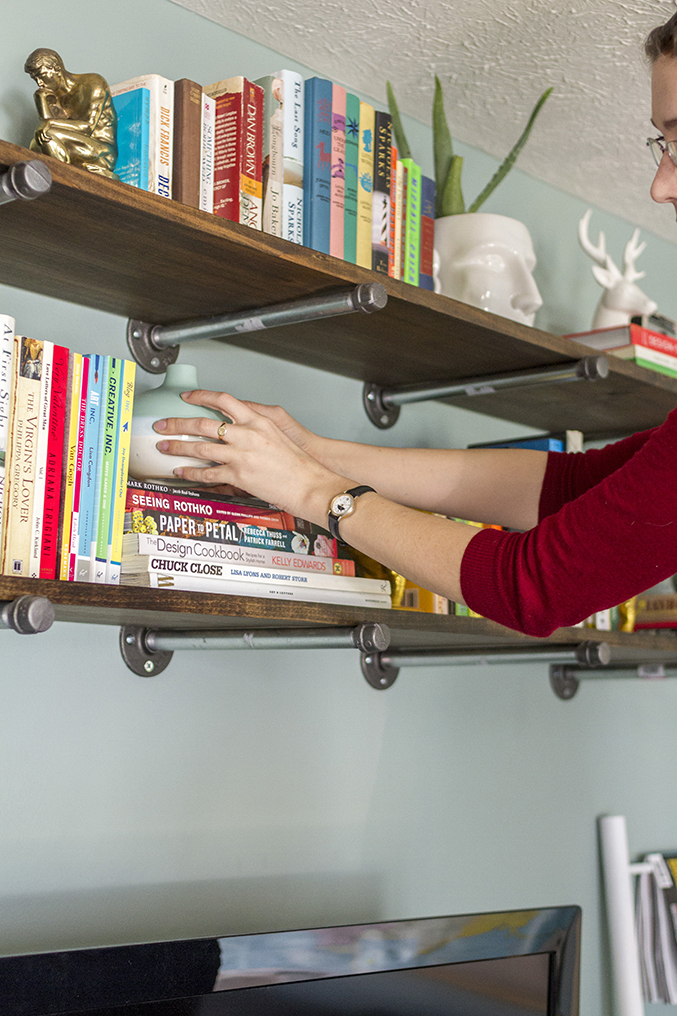
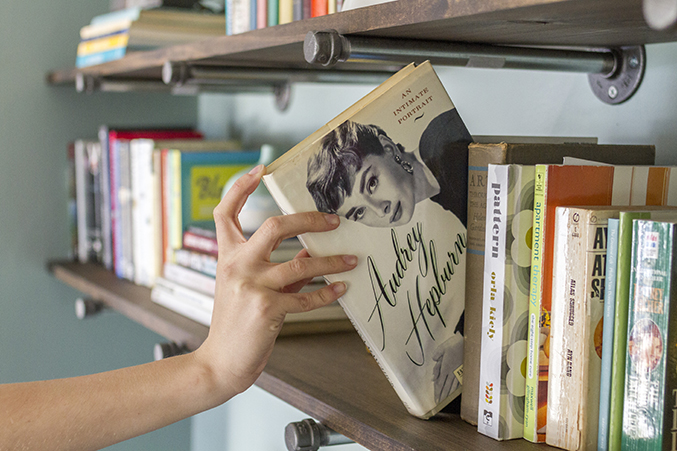
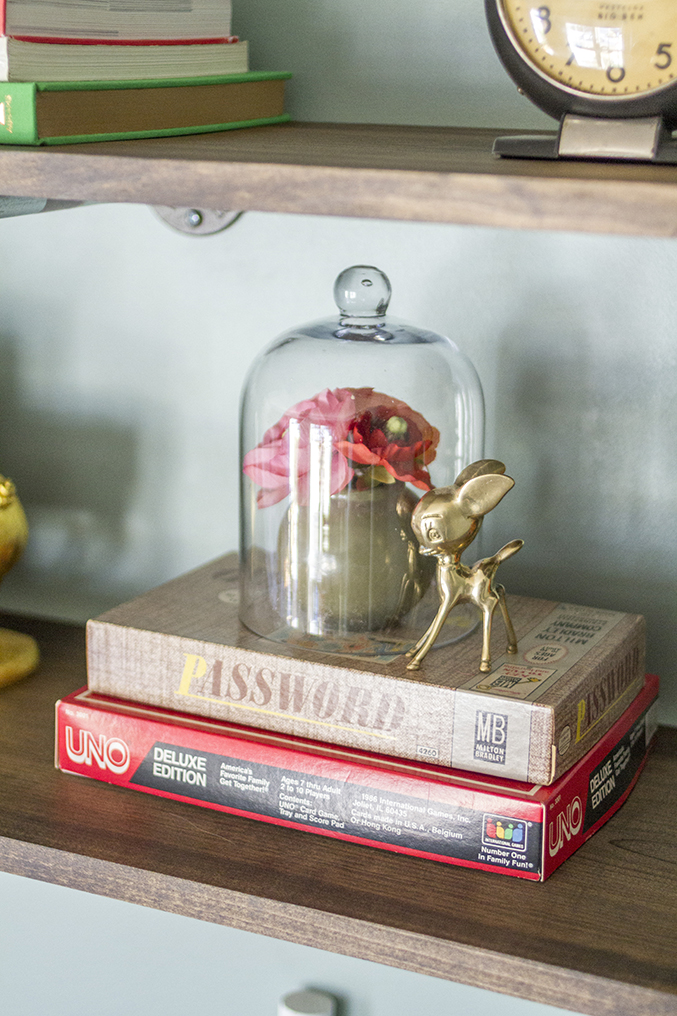
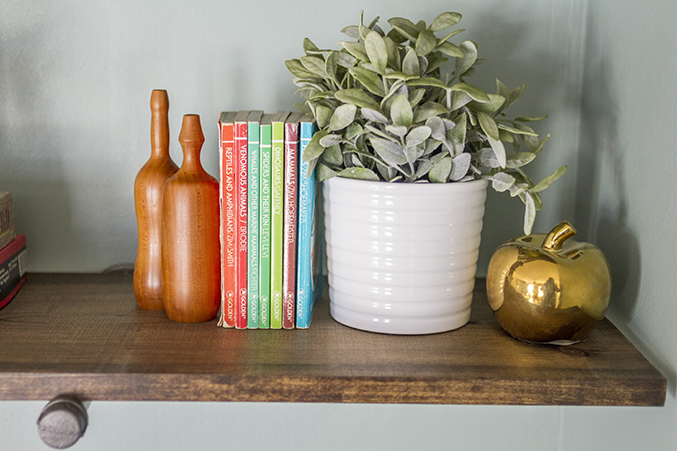
Finish by styling your shelves with books, potted plants and your preferred trinkets.
Now that it’s all completed, I can undoubtedly understand why industrial specifics appear to be all the rage these days—especially in the DIY realm. I think because the supplies are reasonably reasonably priced and accessible to the “average Joe,” and due to the fact the approach is manageable, even if you possess nothing at all but the most basic of handy-man expertise. Now, when I stare at that wall every single night I think only the most happy of thoughts—it’s ultimately completed and perfect.
P.S. The winner of the customized subway art print from Sweet Sycamore has been announced! Was it you? Discover out right here.
I feel that you all are pretty aware of what I commit my time on—crafting, writing, decorating and the like. You pretty a lot know my hobby inside and out. Properly, my husband has a bit of an obsession of his own—a really like that, like mine for DIY, knows no bounds.
His is all about fishing, and fly fishing in specific (yes, as I’ve learned, there’s a huge distinction there). Each night he’ll quietly wander down to the den whilst I finish up what ever deadline I’m functioning on to tie some flies. And every weekend he’ll pack his Subaru to the brim with supplies and rods in preparation for a day spent traipsing about the mountains in search of his next wonderful catch.
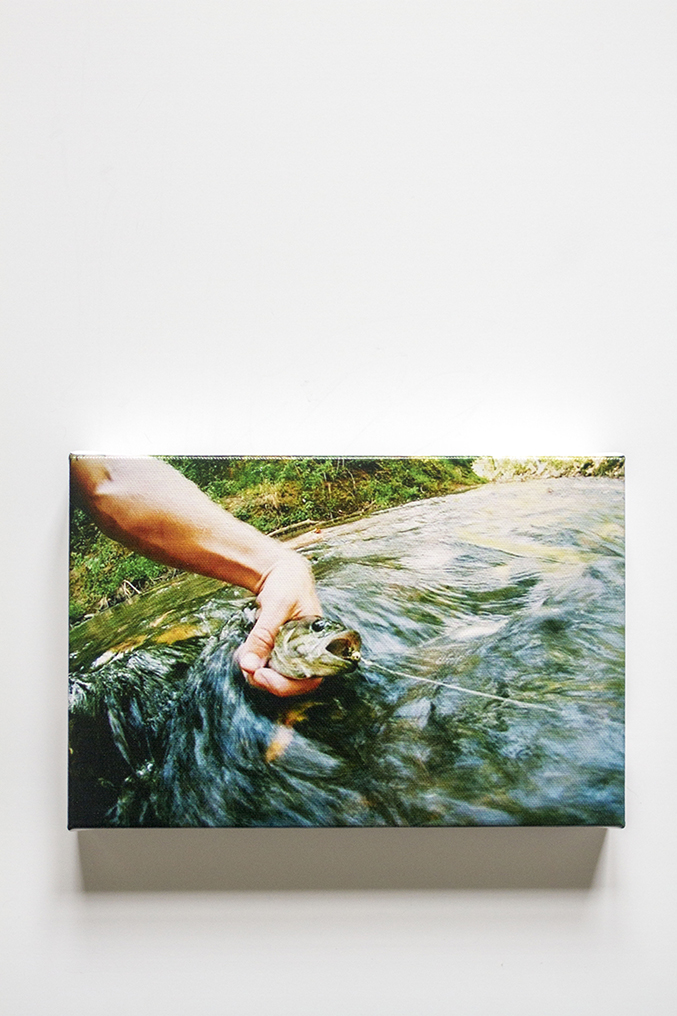
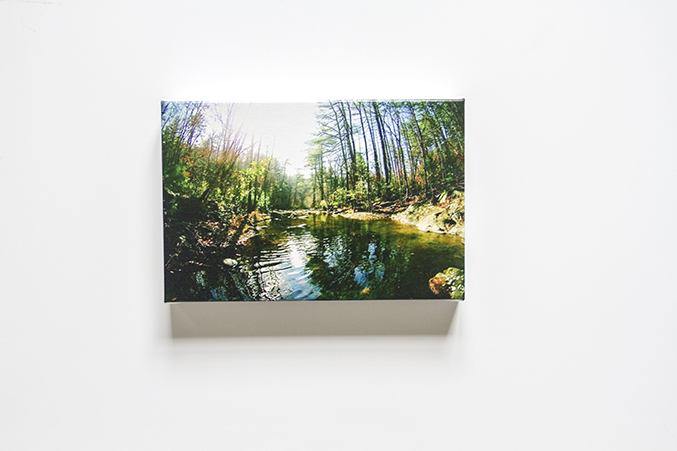
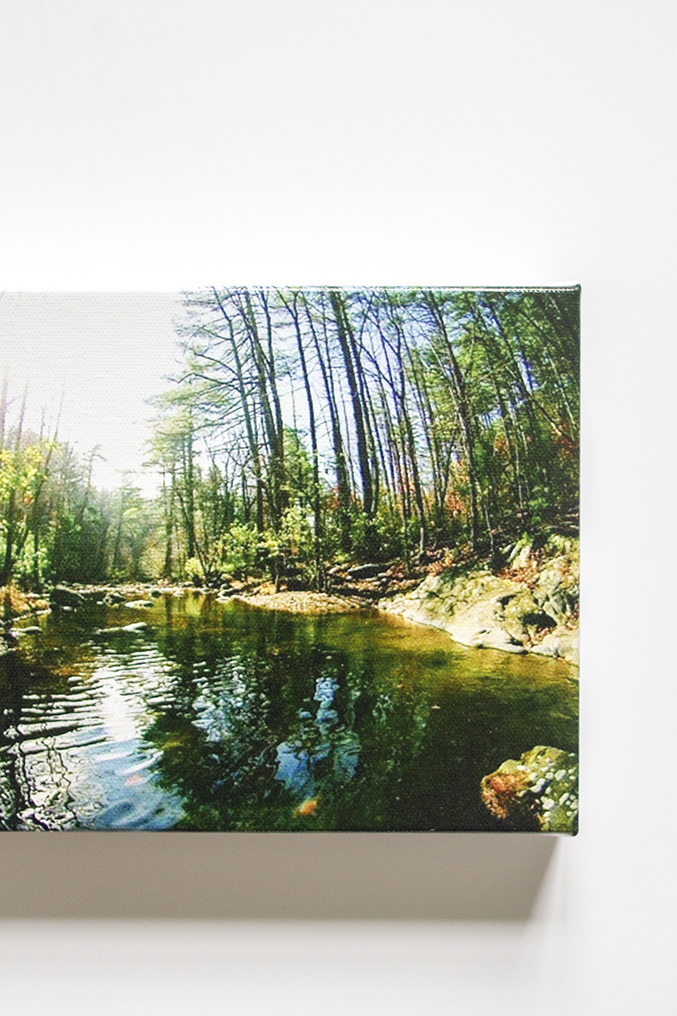
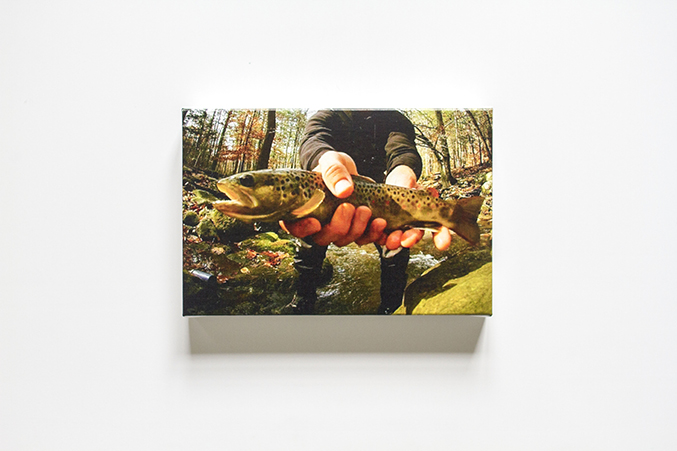
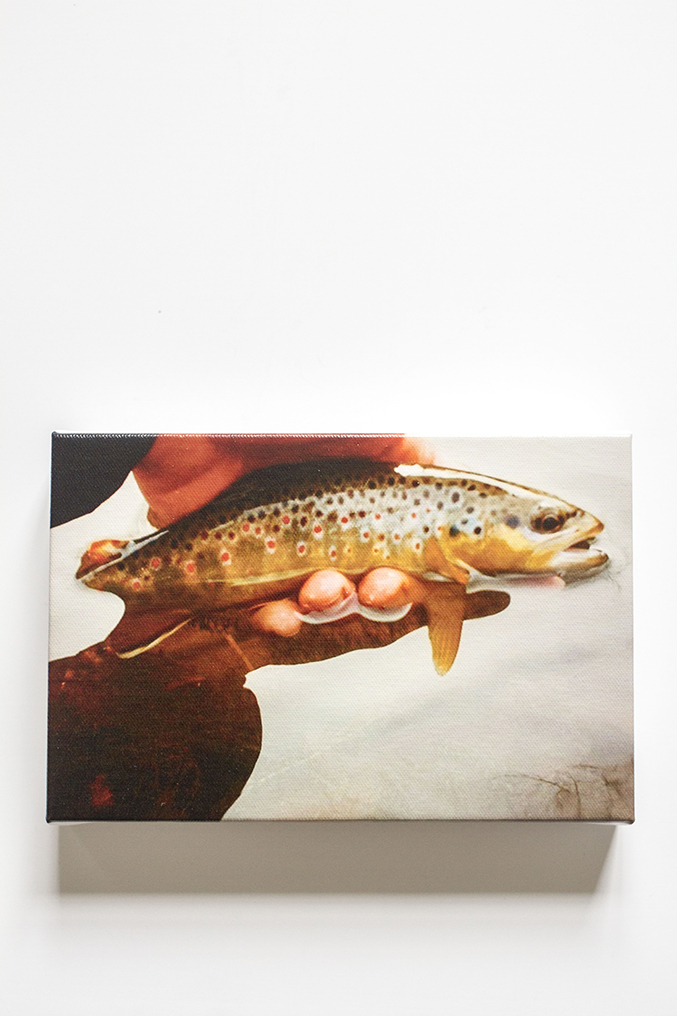
Throughout his weekly travels—sometimes driving as far away as two hours just to hit this river or that one—he’s come upon some fairly magnificent sights. His Instagram feed delivers one particular lovely peek into his mountainous perspective, from catches of the day, to pristine waterways that beg for a bit of (har, har) reflection.
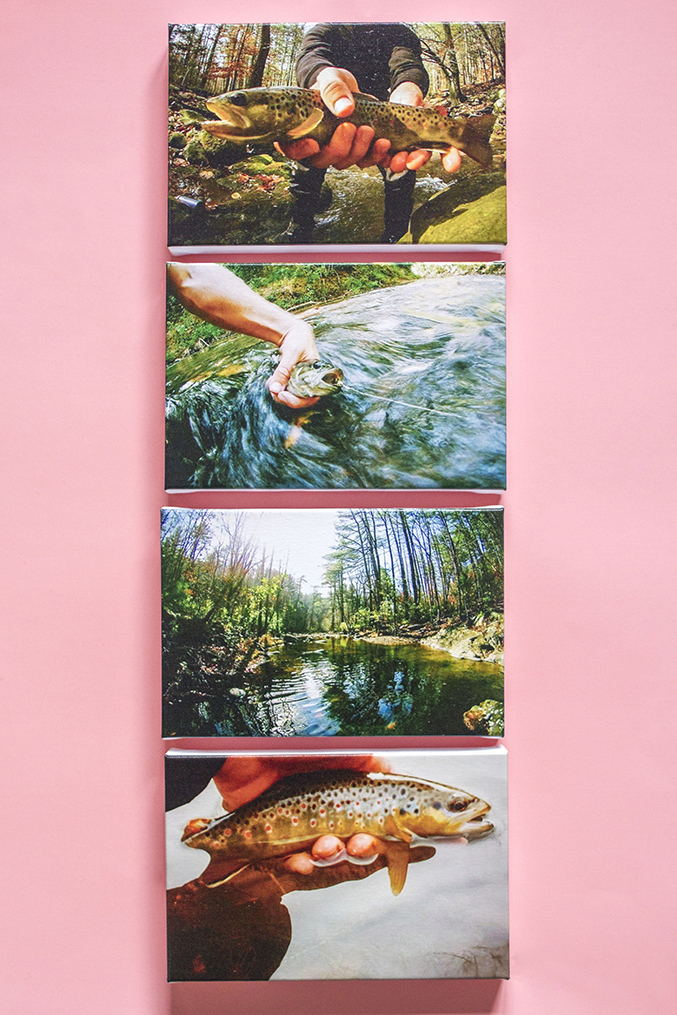
All this to say that when I was attempting to think up the excellent gift for my Valentine, I knew that it was going to be the present of custom art. A collection of prints to commemorate his fly fishing excursions and to give him a location to show off all of the locations he’s observed and fish he’s caught (and released, of course).
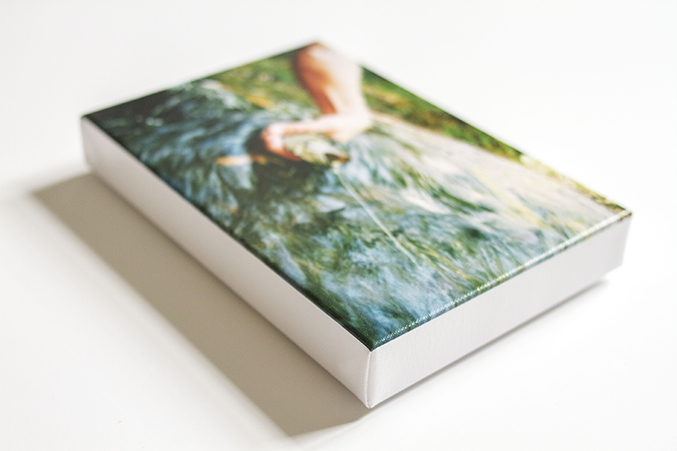
This time, I ordered from SnapBox. It was my initial time working with the brand, but it definitely won’t be the final. In order to keep the secret, I hopped onto John’s Instagram account and took screenshots of his favourite photographs, and then uploaded them to my new SnapBox account. Right after that, I chose my variety of print (wrapped canvas), size (six࡯ inches) and the wrap sort (a crisp and pure white). Right after perfecting the crop of every single of the four photos, I was carried out.
I am terrible at keeping surprises and gifted the completed custom canvases to John as soon as they arrived a week later, but (spoiler alert!) he loved them and we immediately hung them up proper beside his fly tying “station” in the den.
To celebrate everybody’s artistic side, SnapBox is supplying a single DGD reader a \$50 shopping spree on the site with free shipping! To enter, hop on over to Instagram and comply with the SnapBox feed. Then, leave a comment right here telling me that you did so that we can count the entry. Contest ends two/10/15 and the winner will be announced on two/11/15. Excellent luck!
P.S. Speaking of giveaways, nowadays’s the final day to enter to win the Darby Sensible DIY pillow cover craft box! Click right here to enter. And there’s nevertheless time to enter for a custom art print from Sweet Sycamore, too! Contest details this way.
A little while back now I was contacted by 1 of my lovely neighborhood readers who was looking for some design and style suggestions. She was truly enquiring about ‘hiring’ me to assist, and while this is anything I’ve accomplished in the past, the timing was just a tiny off for me so I felt uncomfortable committing to the perform.
That mentioned, I was still keen to assist her out and do appreciate the challenge, and just plain fun, of playing ‘dollhouse’.
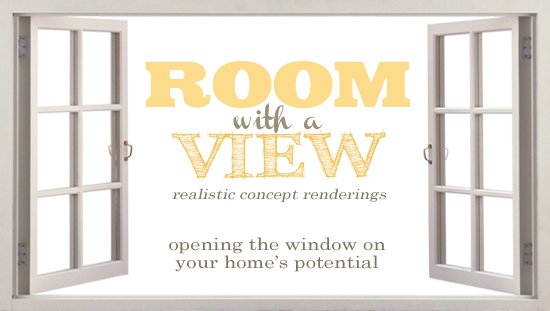
Fortuitously, I’d in fact been toying with the concept of beginning a new reader-primarily based design and style segment and her open program living space seemed like the prefect kick-off candidate!
The segment will focus on breathing virtual life into your design and style visions. In other words, turning your dreamy residence desires into realistic concept renderings you can in fact see!
Notice how I stated ‘your’? While I’m super open to assisting propel the style – filling in any gaps and dealing with dilemmas – at this stage I’d actually like concentrate on rooms you guys already have some suggestions for, rather than full-blown “I’m totally lost” re-dos. I adore the notion of operating in a collaborative way to make your personal imaginings visible.
Maybe you’ve got a new colour scheme in mind, various furniture layout to trial or are even contemplating a mini reno. From using a certain wallpaper to creating a distinct general ‘vibe’, it can be as precise or vague as you like, as lengthy as there is some intent. The general objective of the rendering is to supply a motivating (and hopefully fascinating!) visual guide which you can then tailor to your needs throughout the design and style implementation process.
Anyhoo, back to the kick-off space.
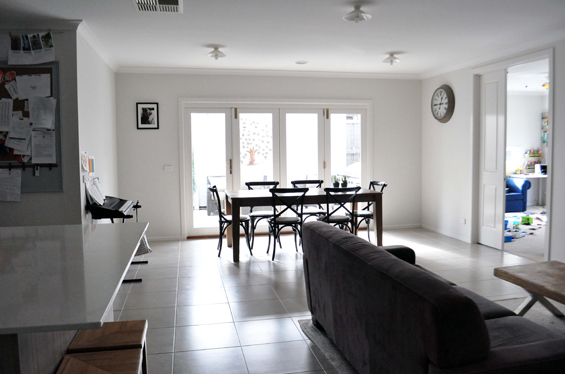
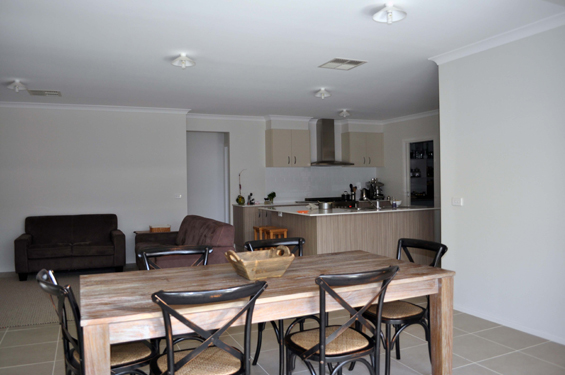
My reader, Jelaine, had come to a stand-nevertheless in her combined living-dining area.
She wanted to function with what she currently had (for the most element) to obtain a cohesive contemporary french nation feel, with hints of vintage industrial. Even though she had some ideas, she just wasn’t fairly certain how to pull every little thing collectively.
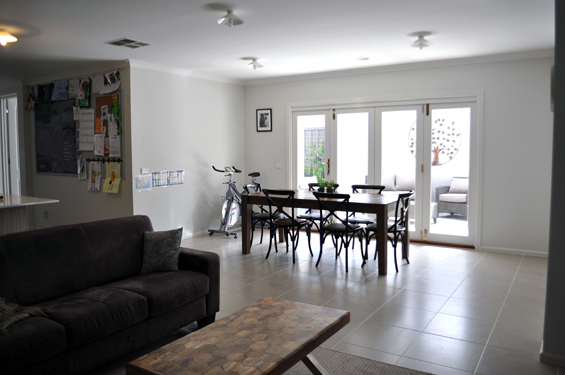
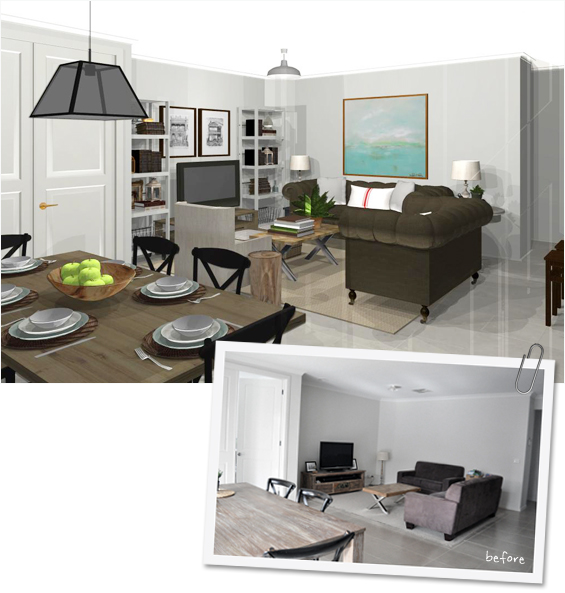
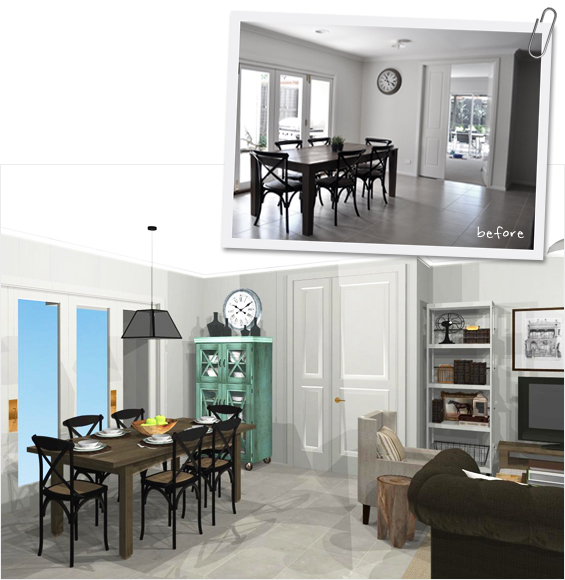
Right here’s her space…
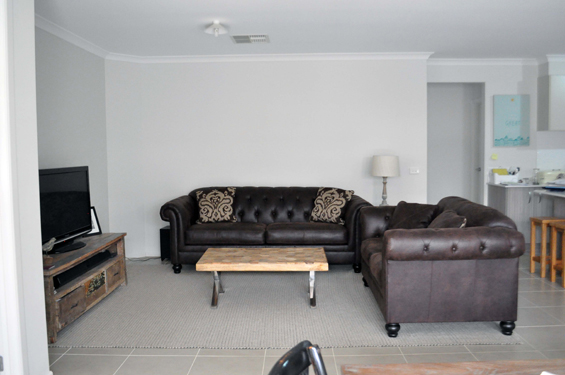
Note: Jelaine purchased new sofas mid-way through the consultation process soon after I saw a great deal on some which I thought fit her criteria and recommended she check them out. Despite the fact that I was sent a couple of fresh pics of the space such as the new sofas – which had been adequate for my rendering purposes – the initial photographs (incorporating the original micro-suede couches) have been just a little wider angled and much better showed the space as a complete which is why I’ve used them above. Of course, the new sofas are depicted in my plans and right here they are in the room…
She also shared photos of some accessories she’d like integrated…
And right here are her requirements and desires…
DINING Location – Table, chairs and clock to stay – Lighting for above dining table – Furniture (incorporating storage) for beneath clock – Artwork for blank wall
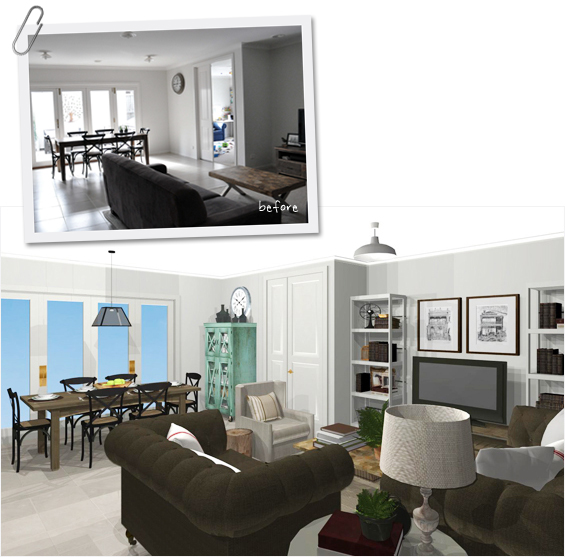
LIVING Region – Rug, coffee table, new brown sofas and Television bench to stay – Incorporate lamps someplace – Artwork for above three-seater sofa – Use architectural prints if achievable – Lighten-up the overall brown-ness – Additional furnishings to accompany Tv bench (likes the appear of constructed-ins)
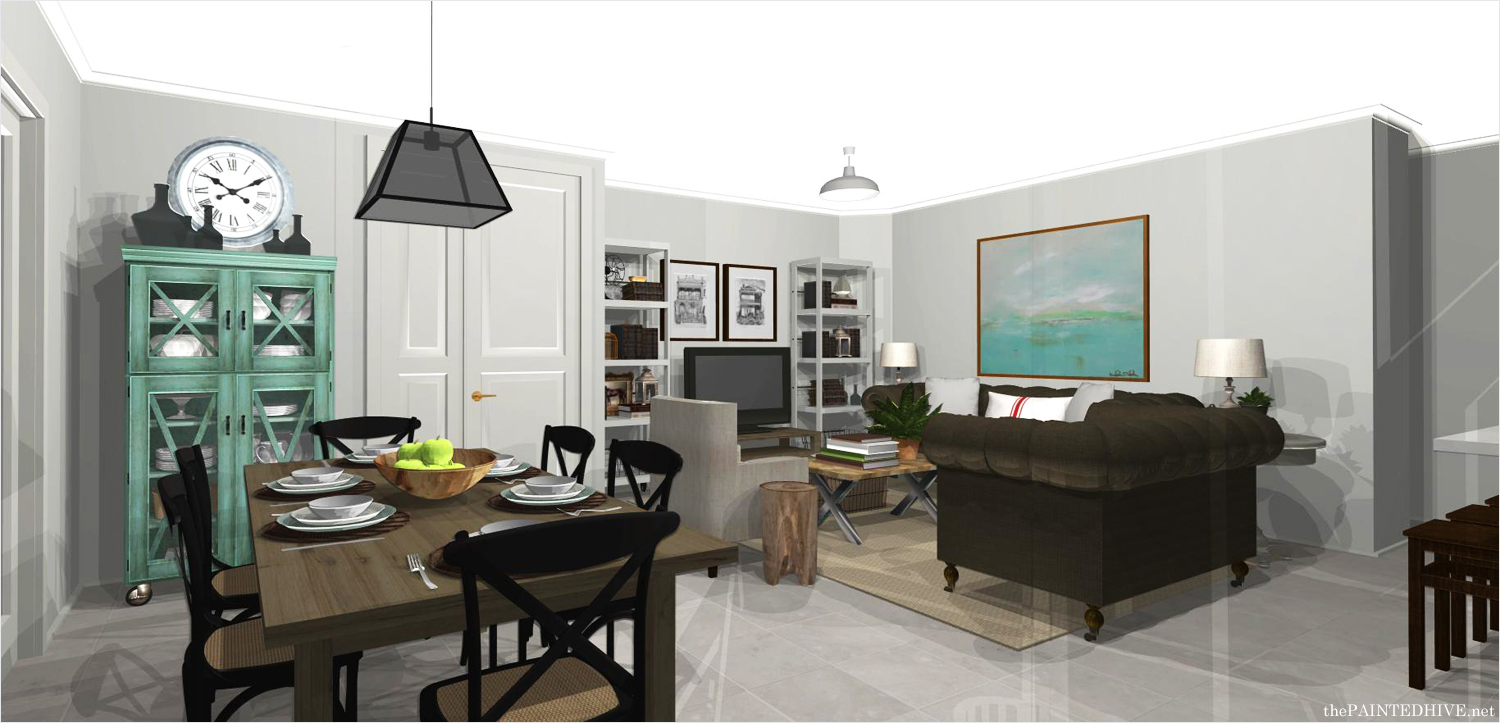
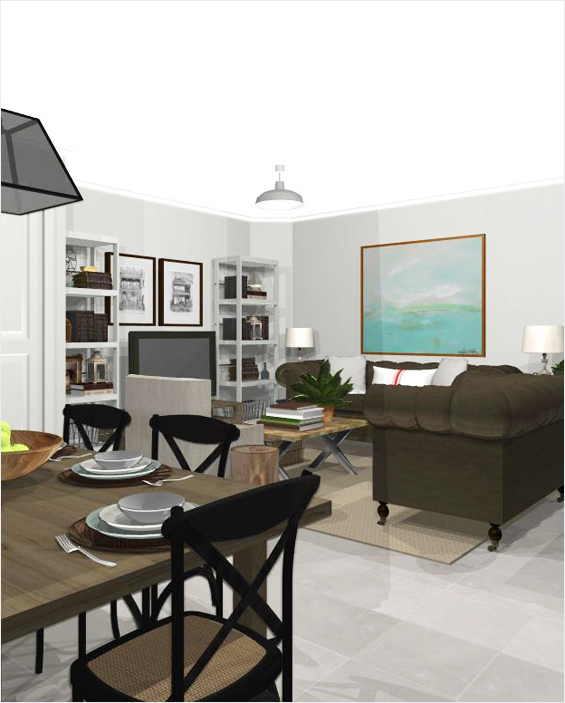
So, taking all things into account – like accurate dimensions of the room itself along with any existing furnishings – right here’s what I came up with (side-by-side comparisons can be identified further below)…
CLICK THE ABOVE IMAGE TO ENLARGE Go on, you know you want to – it appears heaps better big!
Pardon the funky shadowing. Just a quirk of the system.
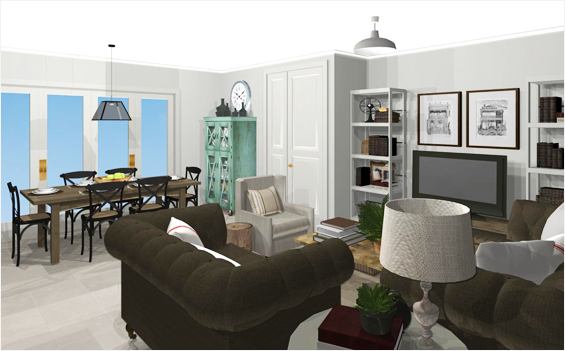
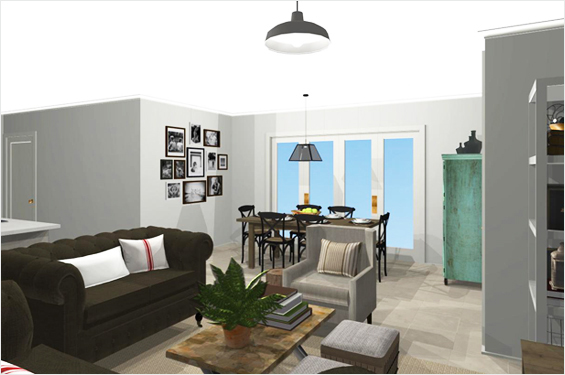
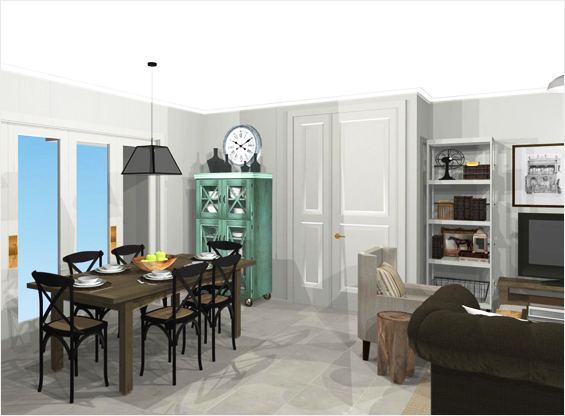
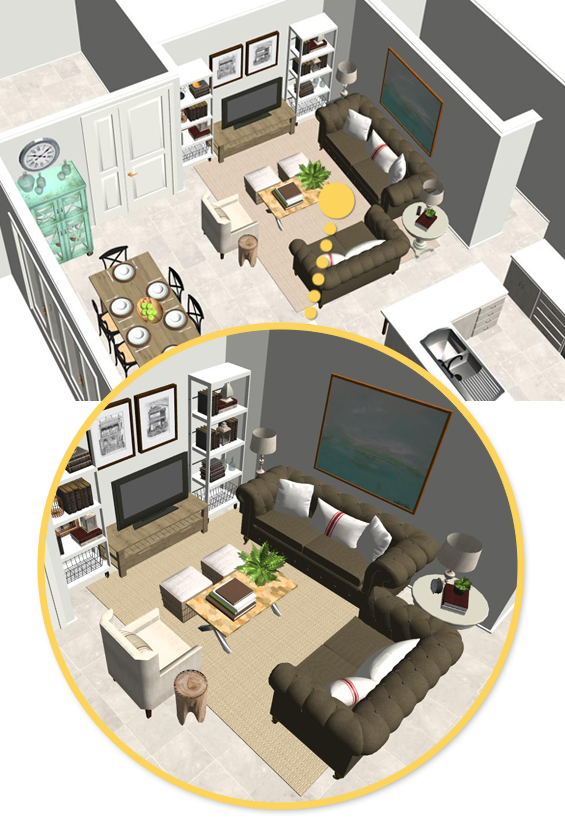
Under is a ‘doll’s home’ view to a lot more clearly show the spacial preparing and furniture lay-out.
And a bit about the choices I produced…
DINING Location I was initially going to suggest putting a little cabinet beneath the clock, even though its high hanging position prompted me to suggest a 3/four cupboard alternatively. Not only does it provide much more storage, believed it’s also just a bit different. I went with a distressed mint green which references the artwork in the living area, breaks-up all the timber in the space and adds some necessary personality. Atop the cupboard a simple collection of glassware befriends the solitary clock.
On the opposite dining space wall I have produced a basic photo gallery. This location is currently a bit of a transient zone (you may have noticed each a spin bike and keyboard in each of the just before pics – which were taken a few weeks apart) with no genuine defined future plan. The gallery, being each easy and fascinating, gives flexibility however performs to give goal and impact to the wall. If in the future Jelaine want’s to pull in some thing more permanent (possibly in the type of a sideboard, low bar or bench) the gallery can simply be adapted to perform.
A low central pendant aids define the dining region. I utilised an industrial pyramid style pendant, though a longer rectangular one particular would function equally well, as would an appropriately scaled pair of alternate pendants, like glass cones or standard lanterns.
LIVING Location Rather than commit to the permanence and expense of built-ins, I have basically flanked the Television bench with two tall narrow shelving units. Although open to changing the Tv bench, Jelaine did mention that she does like it, so I have retained it at this stage. That stated, I do like the notion of switching it out for something simpler which can be painted to match the shelves (and doesn’t compete so readily with the coffee table). I described this to Jelaine and she is now keen to locate an alternative. Restrained but thoughtful styling utilizing co-ordinating accessories (notice I sneaked in her pair of beautiful lanterns?) assists avoid a cluttered really feel. Fairly baskets can be utilised to shop any smaller, much less decorative items. To bridge the shelves and take concentrate off the Television I have utilized Jelaine’s existing architectural prints which have been bought by her husband.
I retained the couch configuration – which, after brainstorming all the options, I decided does function greatest for the space – although added a small occasional chair and two ottomans. The chair performs to define the seating area without having enclosing it. It also provides an avenue to introduce a lighter coloured fabric. I felt the rectangular shape of the coffee table was a tiny ill-fitting so have teamed it with a pair of ottomans to generate a collective square shape which I feel functions far better in the space. Along with supplying further seating, the ottomans are very easily repositionable as necessary and, based on the style, can also be utilised for storage. To assist brighten things up I have utilised a mixture of light-toned linen cushions, some plain and some with simple grain-sack stripes to fit with Jelaine’s preferred french feel. I have placed a brown ticking cushion on the occasional chair to tie it in with the chocolate couches.
To break-up all the angles in the room I added a round pedestal table in between the couches. I went with anything reasonably tall so it didn’t get also lost behind the sofa arms and chose a warm grey to add a bit of depth. Atop the table sits the shorter of Jelaine’s lamps. Positioned symmetrically at the other finish of the 3-seater sofa is the taller of her lamps. You can’t see it clearly in the pics even though I’ve utilized a tiny milking stool to bring it up to the very same level as the table lamp (books could also be used as risers to get the levels ideal if need be). Giving business to the occasional chair is a little side table, right here in the type of a stump stool, nevertheless numerous different designs could function nicely.
To cleanly counter-balance the fullness of the shelves and generate a focal point away from the Tv I have placed 1 huge artwork above the three-seater sofa. I chose a muted abstract for a bit of edge and colour (as talked about above, the artwork colour is referenced in the green dining space cupboard to support unite the locations).
Note: Of course, all the specifics in my design and style are merely suggestive. Particulars regarding particulars such as colour, style, finishes, and so forth, can and should be adjusted as needed.
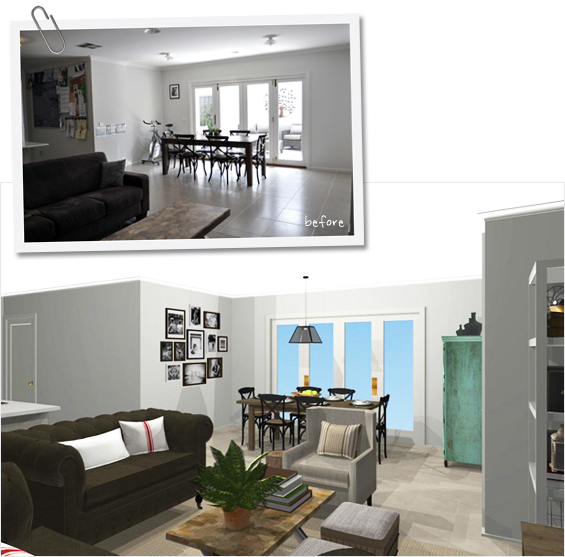
Now, who doesn’t adore a before and following? Right here are some comparisons to save all that back and forth scrolling (bear in mind, she already has the new couches)…
 
Soooo, now I invite you guys to submit a single of your spaces!
If you have a space you believe would be a very good candidate for this new segment basically send me a short overview of your vision for the space along with a few pictures.
E mail [email protected] with topic line “Room with a View”.
Guys, please don’t go into as well much detail or send a million pics at this stage. Depending on the quantity of submissions I receive I could not be able to get to them all and I’d hate for anybody to take a heap of time composing a submission which doesn’t evolve into a rendering. I program to pick a space as frequently as time and motivation permits, any of the a lot more nitty-gritty deets can comply with if your area is chosen.
Even though I have this great rendering program (and have somehow conquered the considerable understanding curve in order to truly use it!) I can’t count the number of instances I’ve just wished a person would simply show me how an imagined space may look. So, I’m truly hunting forward to becoming capable to do precisely that for some of you! Eeeek!
Don’t want to gamble with the opportunity I may possibly pick you? Feel cost-free to get in touch with me about a custom consultation.
This area was rendered using Property Designer Architectural.
You have just read the post New Reader-Based Consultation Segment…and a space just before and soon after! from The Painted Hive. Click on over to visit the blog and get engaged in the comments section – I’d enjoy to hear your thoughts! Republishing this article in full or in portion is a violation of copyright law.
In this post, we will examine you with the stunning theme for balcony flower box. The decoration for the balcony is just as crucial as the decoration in the Property. Everyone wants that his property from the 1st appear gorgeous and desirable views. This can be achieved easily with the assist of flowers! The floral is the best way to make the exterior of your property fresher and far more colorful. The species are many, so that you can generate some thing unique and exclusive! Often only a flower box for balcony is sufficient to modify the entire look of the facade. Beneath will locate our fantastic suggestions!


 I did not want to do upper cabinets – I knew it would truly feel too heavy, so the tiny shelves are excellent. We don’t have a ton of factors to retailer in that region anyway.


 One particular of the simplest projects I acquired done was an straightforward (and totally free for me) frame I put on the artwork my son and I manufactured: