Sumptuous, Yet Intimate Design Scheme Exhibited by M Restaurant in London

The first thing that strikes you when you walk into M Restaurant on Threadneedle Walk is how big the space is, yet how intimate it feels! This brand new 12,000 square foot London eatery, was a collaboration between a veteran restaurateur and his interior designer, Rene Dekker. Martin Williams’ vision was to create an establishment that would appeal to a broad spectrum of gastronomes and offer the best cuts of meat as well as the finest ‘raw’ cuisine. Coupled with this, the interiors had to emulate a sleek and sophisticated ambiance that would feel intimate yet familiar; in his words “a boutique hotel without any rooms or a private members club with no members”.

On the ground floor the space is divided into two main areas by the clever use of bespoke designed, bronze screens, emblazoned with the subtle but ubiquitous M logo. To the left is ‘M Grill’, which serves some of the finest cuts of beef in Europe. The scheme is a fusion of many elements, most notably the strong teal fabrics on the banquette seating mixed with subtle wool tweeds on the chocolate brown armchairs which create a sumptuous, yet simple ambiance. Everywhere you look, René Dekker Design have added exciting textural elements leaving no surface unadorned, such as the faux eel skin wall paper by Elitis, which decks the walls in the banquette niche.
The client wanted a scheme that was unique and exciting but that would still be self-deprecating,and this is evident in the selection of art as seen in one of the many Miles Adridge photos that adorn the restaurant. Hanging squarely in the middle of this gorgeously finished wall is a seductive shot of a glamorous model sitting at a table in front of a large plate of steak tartar. The scale has also been carefully contemplated considering the double volume ceiling height on the ground floor. It was essential to ensure the space delivered an intimate atmosphere, so the team created niches for the banquette seating and brought the decorative lighting down to just above the tables. [Photos and information provided via e-mail by James Silverman]


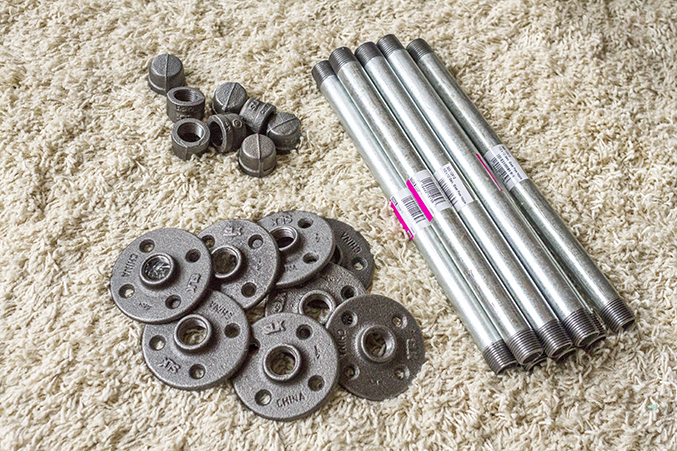
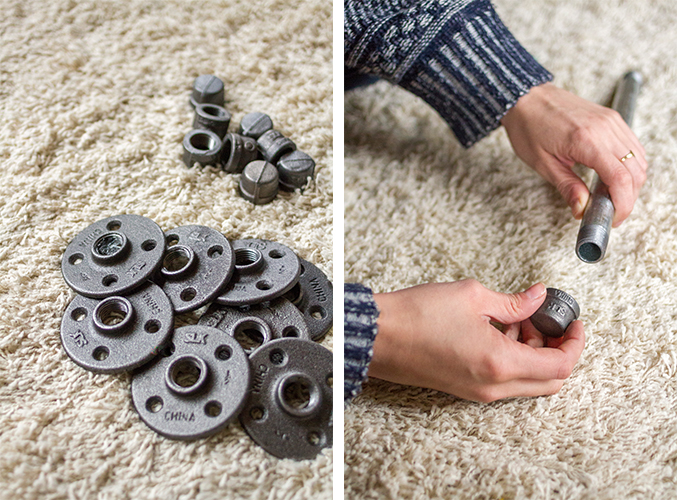
Begin by screwing the caps onto every of the galvanized pipes and set them aside. Then, use a stud finder to find and mark all of the studs in your wall with a pencil. It’s specifically crucial to uncover the studs and drill appropriate into them for this undertaking since the industrial supplies are hefty, as are the books and add-ons you’ll put on the shelves once they’re complete. Carry on the process down the length of the wall, making certain each mark is degree with the one beside it.
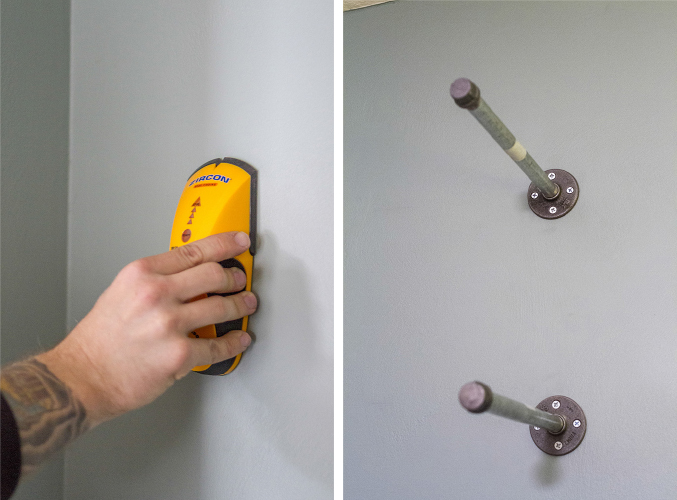
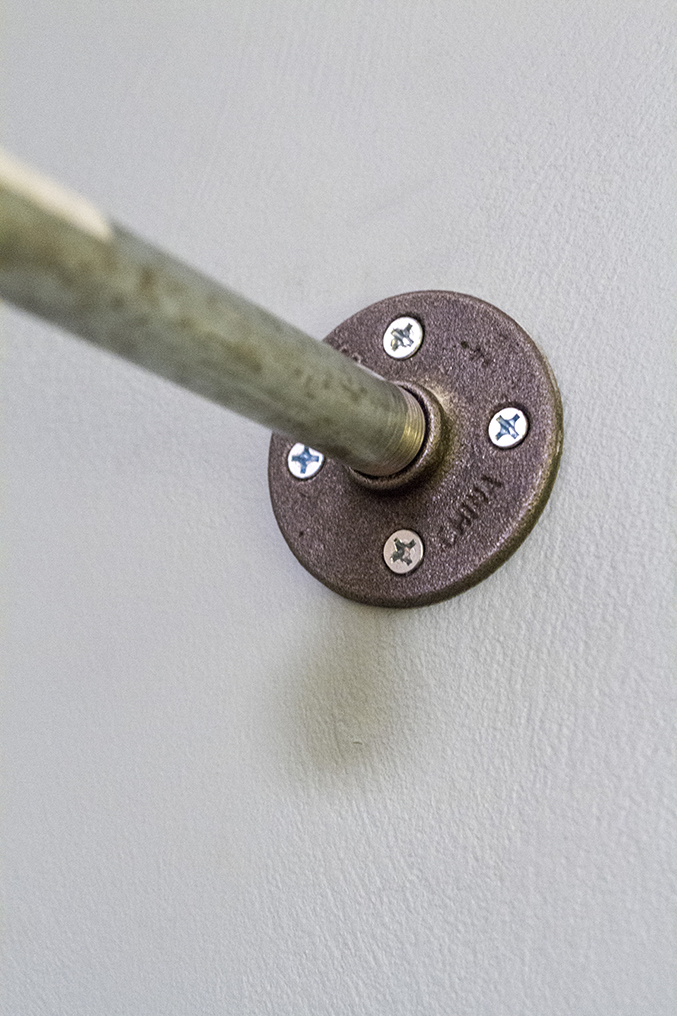
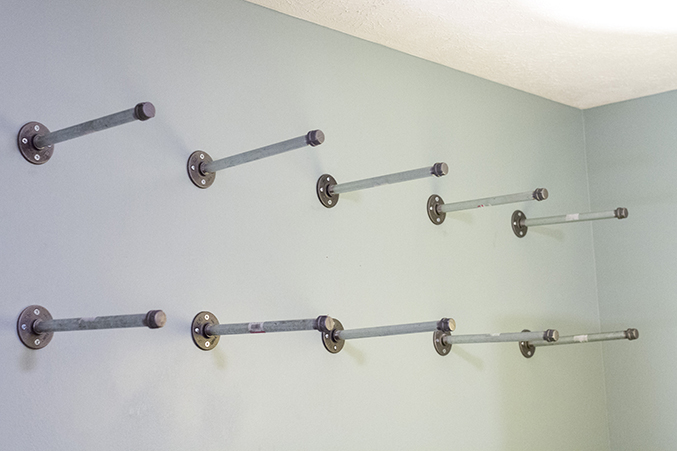
Pre-drill holes into the marked wall and studs making use of an electrical power drill and drill bit, and then screw the flanges tightly into the wall. Use a guide screwdriver if needed to get the hardware started out and then finish with the electrical power drill. Complete the supports by screwing the exposed, threaded finish of the galvanized pipes into the flanges now attached to the wall.
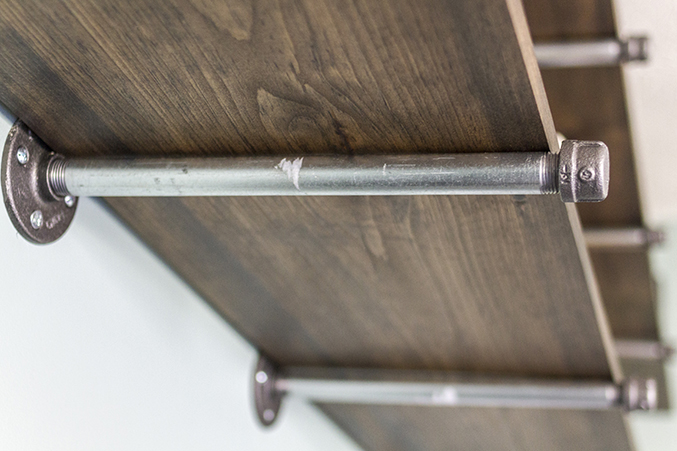
Sand down the wood for your shelf and give it two coats of stain. Let the stain to dry for 24 hrs, and then place the shelves on leading of the galvanized pipes. Because the cast metal flanges are all inherently distinctive from one particular yet another, there may be some inconsistency in angle. If this is the case, you can consider unscrewing the flange from the wall and flip it 180 degrees, then screw it back into the wall. This could assist to reorient some of the a lot more sharply angled pipes and enable the wood to sit levelly.
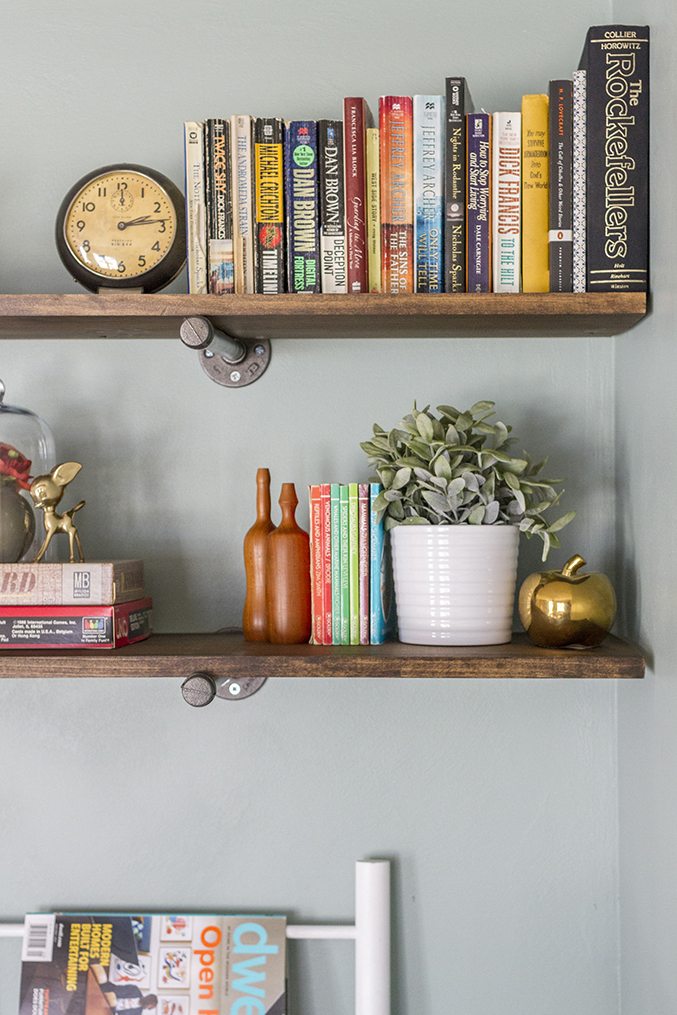
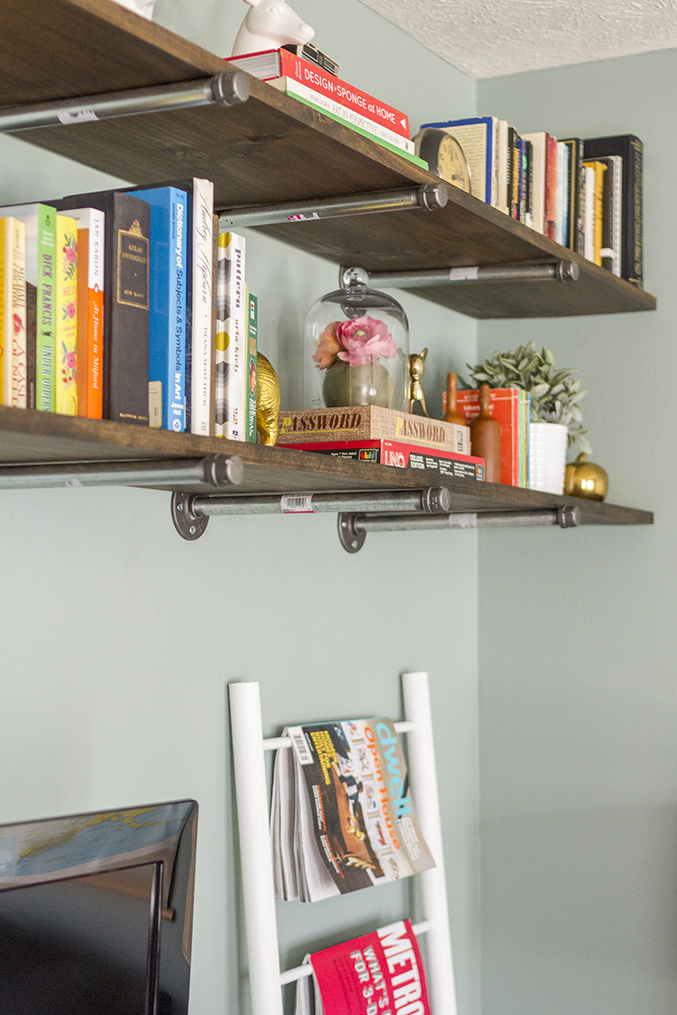
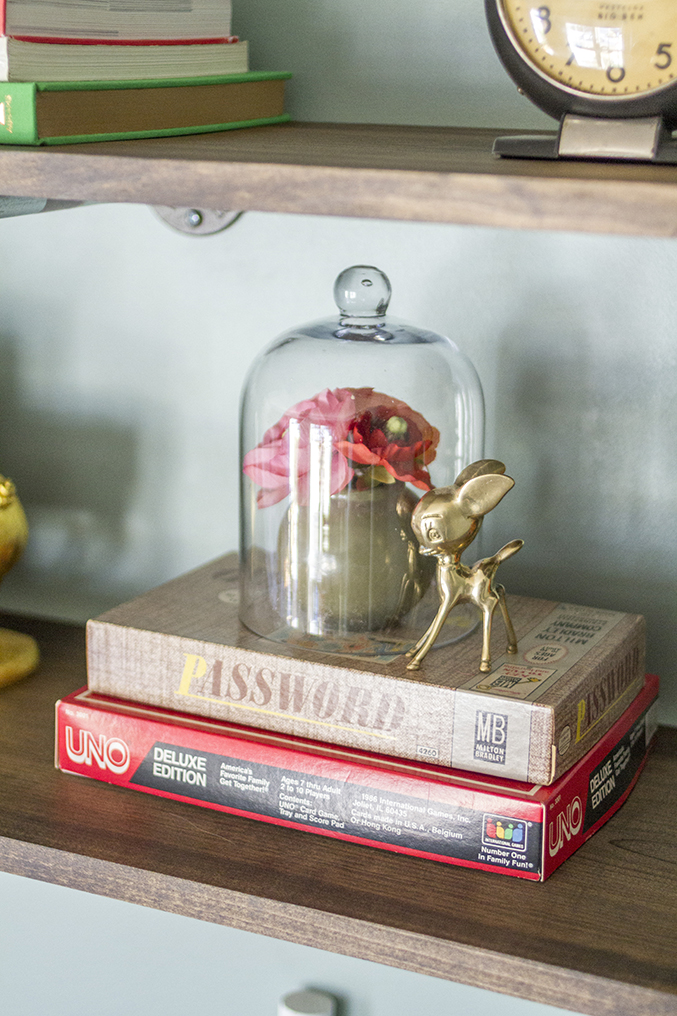
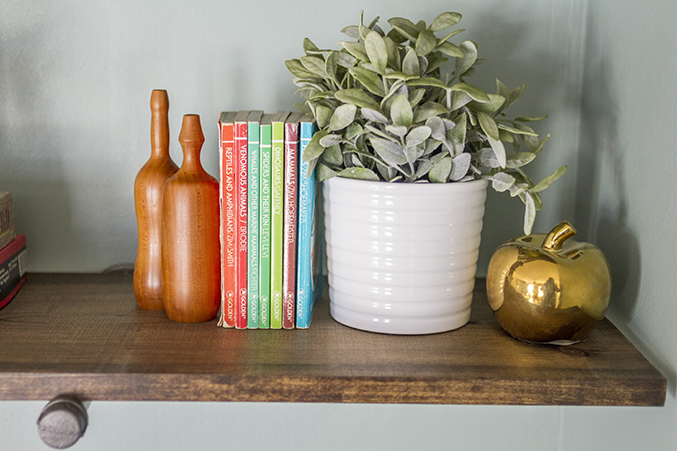
Finish by styling your shelves with books, potted plants and your preferred trinkets.
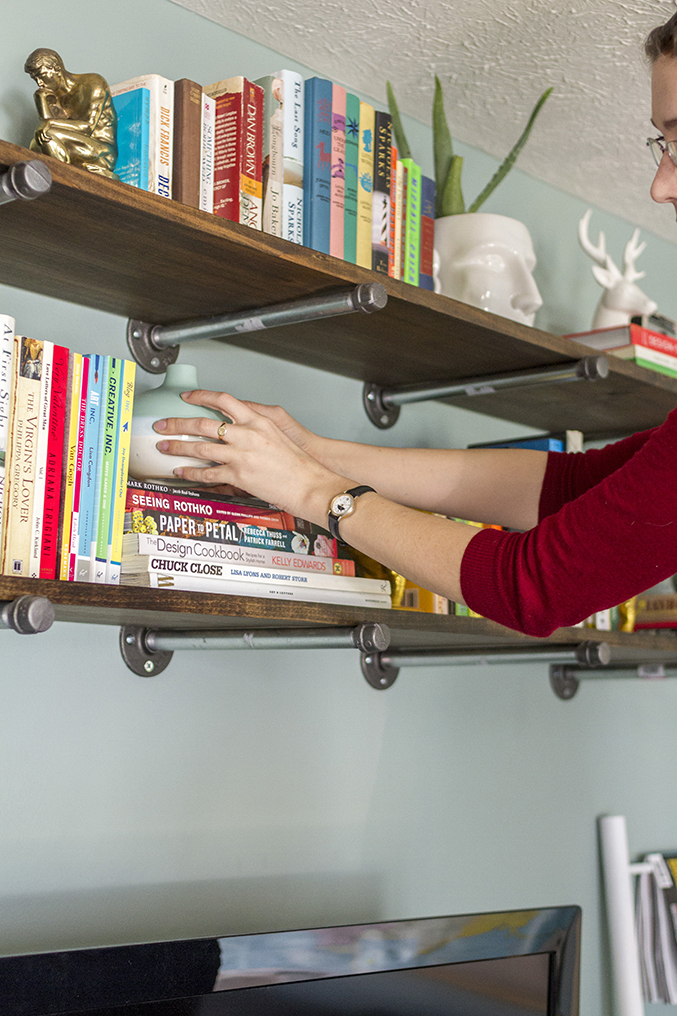
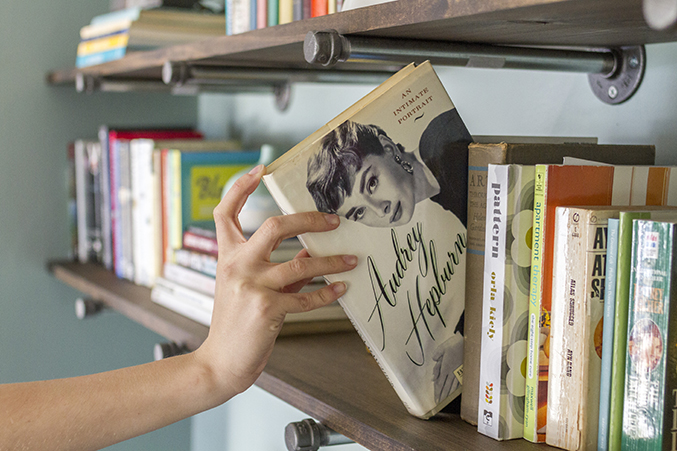
Now that it’s all completed, I can undoubtedly understand why industrial specifics appear to be all the rage these days—especially in the DIY realm. I think because the supplies are reasonably reasonably priced and accessible to the “average Joe,” and due to the fact the approach is manageable, even if you possess nothing at all but the most basic of handy-man expertise. Now, when I stare at that wall every single night I think only the most happy of thoughts—it’s ultimately completed and perfect.
P.S. The winner of the customized subway art print from Sweet Sycamore has been announced! Was it you? Discover out right here.


