Hi, my title is Carrie and I kill flowers (i.e. all houseplants in common) just by hunting at them.
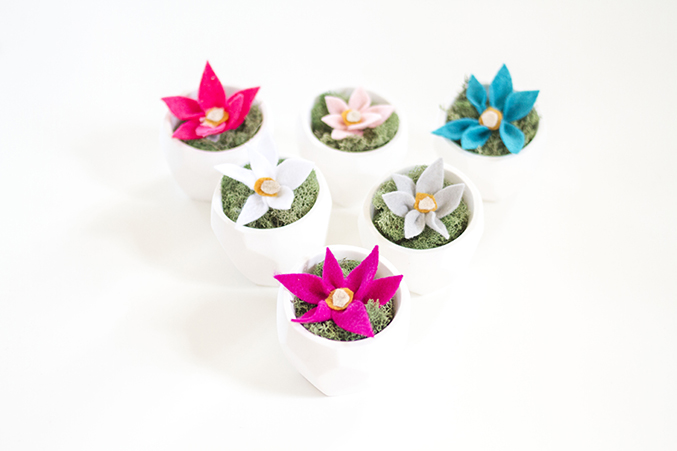
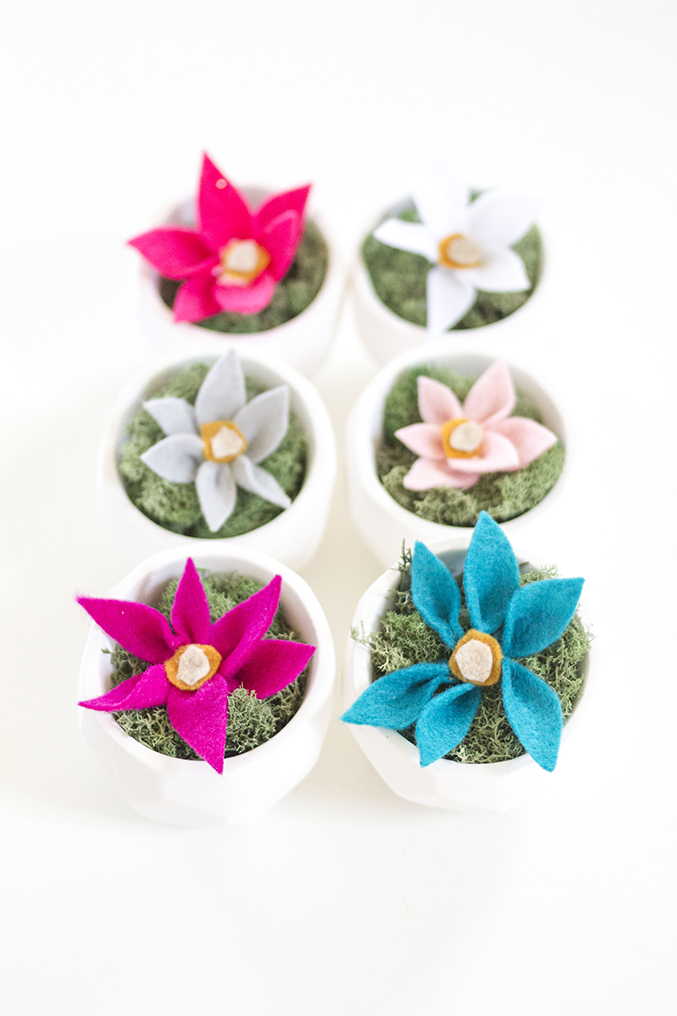
Happily, I have my DIY skills to lean on so that I can bypass the prospect of caring for live plants altogether! The concept started out even though planning a spring photoshoot (that has now been rescheduled for tomorrow) based close to a brand new set of party goodies from Kate Aspen—namely these cute-as-buttons white geometric planters. I needed to fill them with some thing normal and colorful and quite, which left the one alternative of flowers. But alternatively of working with the dwell variety, I made the decision to make my own employing felt and glue. Go through on for the scoop!
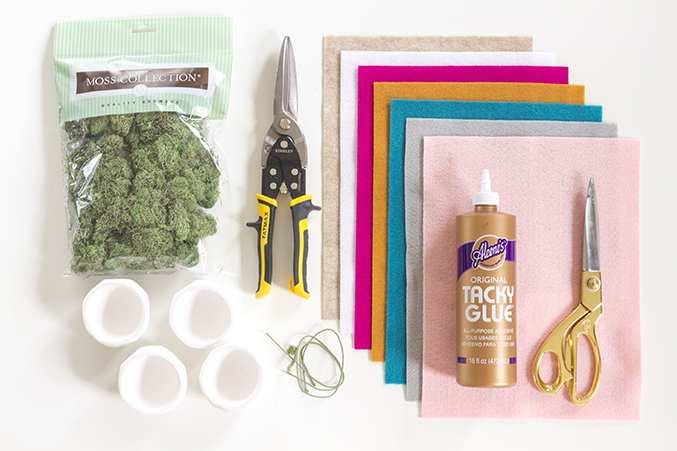
Geometric planters
Moss
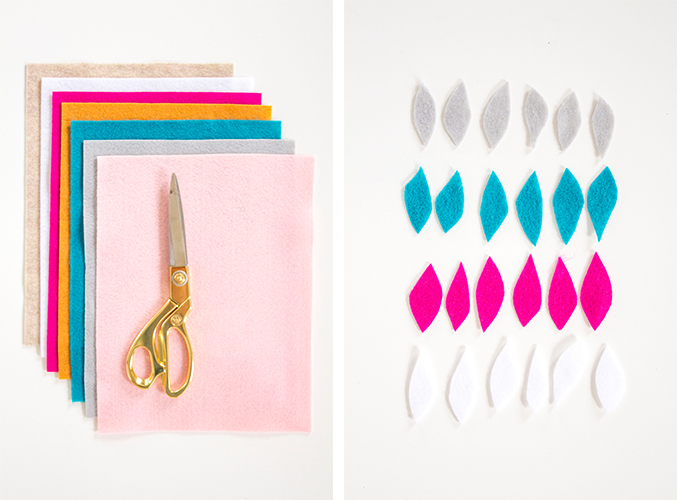
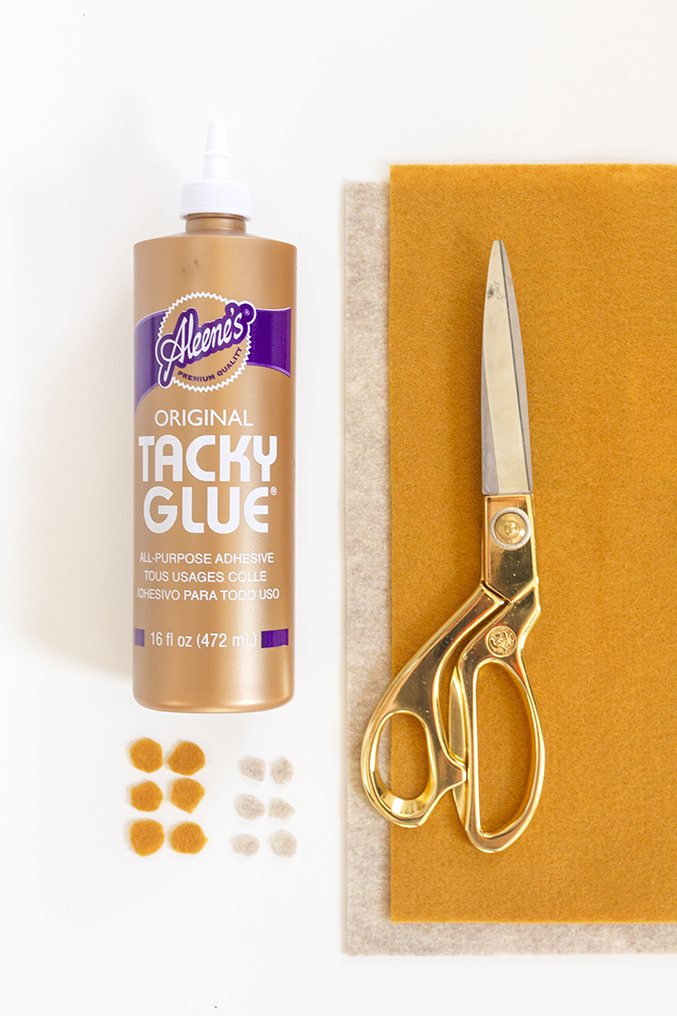
Colored felt
Scissors
Wire cutters
Wire (even though you see green floral wire pictured, it ended up becoming also thick, so I went with a super thin, silver range instead)
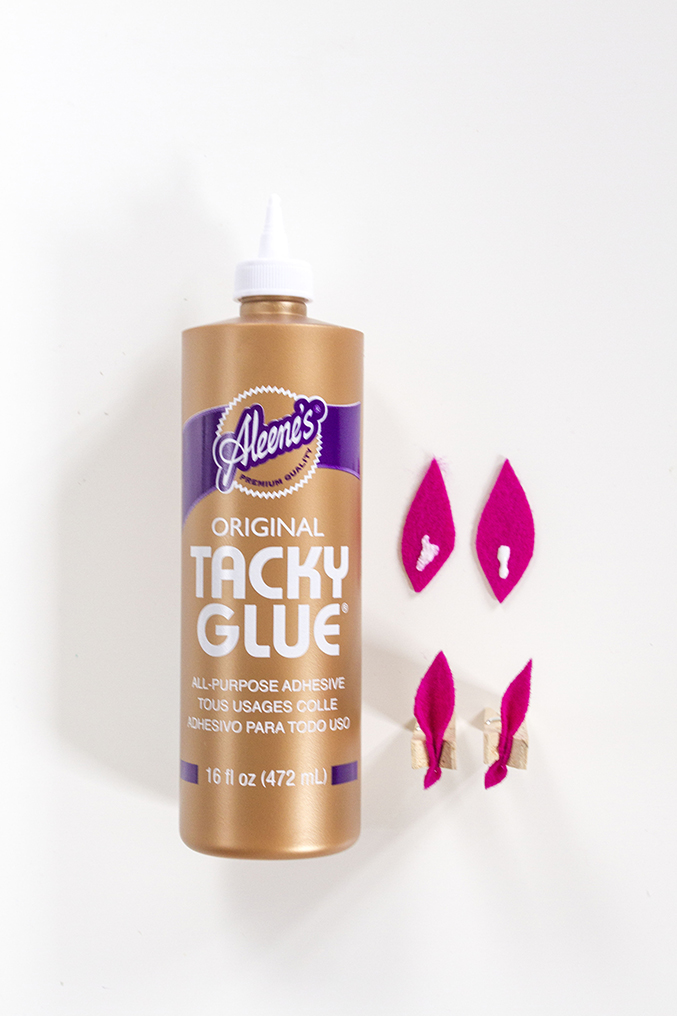
Craft glue
Wooden clothespins (not pictured)
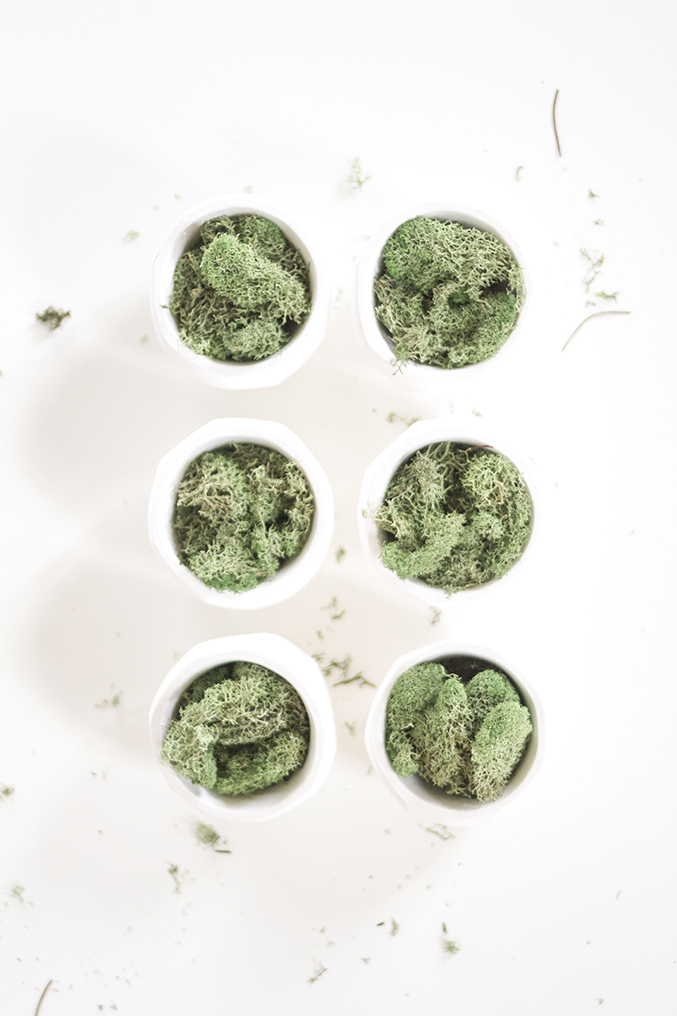
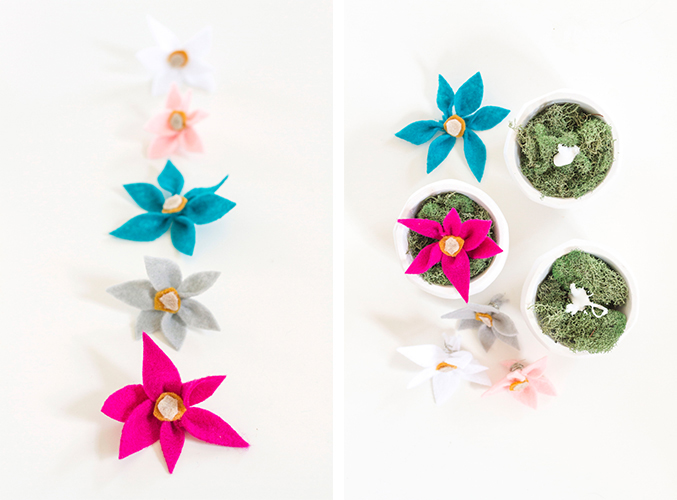
Start by pulling tufts of moss from the packaging and things it down into the white planters. I located it was easiest to roll the moss around in between my palms so that it formed a rounded shape before making an attempt to add it to the pots.
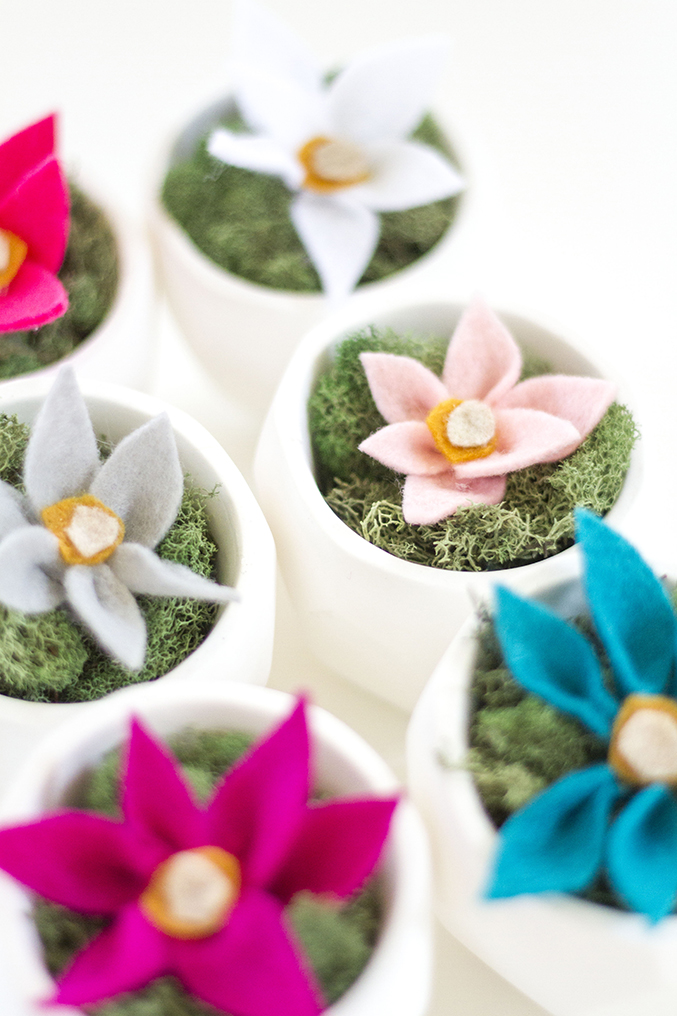
Up coming, use scissors to lower the felt down into petal shapes. These don’t have to be perfect—in reality, they looked a lot more practical when the size and form varied a bit between every single. I manufactured 6 petals from each and every shade of felt.
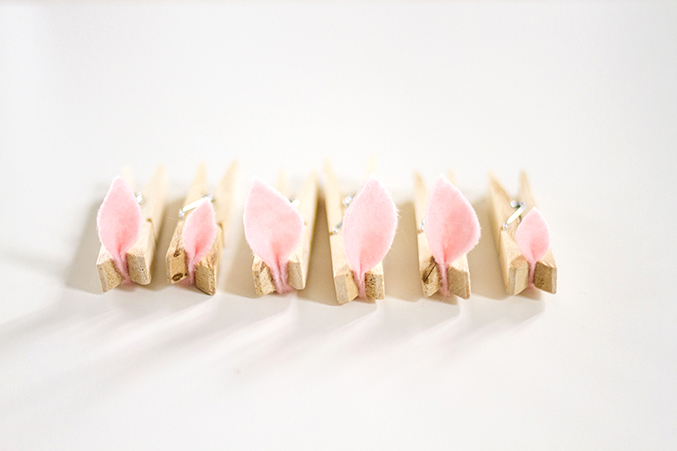
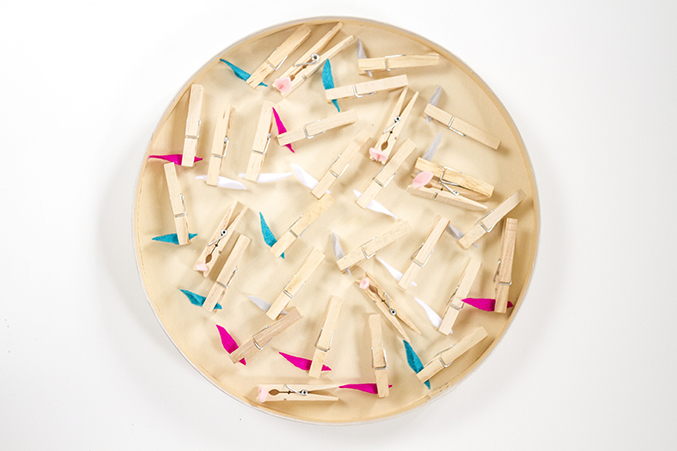
Once all of the petals have been reduce, squeeze a dot of craft glue at the bottom of one end of each petal and fold the felt up and over the glued area. Clamp the glued felt in between wooden clothespins, currently being cautious to avoid obtaining glue on the clothespin. Enable to dry for an hour and then unclamp and set them aside, separated by shade.
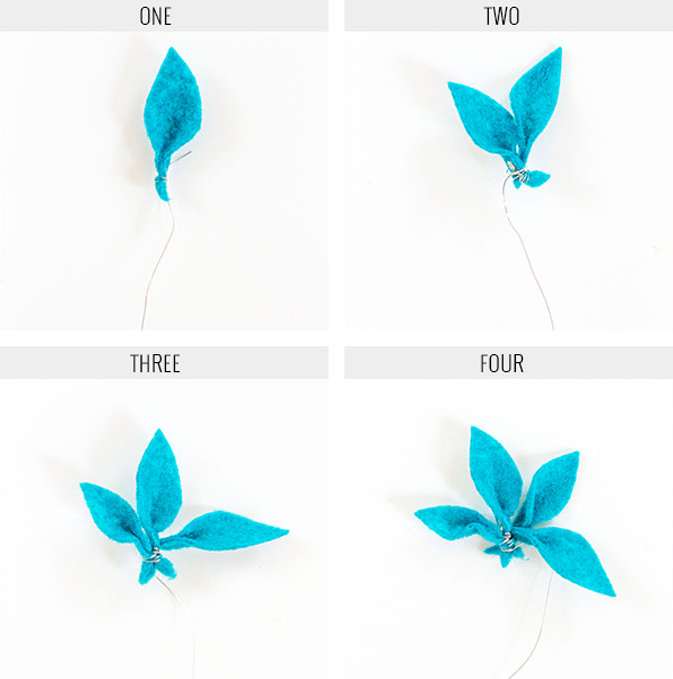
Now it’s time to create your flower shape. To do so, you’ll want to minimize off some wire about 9 inches in length and wrap 1 end securely all around the folded and glued finish of your 1st petal—maybe four or 5 turns. Then, select up the next petal, and holding it correct following to the previous petal, wrap far more wire all around the pair of petals.
Carry on the approach of including petals and wrapping a lot more wire all around until you have all 6 petals wrapped with each other with wire. Following it’s done, you can clip off any extra wire (or just hold wrapping until finally it’s all utilized up), and then pull the petals gently outward until you have the wanted flower-like shape.
To finish, cut out huge, round mustard-colored felt (about three/4 of an inch in diameter), and smaller round cream-colored felt—when glued with each other, these will turn into the center of your felt flowers. Merely glue in area appropriate in the middle of every single set of wrapped petals, and then include a dollop of glue to the center of the moss and press each flower into place. Allow every thing to dry for an hour before handling.
I can’t wait to place these in area at each and every spot setting for my “faux get together” photoshoot. Stay tuned for the complete reveal in a couple of weeks!
A fast thank-you to people of you who commented (or just sent great vibes) on final week’s post: thank you from the bottom of my heart. I didn’t get a chance to seem at them right up until this morning, so reading through them all on a day where I had much more peace of mind was certainly wonderful to see. These days’s sponsored art project seems appropriately properly-timed in context, so let’s get on with it!
I’m thrilled to share some cheerful, decidedly flawed art with you nowadays:
Has any person ever handed you something and asked you to make anything from it? I don’t forget it happening a great deal a lot more as a child, specially in artwork class or when hanging out with my grandfather, but not so considerably as an grownup. It was a single of my preferred things to do—just to see what you can generate out of a spontaneous material and nothing at all but your creativity.
I suppose that’s why, when Brother asked me to produce art for my office making use of their P-Touch PT-D200 Label Maker for April’s tiny month-to-month DIY venture, I was the two a small perplexed (from not getting done this variety of workout typically sufficient) and enthusiastic for the challenge. Soon after all, I could consider of plenty of ways to label issues with a label maker, but art? How fancy can that perhaps get?
Turns out, Brother manufactured a gold foil label maker tape. Which is right up my alley, taking into consideration that I’ve attempted gilding just about every thing else in my workplace (like the painted gold light fixture on my DIY desk or my gold leaf map art). But what to generate?
As you know from final month’s attempt at generating a watercolor border for a quote, I have been struggling to uncover words to pair with these watercolor backgrounds. What I didn’t tell you however was that my dilemma was actually that I had the right quote, but the watercolor border I’d created just didn’t come to feel right once I started printing out the phrases on my P-Touch. I still had the rather watercolor border produced, and didn’t want to toss it, so I place it aside till the phrases came to me (which still haven’t quite occurred nevertheless, but I think this weekend opened up my search a bit).
Anyway – I developed numerous possible watercolor backgrounds to use, and a pink and orange one particular appeared just appropriate for this tutorial. Phase 1 is type of apparent:
1. Generate the background
For these of you that missed last month’s rapid DIY tutorial (if you can truly call it that), the essential to receiving light colours all mottled with each other like this is to wet the paper down adequate to allow the watercolor paint to just kind of take on a lifestyle of its very own and swirl about as you move the brush. I randomly dabbed into pink, orange, purple, and even red (similar to last month’s watercolor border DIY, but much less saturated) to get the color variation I was going for.
two. Decide on Your Quote + Load the Label Maker
I started experimenting with fonts for the quote while I allow the paper dry. The P-Touch label maker has a number of to choose from, which are then given additional possibilities from there (daring, italics, outline, sizes, combinations of these, symbols, and so on). Brother also sent me several colour possibilities to decide on from (green, pink, gold and silver foil are amongst the snazziest), but eventually, I made a decision on gold. Possessing in no way employed a label maker ahead of, I located the entire cartridge loading point to be really straightforward—just pop in the batteries, pop in the cartridge color of your deciding on, and go.
3. Print
As each selection printed (attempting to conserve tape, I printed just one particular line of the quote at a time), I compared the results and produced my last variety ahead of printing out the rest of the quote. As you can see in the pic below, I tried out a handful of combinations, which includes the watercolor background I didn’t wind up in the long run selecting for this venture.
three. Apply Labels to the Background
The beauty in this piece is that the quote is exclusively about flaws (Augusten Burroughs, the author of this quote, is a fantastic author, FYI), so I didn’t want the lines of each and every part of the quote to be ideal. In truth, because the labels come with a backing on them, it was straightforward to lay out every single line and tszuj them into location to see specifically how they ought to all go down. I also debated regardless of whether to clip the added ends off of either side of the quote (you can see two variations at the bottom), but in the end wanted the further gold on the ends.
“I myself am manufactured completely of flaws, stitched with each other with good intentions.”
four. Frame & Show
Completed! I uncover that including some greenery following to artwork keeps items fascinating (and for people asking yourself, I bought these plants at Walmart on a whim for \$two, and they’re still going strong).
five. Photograph the Artwork in Your Workplace
Just kidding. I needed to, but you don’t. This artwork is only 4 steps lengthy, which implies you can easily crate it in an afternoon. (And FYI: it looks shinier in man or woman, but gold tape is relatively challenging to photograph although producing positive the phrases are still legible, but it looks less brown and has more of a gold sheen in individual).
All in all, I truly loved making this piece. It’s very straightforward (like most of the artwork I like), but the stage of these little DIY tasks each month has been to just preserve the imaginative juices flowing, and I think they’ve accomplished that (you can see January’s right here and March’s here… February was a short month and acquired lost in the shuffle, but I did have a undertaking for that month too I just require to frame it!). I located that as soon as I started out striving to consider of one thing, I created another venture. And then one more. And I stored going until finally I had a slew of new items created from my label maker (#craftnado). Brother has also asked numerous other bloggers to make a number of imaginative projects, so we’ve all been posting the items we generate on Pinterest. You can see the ones I thought have been pin-worthy (and you prolonged-term readers will spy a very required label in the bunch!) by checking out my Trends: Label It board right here:
And now, of course, a giveaway! If you’ve been right here before, you know the drill:
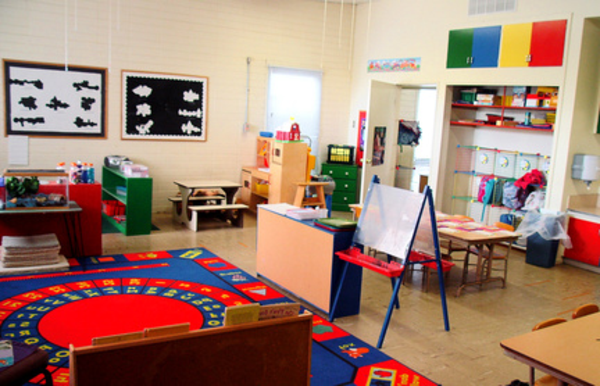
How previous is your little one? Maybe it’ currently in the kindergarten? Or not nevertheless? It is of no value, due to the fact in all situations, you will locate this publish super inspiring! Due to the fact it is present day and chic nursery Interior. We have collected a hundred incredible images of modern interiors of diverse kindergartens. If you are interested to find out what the industry today offers a range of original interior layout concepts, you appear to these gorgeous pictures. Certainly, you shock of some designs. All kindergartens, we present in the report, young children offer comfort and numerous methods to play. And what about the mothers and fathers? Mothers and fathers stay just speechless!
These days doing work quite considerably at the Office. With the improvement of technology, new occupations are produced. For example: on the internet marketing. This is a profession that would not exist with no the Net and social media channels.
 
A big amount of people spends all day on the laptop. What occurs to the body following this lengthy hours sitting, is a various matter. Today we are dealing with you to present inspiring models from the desk stool. If you are interested, consider a search at the great images. We have specially picked it out and brought together. The designs are not for sale. But they may possibly give you some inspiration!
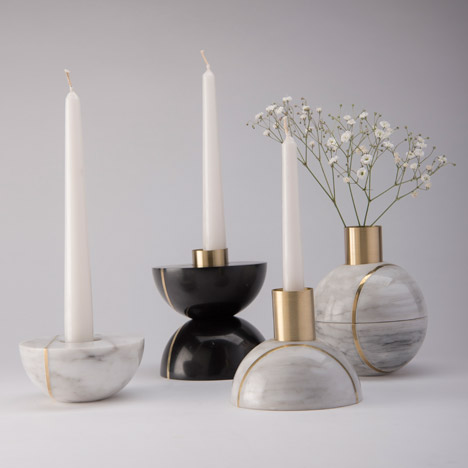
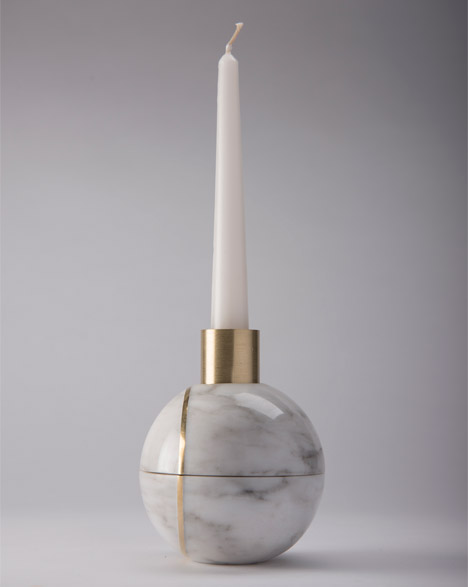
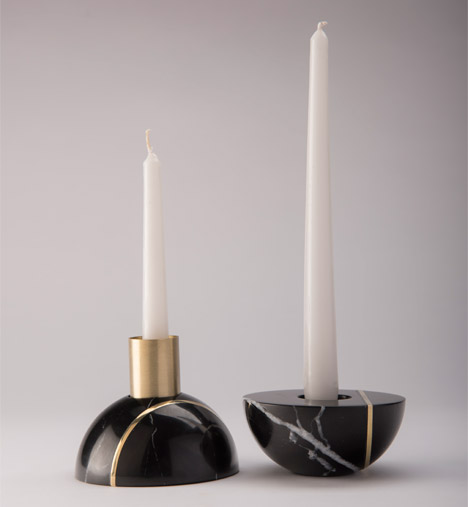
Mexican layout studio Peca has launched a collection of candle holders manufactured from marble spheres that can be split in two.
Created by Caterina Moretti and Ana Saldaña for Peca, the Hauri candle holders are hand-carved from marble into a best sphere before becoming reduce in half and re-polished.
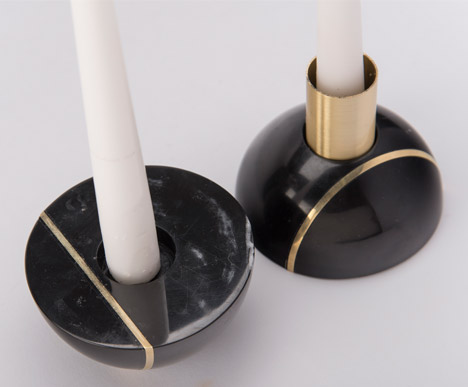
A brass band that wraps about one particular side of the sphere and also extends across the inside surface of each half is also inlaid by hand. Each and every candle holder takes virtually two days to make.
The name of the assortment comes from the language of the Huichol folks who reside in the states of Jalisco, Durango, Nayarit in Mexico.
Connected story: Ding3000’s Coasterlight holds drink mats beneath a candle
“The word Hauri indicates light supplying,” Moretti informed Dezeen. “Huichol folks use fire in ceremonies to purify themselves and to worship their gods, but they also take into account the fire they cook more than every single day an giving.”
“Our Hauri candle holder should remind us that every time we light a candle, we make an providing of respect and devotion to nature and to the unknown,” Moretti additional. “A connection that maybe we have misplaced.”
The light of the candle illuminates the veins in the marble that make every candle holder unique.
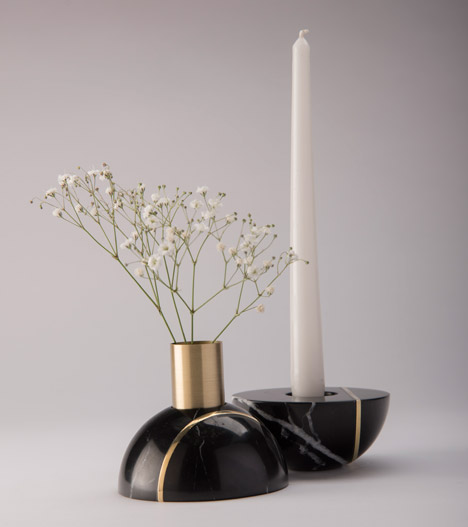
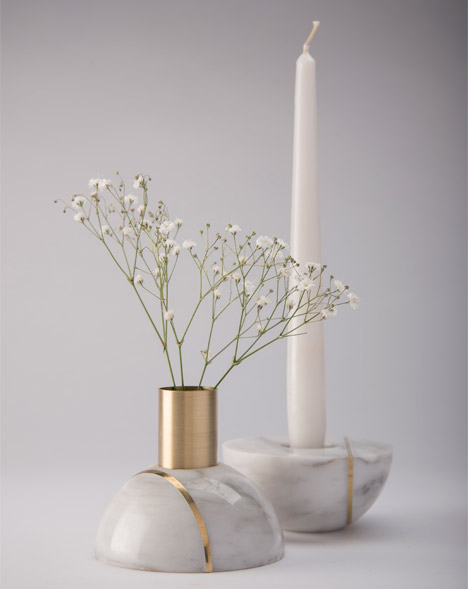
The candles are held in circular niches set into the prime of the sphere and into the flat surface of every half. Tubes of brass in different heights are used to line these indents, generating a neck that enables the objects to also be utilised as a modest vase.
Peca is an independent design and style studio based mostly in Guadalajara, Mexico. Prior tasks incorporate Lava Plates manufactured from half-polished volcanic stone.

 To finish, cut out huge, round mustard-colored felt (about three/4 of an inch in diameter), and smaller round cream-colored felt—when glued with each other, these will turn into the center of your felt flowers. Merely glue in area appropriate in the middle of every single set of wrapped petals, and then include a dollop of glue to the center of the moss and press each flower into place. Allow every thing to dry for an hour before handling.