The floating shelves in the laundry space are now a hundred% completed. And with these crossed off the checklist, I can ultimately start off utilizing them—which also means that I can lastly make the cluttered floor of “Mount Washmore” a point of the past and achieve some additional storage.

Here’s the factor with these shelves: I’ve been considering them for a although. Due to the fact despite the many tutorials I’ve looked via, I’ve never been able to discover the precise mixture of attributes I was looking for. Specifically:

Lengthy. Deep. Thin. Low-cost. Secure. I spent a while seeking, but I honestly had a hard time discovering a single that had all of these in one. My greatest problem was that most floating shelves require the frame of the shelving program to be rather thick if they’re going to be as long as I essential mine to be. And I could be alone in this, but I do. not. like. “chunky” floating shelves. For me, certain factors are meant to be chunky—like a infant’s legs and cookie dough ice cream. And some things just aren’t—like peanut butter, Leonardo DiCaprio (sorry #dadbod supporters), and my floating shelves.
I get that it’s a blend of private taste and perform. A particular thickness is to be understood for the sake of getting a long, broad shelf to be sturdy ample to final with a affordable amount of bodyweight on it (and with out bowing in the middle in excess of time). The inner construction has to bear the weight, and shelf thickness is often just a byproduct of that. Or some people just like them that way, and that’s great too. But taking into consideration that my laundry area space is genuinely, really tight (and awkwardly shaped), I simply didn’t like the thought of thick, chunky shelves taking up the view. What wasn’t so simple is figuring out how to make some thing thin assistance a lot of weight…like chicken legs on bodybuilder. So, I worked on the concept for a bit and mixed tutorial tips that I spied on Pinterest until finally I came up with anything that worked for me. And a good deal much better than the total bodybuilder issue.
So let’s get on with the tutorial, shall we? (Note: some hyperlinks incorporate affiliates.)
Lumber:
- 1x2s (frame & front shelf piece)
- 1x3s or comparable 1x scrap wood (frame)
- 1/2″ sanded plywood (for the prime of every single shelf)
- 5mm sanded plywood (for the bottom of each shelf decorative purposes only)
Resources:
- Pocket hole screws (one 1/4″)
- Wood glue
- Finishing nails (one and two one/two″)
- Wood putty
- Caulk
- Paint
- Pencil
- Painter’s tape
- Paint/stain
Tools:
- Kreg Jig
- Circular noticed or table saw
- Miter noticed
- Nail gun & air compressor or cordless nail gun
- Degree
- Stud finder
- Square
- Utility knife (mine was supplied to me by the individuals at Olfa, but I significantly Love this thing)*
- Clamps
For drilling into tile (see this post for the full tutorial):
- 5/sixteen″ ceramic/glass tile bit
- five/eight″ wall anchors (make sure you acquire the sort for the appropriate materials/thickness of your wall!)
- hammer
- spray bottle of water
- & much more
Initial factors initial
My shelves have been surrounded on 3 sides by walls the whole tutorial is pretty a lot contingent on that fact alone, so if you are attempting to secure these on a wall that isn’t at least surrounded on two sides with studs or a area to put anchors, you could have assistance problems.

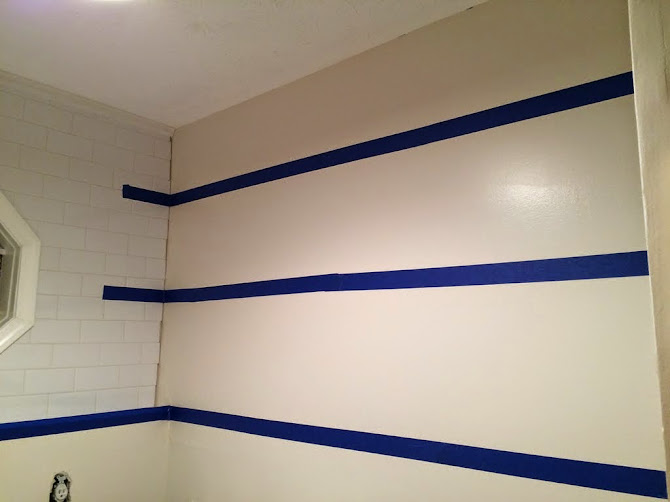
To get started, mark the spot for your shelves along the wall. Utilizing painter’s tape will aid you visualize each shelf for placement and spacing. Get rid of the tape, then use a level to mark a pencil line along the whole wall to use as your degree edge for including the support (basically, you’re going to match the straight edge of the prime of your assistance with this line).
Shelf measurements
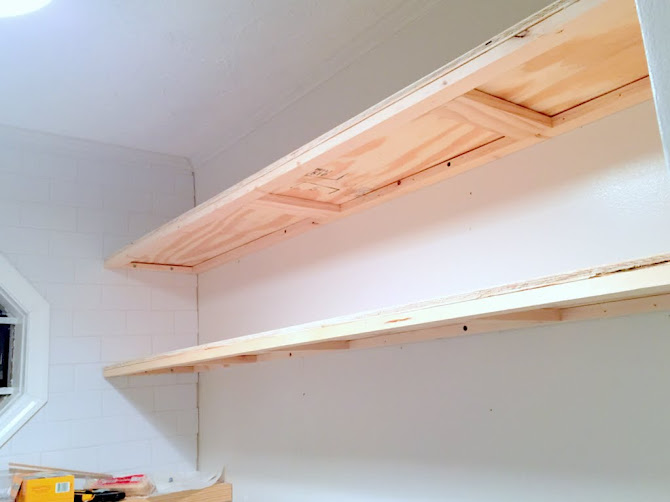
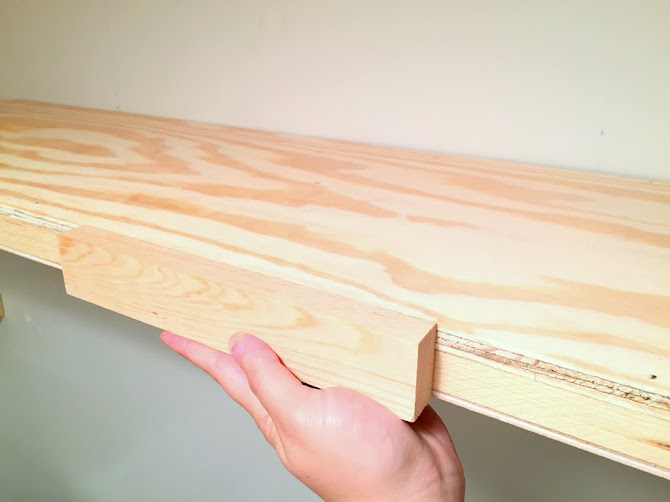
Each and every of my shelves (on the appropriate side of the image over) have been around 69 inches lengthy and 12 inches deep (I know, it sounds like the setup for a joke, but it’s correct). The best part even though is that the thickness of each shelf is only 1.5″, and nonetheless super sturdy!!!
By employing a 1ࡨ on its thin side, I was in a position to maintain the shelf thin but nevertheless supply a supporting framework. It’s also the reason why I produced a full 4-sided frame rather than just putting in the cleats and middle supports through the shelf other floating shelf tutorials do not include the 4th piece in the front, which helps make sense to me, but I located that it genuinely came in helpful for retaining the middle pieces safe, degree, and in the long run supporting the plywood on top.
1. Create the frame
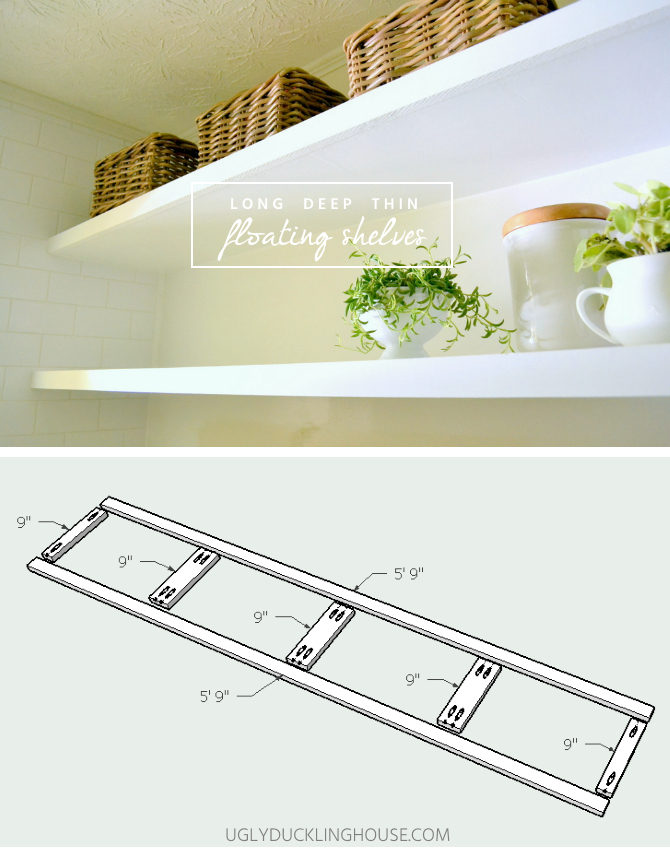
The frame is fairly simple to make I utilised 1x2s for the sides of every shelf, reduce to length for the back and front pieces (so 69″ or 5𔄃″ long) and width for the sides, minus the width of the front and back pieces (I wanted 12″ broad shelves, but the actual width of 1x2s are 1 1/2″ broad, so that meant only 9″ for the side pieces). I experimented a little with the inner pieces of every shelf even though, very first attempting 1x2s on the lower shelf and some scrap pieces of 1x3s on the leading shelf (so you’ll see some distinctions in every shelf’s construction in my pictures). I located the 1x3s to provide a much sturdier frame when making use of in blend with the Kreg Jig, so I’m recommending that you use this framework as well. I’m even now really considerably a beginner with Google Sketchup (getting carried out only one other post ages ago with it), so hopefully this helps make sense!

And just due to the fact I’m new to SketchUp, I believed I’d give you a color-coded edition as well. Blue and white are 1x2s (9″ and 69″ extended, respectively) and the green is 1ࡩ (9″ prolonged).

The holes for all of the Kreg’d pieces were completed before installing on the wall, but I wound up taking the side cleats off for the subsequent handful of methods before putting it back with each other (I nonetheless suggest carrying out this given that it tends to make screwing factors back with each other significantly easier).
About the side cleats
For newcomers, you might not be acquainted with the phrase “cleats” – but these are usually the pieces that screw into the wall and support help/distribute the fat. I’m also a DIYer who utilizes no matter what hassle-free term that pops into my thoughts, so cleats, frame, supports, and so on. all share a comparable which means for me in this project. Primarily, what I’m doing right here is turning these cleats into much more of a frame so that there are other parts that also help support excess weight, but it all relies on how securely these very first couple of pieces are put in. You’ll want to make certain these are great and secure by both screwing them into studs or using wall anchors on all 3 sides that attach to the walls. I first began by putting in these pieces on each and every side—the tile wall 1st (given that it would be the least forgiving), and then the opposite wall using wall anchors. Be positive to leave a gap along the back wall for the back piece of the frame to fit in snugly (1 1/2″).
Tip from Quite Helpful Girl: Use Cobra Triple-Grip anchors for a solid hold.
2. Installing support through a tile wall
This needed a tutorial of its very own, so you can uncover that here.

three. Add the middle supports to the back cleat
With the longer pieces of each shelf minimize to 69″ every single, I utilised some remaining scrap 1x2s and 1x3s to fill in the middle part of the first shelf. I drilled pocket holes employing my Kreg Jig and one 1/four″ screws (determined primarily based on the thickness of the wood, which is 3/four″). Use wood glue also (but only after you’re confident of how factors will be put in I had some trial and error figuring out each and every stage, so I’m glad I waited to use wood glue!). As I mentioned over, I identified after putting in the very first shelf that I liked the 1x3s for middle assistance much better, so I advocate employing them as you can see in the diagrams above.
Tip: Encounter clamps are your best pal if you have a Kreg Jig, I extremely recommend utilizing their encounter clamp for tasks!
I wound up not getting sufficient scrap oneࡩ laying about for both shelves, but I located that even with only two supports in the middle (I eyeballed the spacing), it was nevertheless very solid.
4. Add the frame to the wall
With the side cleats installed (remember to depart a gap to fit the back piece), screw in the back cleat and rest of the frame to studs in the wall. The front piece can either be screwed into the middle supports presently or put on last I wound up making an attempt each approaches and didn’t find that there was a significant distinction (either way, the complete factor was still relatively cumbersome to install by myself because of the length).

Tip: A brad nailer is a great substitute for a helping hand it allows you to temporarily tack up the shelf support and get factors degree before screwing every little thing into the studs.
five. Include plywood
With the frame in location, you can then include plywood. Given that I don’t have a table noticed in my garage appropriate now, I had my neighborhood Blue minimize down a piece of one/two″ sanded plywood and 5mm sanded plywood to twelve″ lengths for me. The rest of the cuts I did at property using my circular saw and a piece of scrap wood clamped to the plywood to use as a guidebook.

Tip: Use painter’s tape to assist hold a clean edge when cutting plywood.

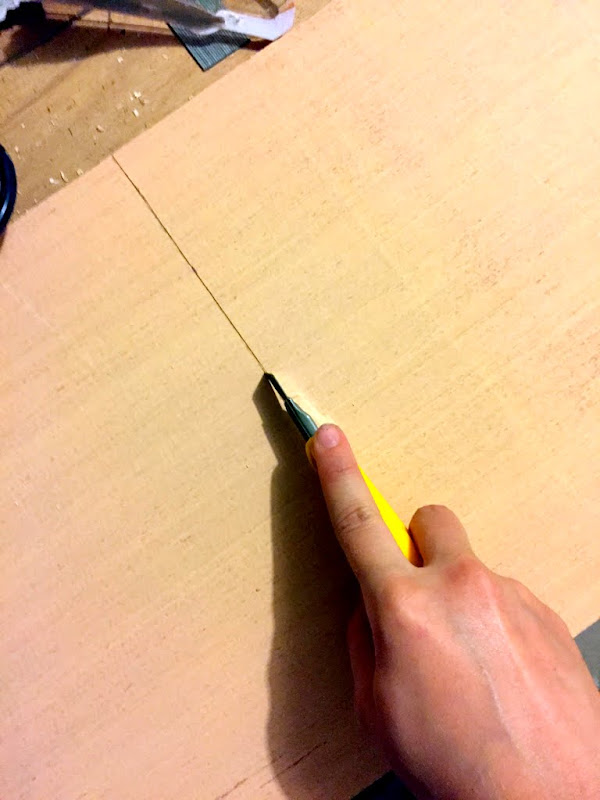
For the underside piece of plywood (the thin 5mm things), I was capable to lower it down with a utility knife really easily (sidenote: Olfa** sent me many of their utility knives to consider out this summertime, and I’ve located that I favor this utility knife to the rest. It’s my new go-to tool—great for little molding projects, and I’ve identified that it’s been the major cause why there are no a lot more cardboard boxes in this home any longer*).
I attached the leading piece of plywood with wood glue and my brad nailer. The bottom piece necessary some clamping prior to it stayed up, so I employed a number of brad nails strategically to hold factors in location towards the back and clamped the front whilst the glue dried.
6. Attach the front piece
When all pieces are attached, they wound up being just shy of one 1/two″ thick, so I was ready to use an additional 1ࡨ for the front to hide the plywood edges.
7. Finish and decorate!
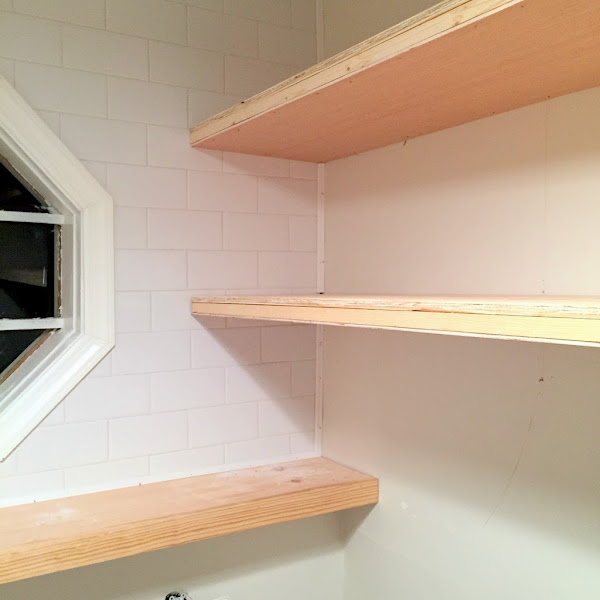
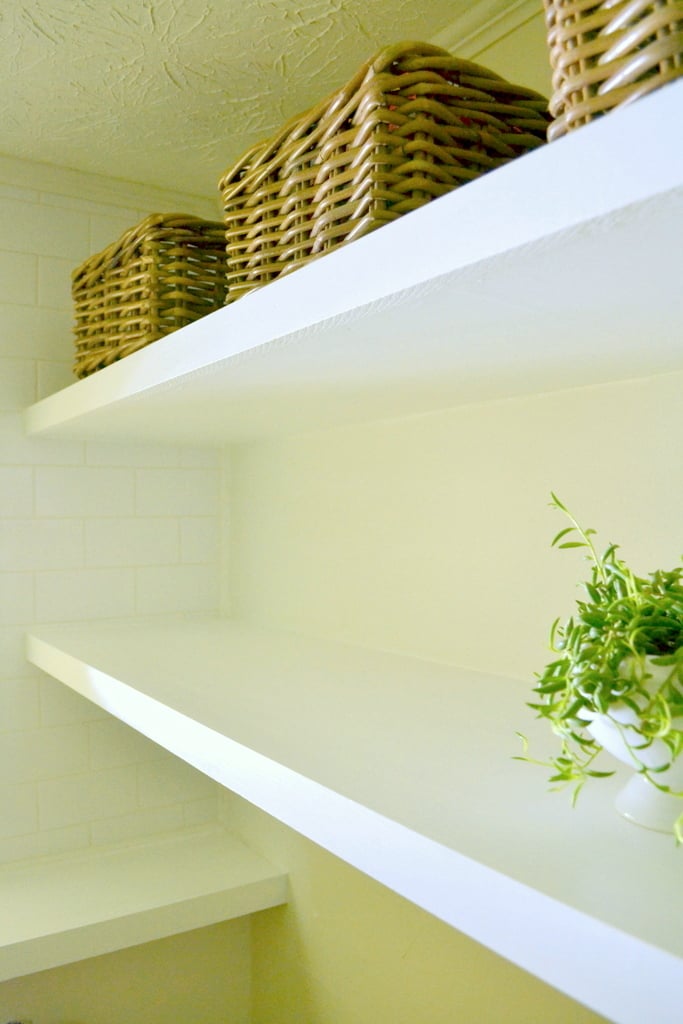
After all of the finishing methods (filling holes with wood filler, sanding, caulking, priming, painting, etc.), here’s how items appear now:
You can also see two other updates in these photos: a single, I extra the rest of the trim about the tile to full the back wall also (which looks a Great deal far better than prior to!) and two, I have begun RE-painting the walls. That makes this the third colour I’ve put on them considering that moving in, and worth a significant eyeroll for taking so many tries to find what works, but I’ve identified for a while that the color I’ve been employing in the rest of the home merely wasn’t working with the lighting in this area. I experimented with to hold out as long as possible to see if I could dwell with it. But when I began painting the shelves, I figured now was the time to see if a leftover gallon of white paint I had from my workplace would fit—and it did! I’m now convinced that my search for the appropriate colour in this space is in excess of. I’ll have a lot more on that when it’s all completed.
And for individuals questioning, the baskets I’ve additional to the room are from Ikea and are Very old, but they appear to perform well in here. The white container on the proper is an previous kitchen container from Goodwill that I snagged last weeked (perhaps a cookie jar?). It now holds my unsightly detergent pods, which are wonderful to have hidden.
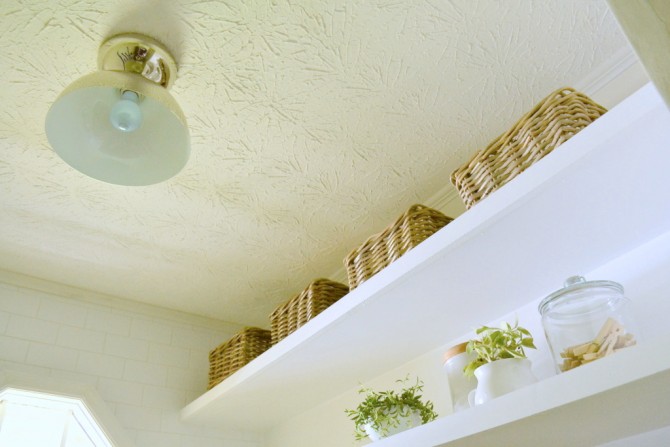
Seems to be like I could need to have to paint the ceiling, as well.
So, that’s it for now. I even now have to do some trim operate, paint items, and have a decorative project in the works for this area, which I’m hoping to finish up later on this evening. I’m loving the way it’s turning out, so it may be the right project to function on although the forecast is predicting rain for the week. Much more on that soon, and you can catch sneak peeks on Instagram if interested.
———————————————
*I have honestly been addicted to cutting up cardboard boxes lately due to the fact this knife cuts so nicely. Is that weird? That’s weird, I bet. But it’s also strangely satisfying, and my backyard bed needed a lot of cardboard to help destroy off the grass prior to laying down mulch, so this odd small obsession worked out great (it’s still mostly just the pure enjoyable of cutting through each and every box like a tiny samurai sword, though).
**Full disclosure: As I mentioned over, Olfa sent me a bundle of products to consider out and asked me to share these thoughts on the weblog as soon as I’d attempted them. But, as always, all thoughts and opinions expressed on this site are 100% my own, and I never ever share some thing unless I truly do like it.
The post How to Develop Prolonged, Deep, & Thin Floating Shelves


