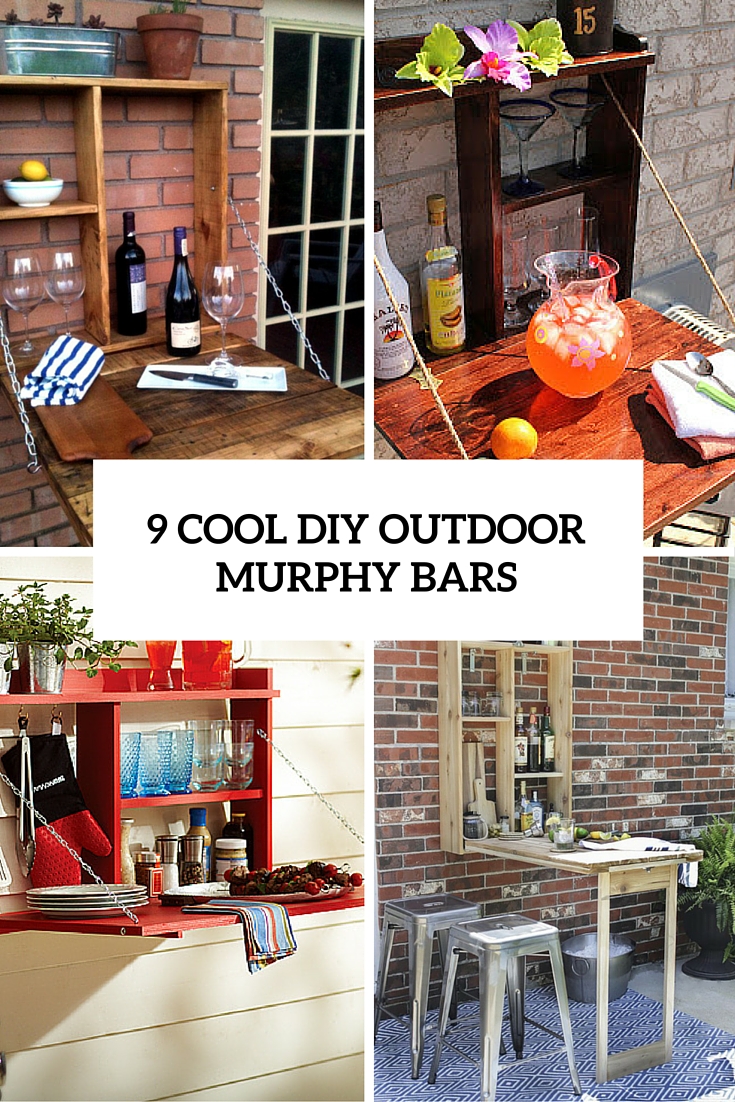

A Murphy bar is a fold down construction that can be adjusted to the wall or pulled to use. This is a ideal answer for any tiny space and in situation you just really don’t want this bar to be an eyesore. When it is folded, you can location some pots on it, and then not, you can serve all types of meals and drinks that you want and shock your visitors. I consider it is a ideal and fresh idea for outdoor parties, you needn’t seem the place to area a bar. So, how can you make a single? Let’s have a look.
Very first of all, choose what kind of wood you’d like to use. You can recycle some pallets or if you want some new wood, pick cedar because is ideal for outdoor furnishings because it is naturally rot- and bug-resistant, and it is a powerful wood that will not warp or sag more than time. If left unstained, it ages to a weathered gray finish.
If you’ve chosen pallets, disassemble them: turn pallet over and reduce bottom slats with a jigsaw close to the sides. This will make removing it from the center board much less complicated. Then, you can take away the prime slats from the back side with a hammer. Remove all nails and discard.
Determine on the size of the box because a Murphy bar is truly a box with two parts, 1 of which is attached to one more. The wood need to be reduce with a power noticed, very carefully measuring and cutting each piece to match. Assemble the sides, top and bottom pieces to make the frame. Ensure they are accurately place with each other using a degree or T-square. Meticulously apply wood glue on the two sides of the place the pieces will meet before joining. Then, fasten collectively with wood screws, producing positive to swiftly get off any extra wood glue that is visible.
Following, location the back top, middle, and shelf pieces, generating positive all are flush and square. Set up and fasten them to the frame. Center and then attach steady hinge onto the front plywood piece with the screws supplied from the hinge. Make confident the other side of the hinge is fastened to the bottom portion of the bottom piece of the bar. Check the hinge to make positive the front piece closes and opens effectively.
Up coming, attach eyehooks and S-hooks a number of inches from the inside edge of the front piece and on the within sides of the bar frame. Set up your chain onto the S-hook, generating confident it is safe. Having extra chain at this stage is fine, as you can reduce and change the length if it is also prolonged. At this stage, test all parts to make sure the front piece functions efficiently.
Inspect where you’ll be placing the two square dowel rod bottom stops, making certain they will stop at 90 degrees when the front piece is folded down. Before fastening them to the front, make positive they will be positioned a few inches from the edges of the front piece. These bottom stops are crucial they will aid the front piece support weight from no matter what is being placed on it when it is opened for use. Then inspect all locations of the bar, sand down rough areas and be confident to fill any screw holes or gaps with wood filler. Any remaining wood glue can be sanded, leaving you with a smooth specialist-like finish.
Apply paint or stain of your selection to all wood surfaces. You may possibly decide on to get off the metal hinges and eyebolts at this step, or mask off to make certain the metal pieces are unaffected. Make positive whichever stain or paint you decide to use is exterior grade and has a resilient finish when it is dry. Most stains will want a prime clear coat of exterior polyurethane or comparable clear coat. If you select to paint the wood surfaces, a primer is recommended to ensure a specialist and even-hunting finish for the ultimate best coat.
Right after your paint or stain is dry, apply the leading latch and back mounting clips to make sure the buffet is safe and will remain in location. The kind of screw or mounting program you will want depends on the wall surface in which you are placing the bar. Usually refer to the mounting technique instructions to figure out if it will work.
Mount the assembled and finished bar cabinet, checking it with a degree soon after installation to make positive that it will be totally functional and risk-free. Voila, now you have a fantastic piece to surprise all your visitors and just to refresh in the summer heat!

DIY cedar Murphy bar (through ehow)

DIY bar or buffet fold down cabinet (by means of site)

DIY foldable pallet outside bar (by means of 99pallets)

DIY colorful Murphy bar (via brit)

DIY pallet Murphy bar (via hgtv)


