

Happy Christmas Eve! To celebrate the momentous occasion that December 24th always is, I’m popping in to speedily share our new DIY seasonal wreath. Inspired by the wreaths of Colonial Williamsburg, this piece is some thing that we plan to leave up all winter lengthy. Rosy berries, mustard colored blooms, white and ivory touches and sweet eucalyptus, when all tucked into a grapevine wreath, make for the excellent customized front door statement.
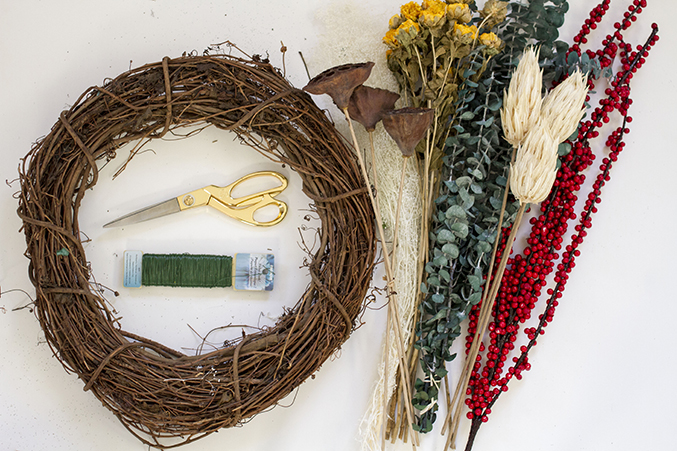

To make, first gather your supplies from the craft shop. This wreath isn’t specifically the most spending budget-friendly up front (I believe that I spent about \$50), but because all of the supplies are dry or silk, it will last year soon after year producing it a worthy investment.
In terms of specifics, I’m no florist and can’t specifically get in touch with out every little thing that I bought by name—that said, I also didn’t go to the shop with specifics in mind. I went just with an notion and an inspiration and picked and chose blooms and accents that matched my intended colour scheme. You can, also!

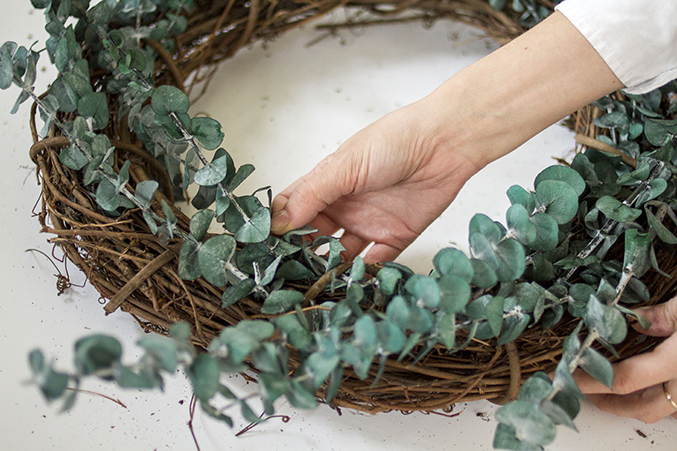
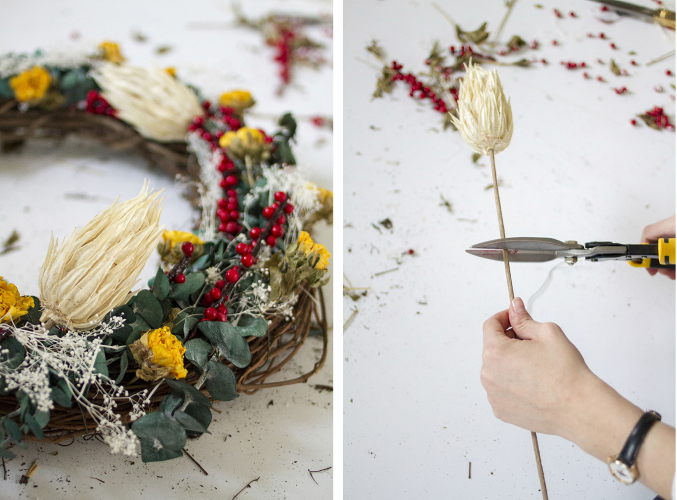
Aside from blooms even though, you’ll want a grapevine wreath kind, scissors, wire cutters and green floral wire. Then, when you have every little thing home, begin by added your foundation layer—I chose to use the eucalyptus 1st. For your own wreath, use scissors to trim off branches of the eucalyptus and then lay them on best of your grapevine wreath.
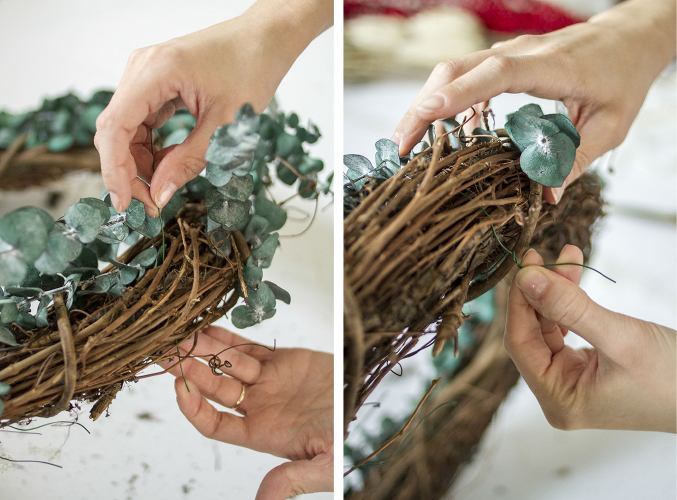
As soon as you have your pattern set, tuck the ends of every single branch into the wreath type, between the grapevines, and then cut off little lengths of wire—enough to go about the wreath form, plus an further 2-three inches for twisting. Wrap the wire around both the eucalyptus branch and the grapevine and then twist the ends of the wire collectively around back to hold it in spot. If your wreath type makes it possible for, you could attempt sticking the wire through the vines to hide it from view totally.


Repeat the steps with all of your supplies until you’ve achieved the appear and layered effect that you’re following. If some of your branches or dried supplies really feel a bit as well fluffy or heavy, you can often use your scissors or sheers to cut off particular sections or trim them down to suit. Happily, there really is no “wrong” way to go about this project. It’s all about playing with the wreath until it feels correct to you.

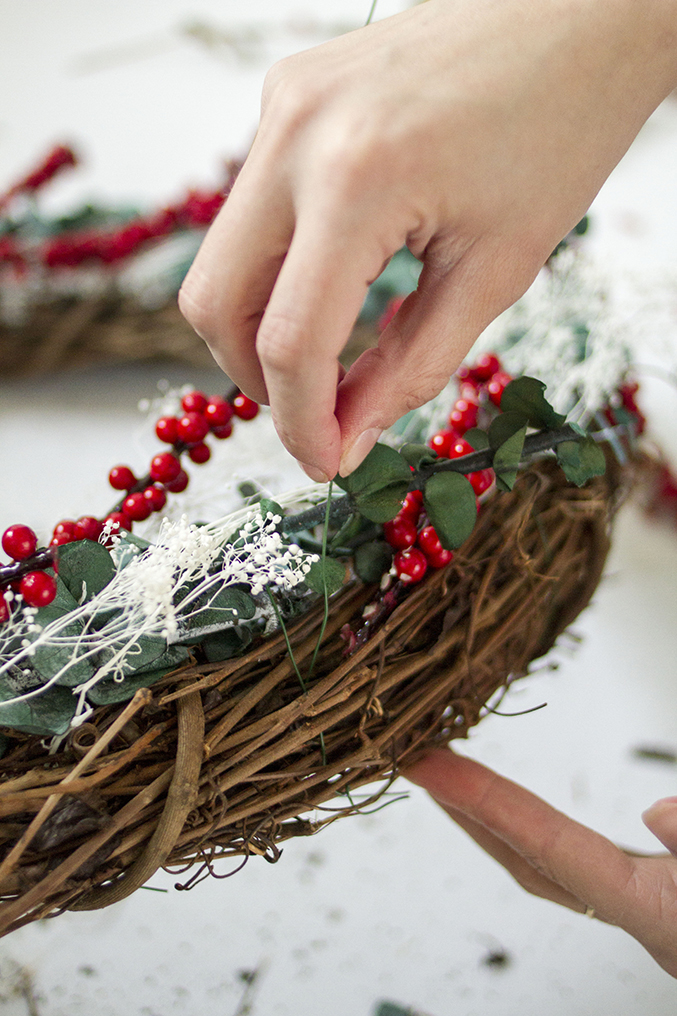


When you get to the bigger accents, things like oversized blooms, pinecones, dried seed pods, and so forth.—trim the stems and then wiggle them down in between the grapevines. If your accent doesn’t have a stem, use floral wire to attach it to the type. You can either try dispersing these bigger pieces evenly over the surface of your grapevine or, for a slightly distinct look, try clustering them in 1 corner of the wreath.


When you’re completed, you’ll be left with a seasonal accent that acts as a accurate testament to your creativity—and to the brand new year to come. Plan on trying this project at residence? Don’t overlook to share by tagging your images with #dgdiy! Have a happy Christmas Eve.


")


