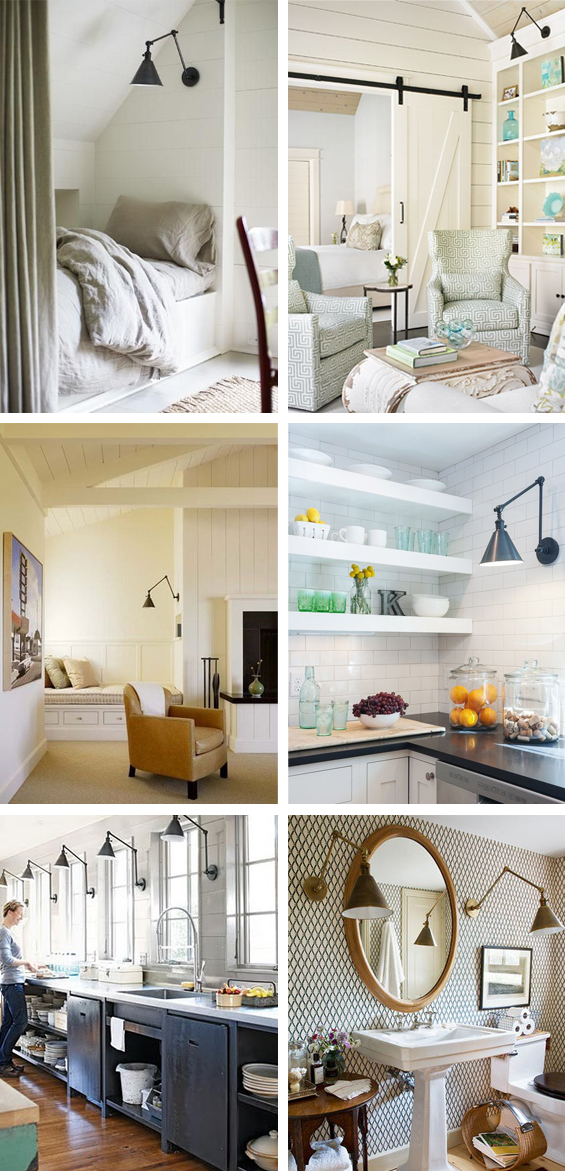
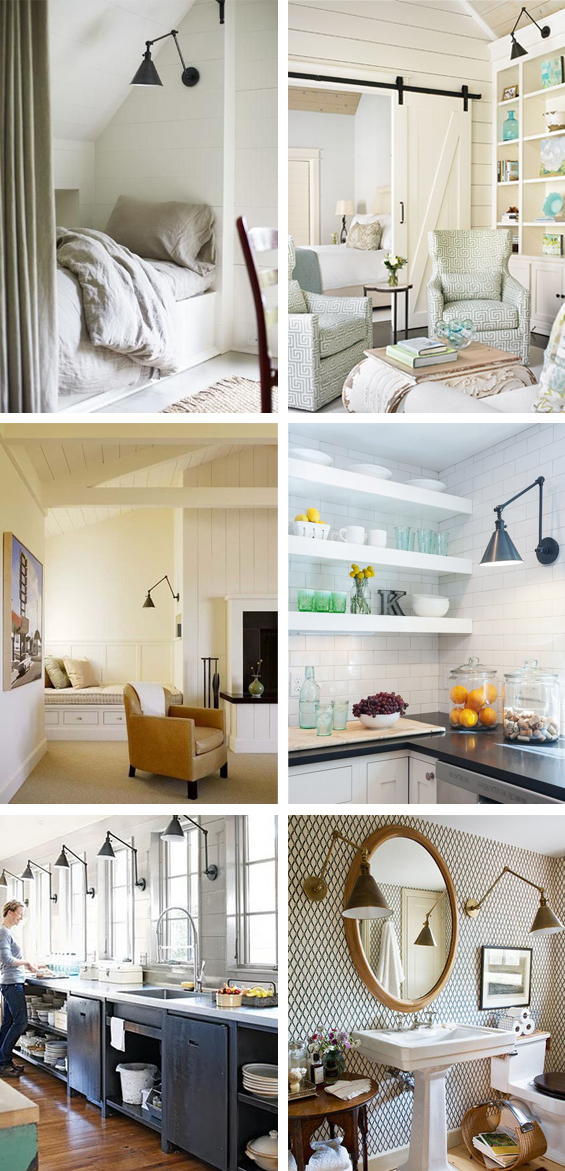
I’ve coveted adjustable arm wall lights from the first moment I saw one.
1 | 2 | 3 | 4 | 5 | 6
To me there’s just something so desirable about their sculptural form and subtle industrial edge. That said, I never really envisioned actually using one in my own home.
You see, despite the oft crazy price tag (and down-right unavailability – especially here in Australia, anyways) I’m just a bit too fickle to commit to the permanence of hard-wired wall lights – I simply like the flexibility of everything in a space being easily repositioned (I guess that’s the reason I’m also a fan of free-standing ‘built-ins’, like the one in our home office). I know, I know, it’s not too difficult to reposition sconce lights if required, though with the cost and work involved with installation, I’d simply rather not go to the trouble. Yep, I’m stingy and lazy like that.
So, when it came time to implement my lighting plan for Charlotte’s room I needed to think a bit outside the box.
Remember my inspiration rendering from ages ago…
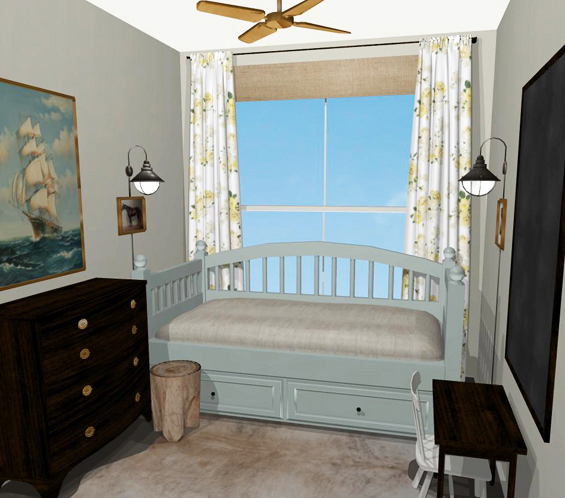
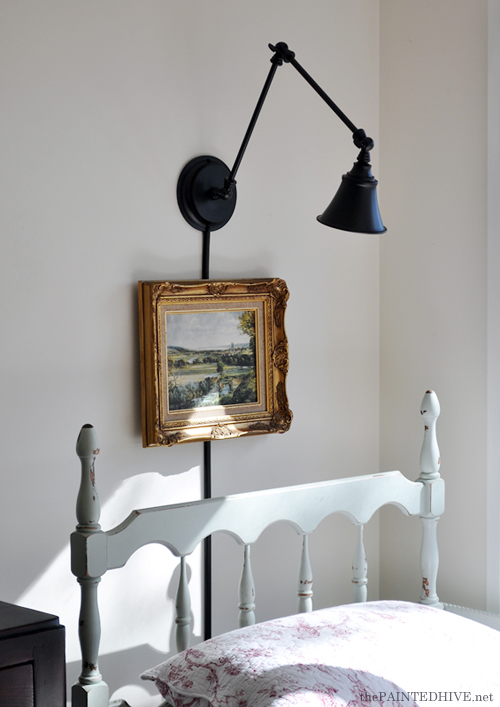
Given the tininess of Charlotte’s room and the position of her bed, I really liked the idea of using sconces in place of a table lamp. My initial plan was to use two. I do still like the symmetry of this though for now have decided to opt for one over the bed head only. As already mentioned however I didn’t want to have to hard-wire it in.
So, I decided there were three main options…
1 Use a plug-in wall lamp.
Simple, right? Well, not exactly. I discovered that aside from the IKEA options there are almost NO plug-in wall lamps available here in Australia and certainly none of the adjustable arm variety. Trust me. I looked, and looked and looked, and annoyed people with seemingly perplexing emails and phone calls, and looked and looked, and looked some more. There was the option of having one shipped from overseas though with the cost of postage plonked on top of the cost of the actual lamp it wasn’t gonna be cheap, not to mention the hassle of incompatible electrics.
2 Convert a hard-wired wall light into a plug-in option.
Definitely do-able (or so my husband tells me) though I was kinda set on using an adjustable arm wall light and the minimum cost for one of those is around \$250!
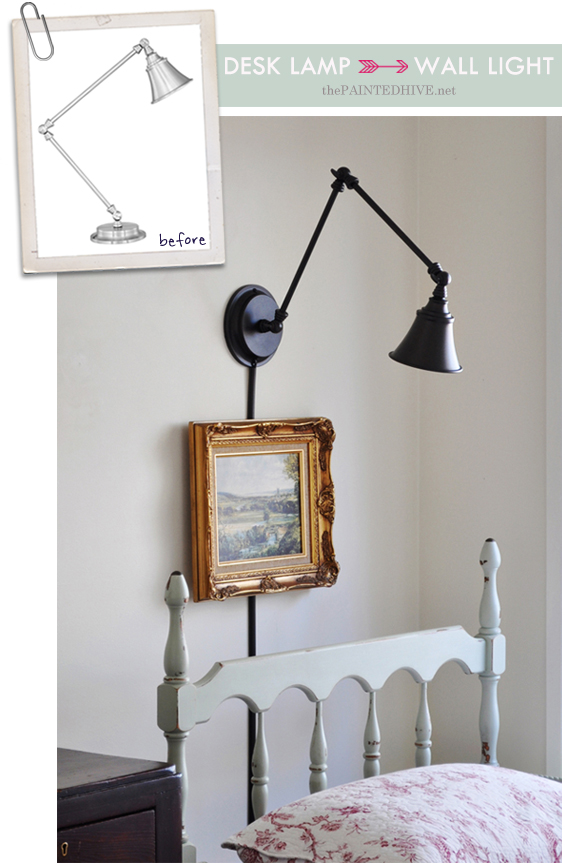
3 Get my décor crazy on and stick a desk lamp to the wall.
Sure, why not, hey?
If you follow me on Facebook you might remember a post (from about a year ago now) where I shared some adjustable arm desk lamps which, at the time, were on sale from Wayfair for just \$35 each (it seems they are no longer available through Wayfair though you can buy them from other retailers – here, here, here. You can, of course, also find similar ones).
I know desk lamps like this aren’t anything new though for some reason I immediately associated these particular ones with the swing arm wall lights I’d been crushing on. Sure enough, my head was soon tilted at a right angle (looking at the lamp pic on my screen) and my noggin cogs were turning! Before committing to buy however, rather than trust my imagination alone, I had a bit of a play around with the product pic in Photoshop, manipulating the lamp into something that might actually work on a wall.
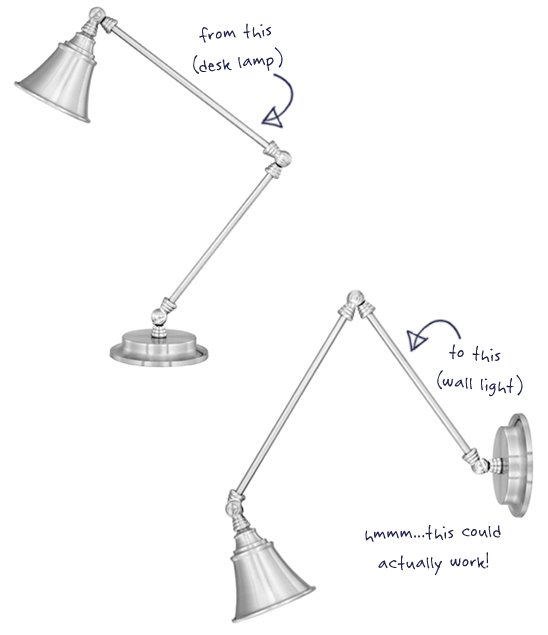
You see, although I was planning on simply sticking a desk lamp to the wall, I didn’t really want it to look like I’d just stuck a desk lamp to the wall. I wanted it to look as legit as possible. Luckily, my rough Photoshop renderings convinced me it could work (in fact, I thought it looked just like the real ones!) so I went ahead and made the purchase.
Once the lamp arrived, I played around with the arms in person. I noticed that the beehive style “hinges” restricted the amount of angle I could achieve because they hit each other. Fortunately, this didn’t effect my desired configuration. I also felt the leading arm was a little too long though figured this was just me being overly fussy.
Anyhoo, here’s how the whole (easy and affordable) project went down…
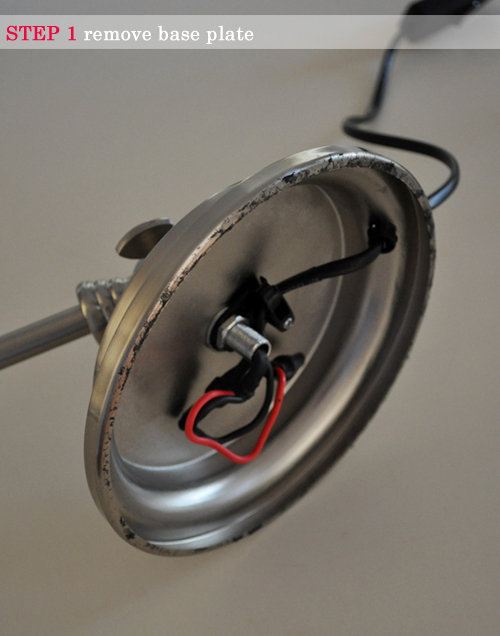
STEP 1 Remove base plate.
Adjustable arm desk lamps come with pretty hefty bases to balance the weight of the angled arms though for my purpose it was just making the whole lamp way too heavy. To remove the base plate, it was simply a matter of pulling off the glued-on cover, undoing a few bolts and nuts then releasing the heavy resin disk.
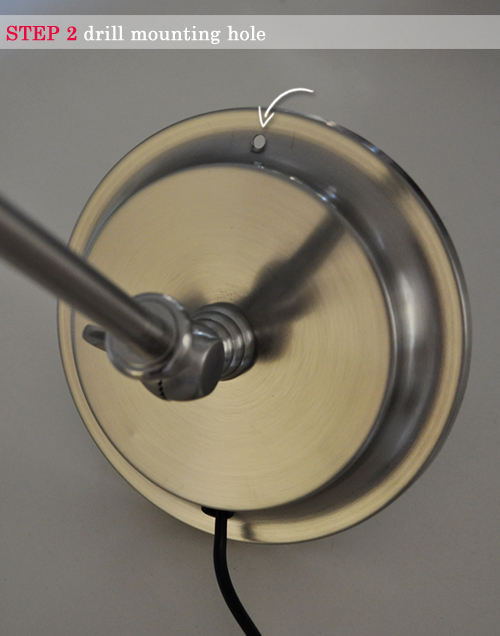
STEP 2 Drill mounting hole.
With the base plate gone the lamp was surprisingly light (like, lighter than a picture frame light) though I still needed to come up with an effective means of attaching it to the wall. After brain-storming a few different ideas I concluded that one long central screw was the simplest and safest method. Sure, this meant there would be a visible screw head though with the slight industrial style of the lamp I decided this wouldn’t bother me. To accommodate the screw I drilled a neat hole in the top of the base opposite the cord. For obvious reasons I did this prior to painting.
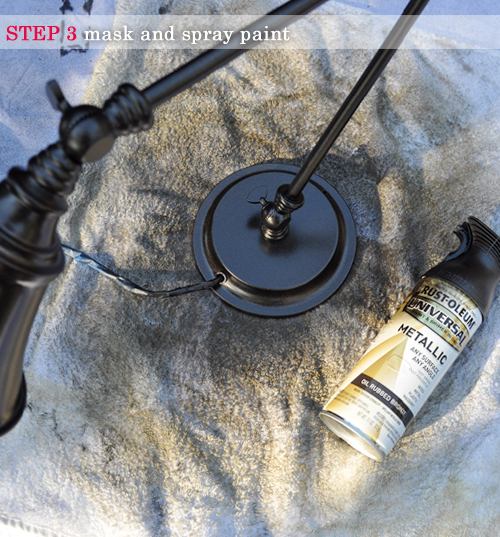
STEP 3 Mask and spray paint.
Ideally, I would have loved an antique brass lamp though they just weren’t available in my stingy price-frame. I contemplated creating a brass finish myself, though decided instead to go with something very neutral and chose Rust-Oleum Oil Rubbed Bronze. I simply taped-off the bulb socket and cord (in hind-sight I didn’t need to tape the cord though) then gave the lamp around three light coats, adjusting the arms as needed to achieve all-over coverage. I thought about doing the whole ‘colour pop’ thing on the inside of the shade (which I do love) though decided to keep things simple. Maybe I’ll hand paint it a sunny yellow or something in the future, maybe.
Of course, the original brushed chrome finish was totally fine, just not in-keeping with the scheme for Charlotte’s room.
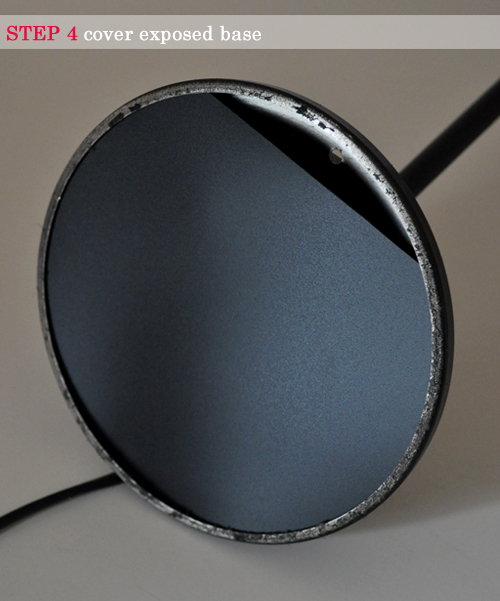
STEP 4 Cover exposed base.
Just to keep things neat and conceal the wires I cut a disk from the front of an old display folder (you know, those flexible plastic ones) and inserted it behind the rim. I also made sure to cut a slot for the impending screw.
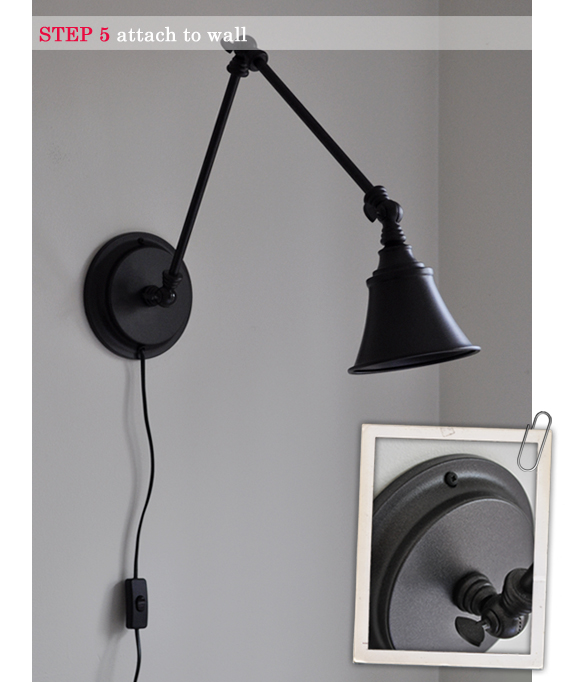
STEP 5 Attach to wall.
As mentioned in Step 2, I decided that once long central screw was the best way to mount the lamp. I was lucky to have an appropriately located wall stud so my lamp is actually anchored in solid timber though given the lightness of the lamp I think a heavy duty plaster plug would also do the trick. To ensure my screw head nestled neatly into the lamp groove, I drilled into the wall on a slight downward angle and used a dome-head screw. My screw was originally black so already matched my lamp though of course you can paint the head any colour to co-ordinate.
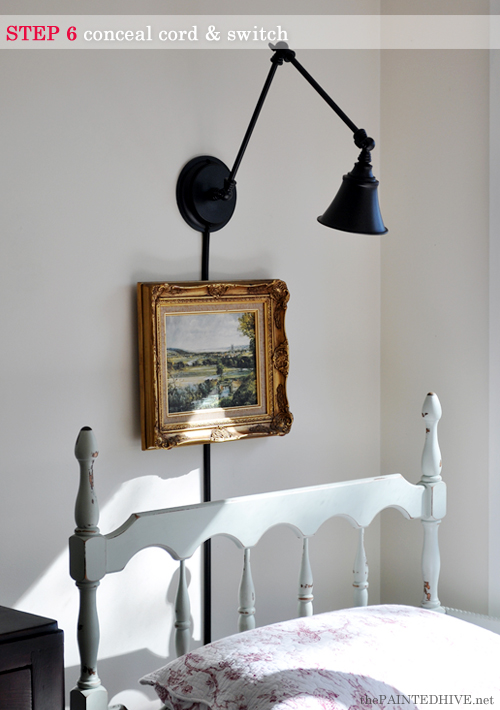
STEP 6 Conceal cord and switch.
I knew from the beginning that the visible cord and switch were going to bug me. That said, I think that in the right space the casual nature of the exposed cord can work. I just wanted something a little more ‘finished’. If it doesn’t bother you then you just saved yourself an extra process!
I decided to hide the cord in a narrow concealer made to appear like part of the light itself. I actually quite like this look. I found an adhesive cord cover (D-Line Micro – \$10 from Bunnings), cut it into two portions (one for above the switch, and one for below) then spray painted it to match the lamp. Of course, you could instead choose to paint the cord cover to blend in with the wall, though I think this is a look better suited to dark coloured walls. I wanted the cord cover to abut the light so it looked like part of it. This created a slight lean away from the wall where it meets the lamp due to the cord needing some clearance space. Thankfully this is only discernible upon super close inspection and the dark colour of the lamp, cord and cover really does help disguise everything.
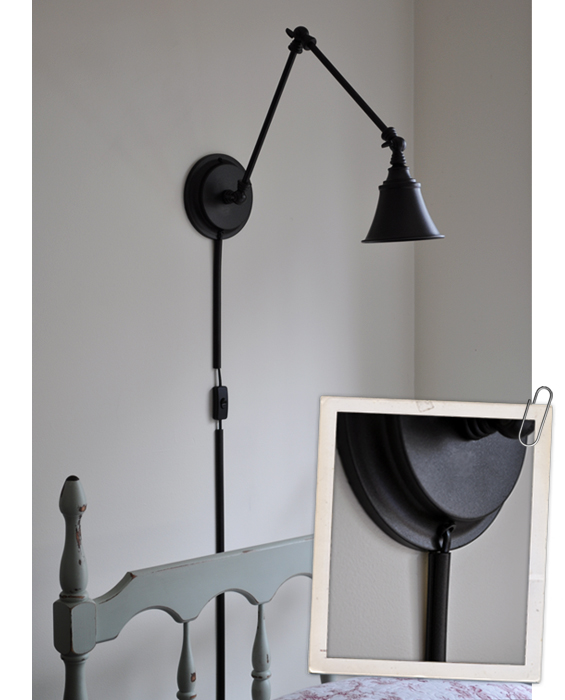
To deal with the exposed switch I decided to hang a pretty picture over it.
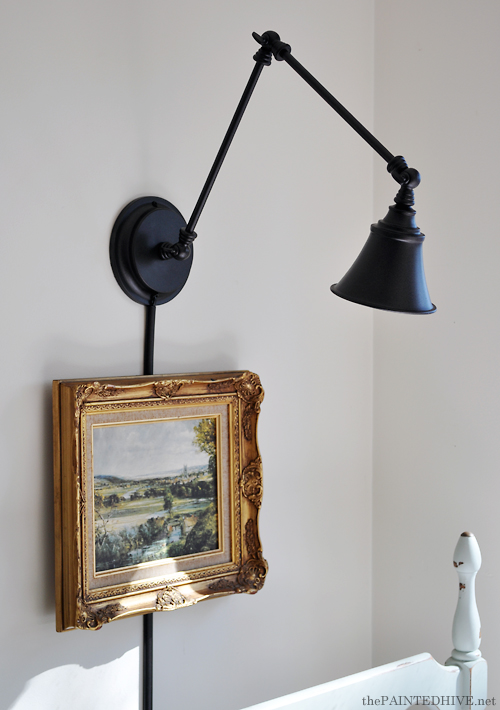
I know, I know, you’re probably thinking how ridiculously impractical that sounds – “A picture over the switch, how the heck do you actually use the dang thing then? Duh”. I thought this too which is why I installed a remote power switch (click the link if you’re not sure what a remote power switch is – sorry, I couldn’t find a link to my actual brand). I love this thing. Essentially, the lamp is always ‘on’ though power to it is controlled via remote. The remote is simply attached to the side of Charlotte’s chest of drawers with a 3M Picture Hanging Strip so it’s nicely hidden, completely removable and super accessible.
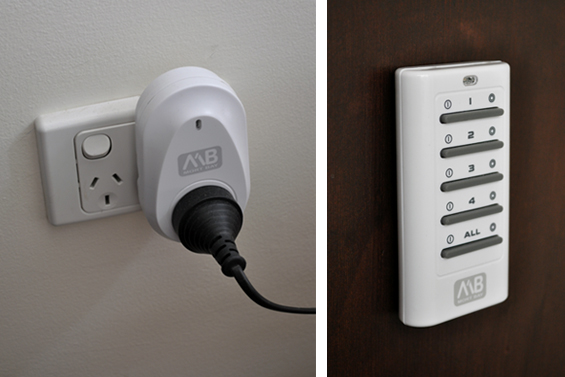
The remote is capable of operating multiple power points which is why it has so many buttons. Of course, we only need to press the top (“1″) button to operate our lamp and Charlotte has this down to a fine art.
I thought about using some kind of hinge system to hang the picture though decided that was overly complicated (and extra difficult given the fact the switch means the picture can’t sit flush on the wall). Instead I simply opted for basic picture string and two long nails hammered in on a steep downward angle. It’s easy to lever the picture without the string slipping off the nails so the switch can be accessed (if needed).
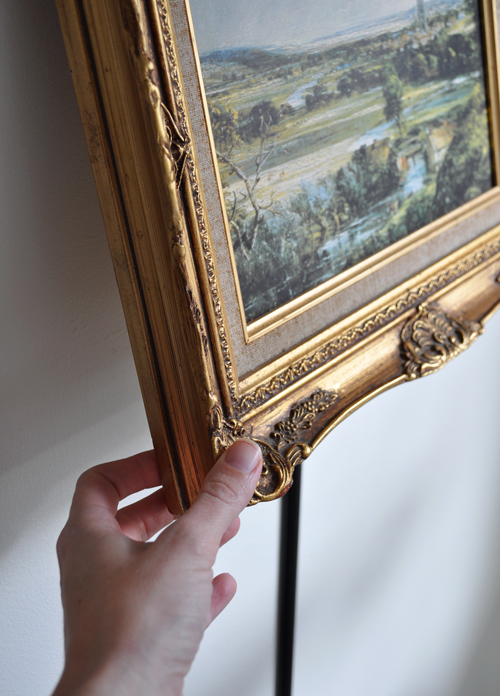
The length of the nails, which sit just proud of the switch plate, also mean that although the picture doesn’t sit flush against the wall it does rest neatly parallel to it. An unintended bonus is how having a piece of art below the sconce gives it the impression of being a picture light, which I like.
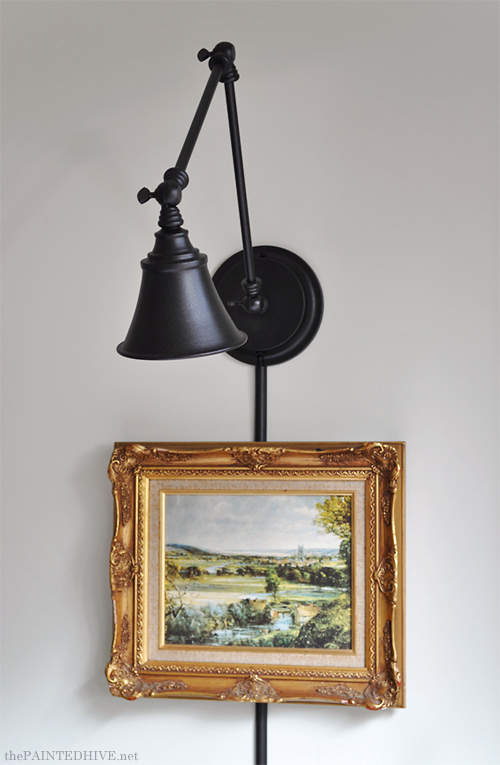
I went with a 15 watt pilot bulb which, although very soft, throws ample reading light. I was initially concerned that the position of the light might be somewhat blinding though have laid beside Charlotte on numerous occasions to read bedtime stories and have never once found it to be a problem – on the contrary, it’s actually quite nice to have a warm back light for a change (and, of course, the tilt of the shade can always be altered to redirect the cast, if need be).
Although I wasn’t ever attempting a specific “knock-off”, before publishing this post I did a quick Google search and found these similar lamps…
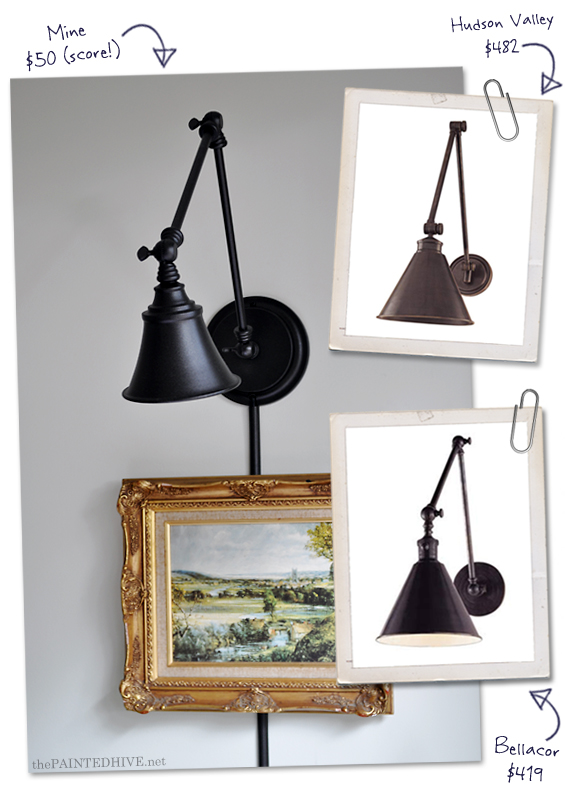
Bellacor | Hudson Valley
The \$50 for mine includes the lamp, cable cover and paint. I know those proper wall lights are pretty gorgeous, though I do prefer my price tag!
This whole project was a total experiment and I’m really happy with how it turned out though the fact the concept is kinda weird hasn’t escaped me. So, tell me…successful or stupid?
![]()
You’ve just read the post A Desk Lamp Becomes a Wall Light from The Painted Hive. Click on over to visit the blog and get engaged in the comments section – I’d love to hear your thoughts! Republishing this article in full or in part is a violation of copyright law.

